Installing a Downloaded MF Driver (USB Connection)
This explains the procedure for installing the newest version of the MF driver using an installer downloaded from the web site. It installs the MF driver to a device connected by USB.
Install with this procedure when the MF driver included in the supplied DVD-ROM is not compatible with the operating system of the computer you are using.
Prerequisites
Confirm that the following conditions are satisfied. Complete the preparation operations.
When starting the computer, log on as a member of Administrators.
[Desktop] screen display (when using Windows 8/8.1/Server 2012/Server 2012 R2)
The USB cable is not connected
Connect the USB cable according to the instructions in the screen. If you connected the USB cable and installed, disconnect the USB cable and reinstall. Also, the USB cable is not supplied with this product. Prepare it separately.
Procedures
1.
Turn off the device.
2.
Double-click the downloaded installer → click [Next].
3.
Read the license agreement → click [Yes].
4.
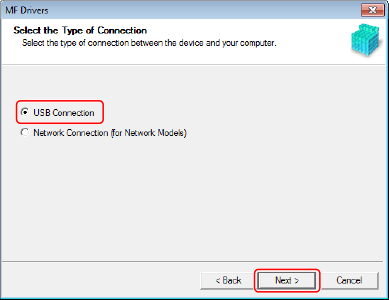
If the following screen is displayed, select [USB Connection] → click [Next].
5.
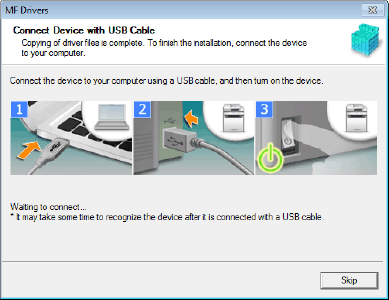
When the following screen appears, connect the device and computer with a USB cable → turn on the device.
If you could not confirm the connection between the device and the computer, click "Open details."
If the following screen is displayed, turn the device off, then reconnect the USB cable and turn the device on again.

6.
Click [Exit].
If installed correctly, an MF driver icon is displayed in the locations shown next. If the icon is not displayed, uninstall the MF driver and reinstall it.
For a printer driver or fax driver:
When using Windows 10:
[Settings] > [Devices] > [Printers & scanners] > [Printers]
When a version other than Windows 10:
Windows Control Panel > [Devices and Printers], [Printers], or [Printers and Faxes].
For a scanner driver:
Windows Control Panel > [Scanners and Cameras].