Scanning from the Machine
 | The sequence of "scanning a document and saving it to a computer" can only be done when scanning from the machine. |
Before Scanning from the Machine
Before scanning from the machine, you must first configure settings for both the machine and a computer. Use the following steps.
Configuring the Machine
1
Start the Remote UI and log on in System Manager Mode.Starting Remote UI
2
Click [Settings/Registration].

3
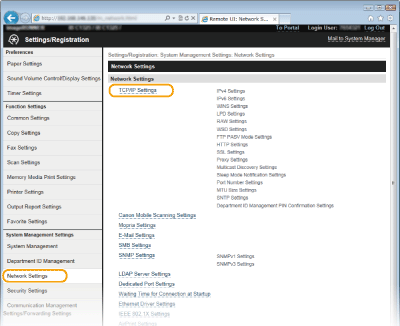
Click [Network Settings]  [TCP/IP Settings].
 [TCP/IP Settings].
4
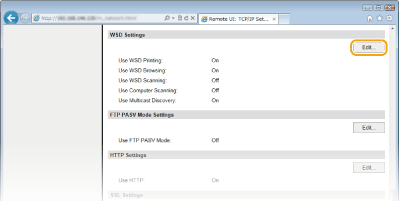
Click [Edit...] in [WSD Settings].
5
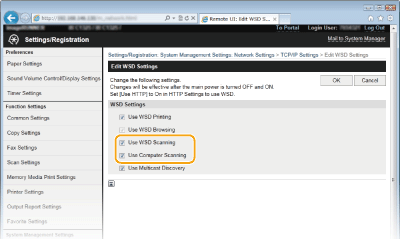
Select the [Use WSD Scanning] and [Use Computer Scanning] check boxes.
6
Click [OK].
7
Restart the machine.
Turn OFF the machine, wait for at least 10 seconds, and turn it back ON.
Configuring the Computer
8
Open the printer folder. Displaying the Printer Folder
9
Click [Add a device] or [Add a printer].

10
Select the machine when it is detected, and click [Next].
Scanning
1
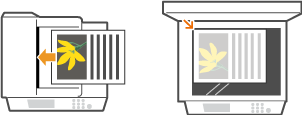
Place the document(s). Placing Documents
When scanning several documents, load them in the feeder.
2
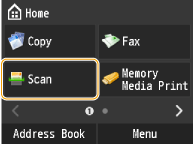
Tap <Scan>.
3
Tap <Computer>.

4
Tap the destination.
A maximum of one computer can be connected.

5
Tap <Scan>.

6
Press  .
.
 .
.Scanning starts.
To cancel, tap <Cancel>  <Yes>.
 <Yes>.
 |
Other useful scanning functionsYou can save scanned documents to a USB memory device or send them as e-mail attachments. The documents can also be saved to shared folders and file servers. You can accomplish these functions directly from the machine. |