
Setting IPv6 Addresses
 |
The IPv6 addresses of the machine can be configured via the Remote UI. Before setting IPv6 addresses, check the IPv4 address settings. You need to specify the correct IPv4 settings to use IPv6 addresses (Setting an IPv4 Address). The machine can use up to seven of the following IPv6 addresses:
|
|
Type
|
Maximum number available
|
Description
|
|
Link-local address
|
1
|
An address that is only valid within a subnet or link and cannot be used to communicate with devices beyond a router. A link-local address is automatically set when the IPv6 function of the machine is enabled.
|
|
Manual address
|
1
|
An address that is entered manually. When using this address, specify the prefix length and default router address.
|
|
Stateless address
|
4
|
An address that is generated automatically using the MAC address of the machine and the network prefix that is advertised by the router. Stateless addresses are discarded when the machine is restarted (or turned ON).
|
|
Stateful Address
|
1
|
An address obtained from a DHCP server using DHCPv6.
|
1
Start the Remote UI and log on in Management Mode. Starting the Remote UI
2
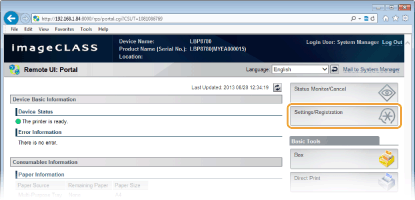
Click [Settings/Registration].
3
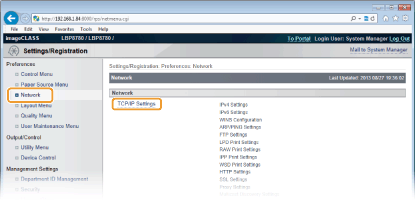
Click [Network]  [TCP/IP Settings].
 [TCP/IP Settings].
4
Click [Edit] in [IPv6 Settings].

5
Select the [Use IPv6] check box and configure the required settings.
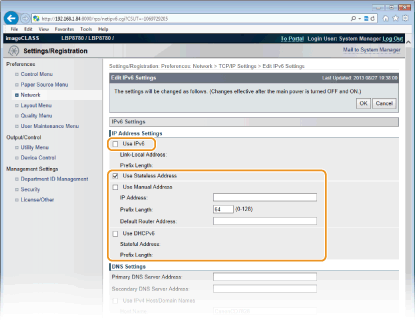
[Use IPv6]
When using the IPv6 in the machine, select the check box. When not using, clear the check box. You can also specify whether to use an IPv6 address from the operation panel (IPv6 Settings).
[Use Stateless Address]
When using a stateless address, select the check box. When not using, clear the check box.
[Use Manual Address]
When you want to manually enter an IPv6 address, select the check box and enter the IP address, prefix length, and default router address in the corresponding text boxes. Otherwise, clear the check box.
[IP Address]
Enter an IPv6 address. You cannot enter an address that starts with "ff" (or multicast address), the address of "0000::0000" (all zeros), or an address that starts with "0:0:0:0:0:ffff" or "0:0:0:0:0:0."
[Prefix Length]
Enter a number that indicates how many bits are available for the network address.
[Default Router Address]
Specify the IPv6 address of the default router as necessary. You cannot enter an address that starts with "ff" (or multicast address), the address of "0000::0000" (all zeros), or an address that starts with "0:0:0:0:0:ffff" or "0:0:0:0:0:0."
[Use DHCPv6]
When using a stateful address, select the check box. When not using, clear the check box.
6
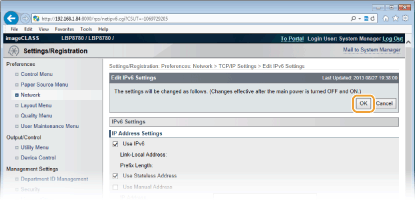
Click [OK].
7
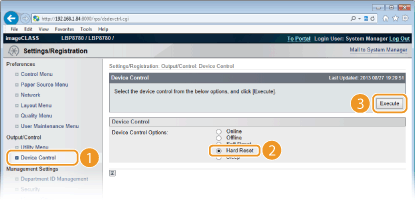
Perform a hard reset.
Click [Device Control], select [Hard Reset], and then click [Execute].
 |
The settings are enabled after the hard reset is performed.
|
 |
Checking whether the settings are correctMake sure that the Remote UI screen can be displayed with your computer by using the IPv6 address of the machine. Starting the Remote UI
If you have changed the IP address after installing the printer driverBy following the procedure for changing the standard TCP/IP port described in the "Printer Driver Installation Guide," specify the port to use again. Installing the Printer Driver
|