
Configuring SNTP
 |
Simple Network Time Protocol (SNTP) enables you to adjust the system clock by using the time server on the network. When SNTP is used, the time server is checked at regular intervals, enabling the correct time to be constantly maintained.
|
 |
|
The SNTP of the machine supports both NTP (version 3) and SNTP (versions 3 and 4) servers.
|
1
Start the Remote UI and log on in Management Mode. Starting the Remote UI
2
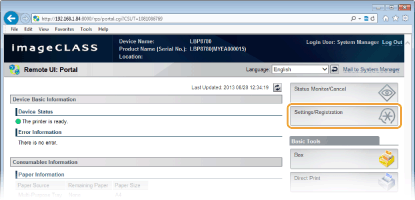
Click [Settings/Registration].
3
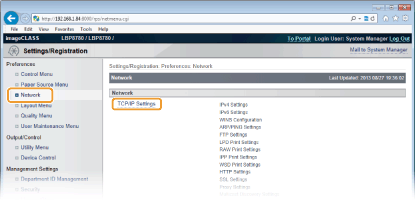
Click [Network]  [TCP/IP Settings].
 [TCP/IP Settings].
4
Click [Edit] in [SNTP Settings].

5
Select the [Use SNTP] check box and specify the required settings.
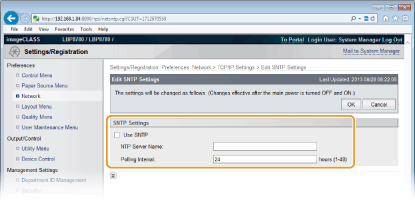
[Use SNTP]
Select the check box to use SNTP for synchronization. If you do not want to use SNTP, clear the check box. You can also specify whether to use SNTP from the operation panel (SNTP).
[NTP Server Name]
Enter the IP address of the NTP or the SNTP server. If DNS is available on the network, you can enter "<host name>.<domain name>" (FQDN) of up to 255 alphanumeric characters instead (example: ntp.example.com).
[Polling Interval]
Specify an interval from 1 to 48 hours.
6
Click [OK].
7
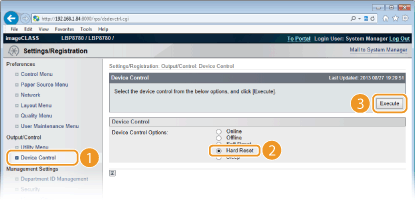
Perform a hard reset.
Click [Device Control], select [Hard Reset], and then click [Execute].
 |
The settings are enabled after the hard reset is performed.
|
 |
Testing communication with the NTP/SNTP serverTo check the status of communication with the registered server, go to [Settings/Registration]
 Click [Network] Click [Network]  [TCP/IP Settings], and click [Check NTP Server Connection] in [SNTP Settings]. If a proper connection has been established, the result is displayed as shown below. Note that this operation does not adjust the system clock. [TCP/IP Settings], and click [Check NTP Server Connection] in [SNTP Settings]. If a proper connection has been established, the result is displayed as shown below. Note that this operation does not adjust the system clock.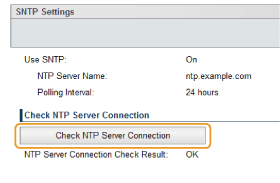 |