Scanning Using the [Scan > PC] Key
 |
|
Place a document on the machine, and press
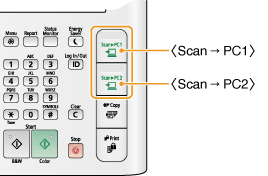
 or or  , and scanning starts immediately. The type of scan (color or black and white), the save destination for the document, and other settings can be registered to a key, and documents can be scanned using those settings. This section describes how to register settings in a key and scan with it. , and scanning starts immediately. The type of scan (color or black and white), the save destination for the document, and other settings can be registered to a key, and documents can be scanned using those settings. This section describes how to register settings in a key and scan with it. |
Registering Your Settings in the [Scan > PC] Key
Register the save destination computer and type of scan in  or
or  .
.
 or
or  .
.
1
Press  .
.
 .
.2
Use  /
/ to select <Scan Settings>, and press
  .
.
 /
/ to select <Scan Settings>, and press
  .
.3
Select <Shortcut Key Settings>  <Register>.
 <Register>.
4
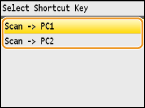
Select <Scan -> PC1> or <Scan -> PC2>, and press  .
.
 .
.Select the key to which you want to register settings.
5
Select the type of connection that is used between the machine and computer, and press  .
.
 .
.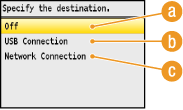
 <Off>
<Off>Select this setting to erase registered settings.
 <USB Connection>
Select this setting if the machine and computer are connected via USB.
 <Network Connection>
Select this setting if the machine and computer are connected via a network.
6
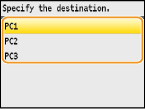
Select the destination computer, and press  .
.
 .
.This screen is not displayed if you select <USB Connection> in step 5.
7
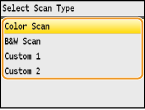
Select the scan type, and press  .
.
 .
.
|
Scan type
|
Color
|
Resolution
|
File format
|
|
<Color Scan>
|
Color
|
300 dpi
|
PDF (searchable)*1/High compression
|
|
<B&W Scan>
|
Black and white*2
|
300 dpi
|
TIFF
|
|
<Custom 1>
|
Color
|
300 dpi
|
JPEG/Exif
|
|
<Custom 2>
|
Color
|
300 dpi
|
PDF (searchable)*1/Standard compression
|
|
*1A PDF format where characters on the document are scanned as text data and the text can be searched using a computer.
*2Documents are scanned in black and white only, with no intermediate shades of gray.
|
|||
NOTE:
To change settings
To change settings
You can change settings from MF Toolbox. Configuring Scan Settings in MF Toolbox
Checking the Registered Settings

 <Scan Settings>

 <Shortcut Key Settings>

 <Confirm Destination>

 Select <Scan -> PC1> or <Scan -> PC2>


 Name of destination computer
Shows the name of the computer registered as the save destination.
 Scan type
Shows the type of scan that has been set.
Using the [Scan > PC] Key
1
Place the document(s).Placing Documents

2
Press  or
or  .
.
 or
or  .
.To check the settings registered in the key, see Checking the Registered Settings.
Scanning starts.
To cancel, press <Cancel>  <Yes>
<Yes> 
 .
.
 <Yes>
<Yes> 
 .
.|
|
IMPORTANT:
You cannot scan while the MF Toolbox setup screen is displayed. Close the screen before scanning.
|
|
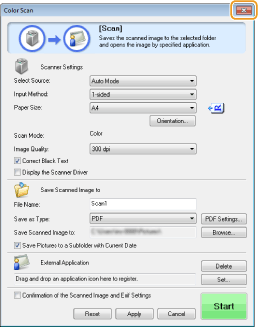 |
 When placing documents in the feeder in step 1
When scanning is complete, the save destination folder is displayed on the computer.
 When placing documents on the platen glass in step 1
When scanning is complete, follow the procedure below.
|
1
|
If there are additional pages of documents to be scanned, place the next document on the platen glass, select <Scan Next Original>, and press
 . .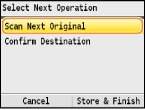 Repeat this step until you finish scanning all of the pages.
When there is only one page to be scanned, proceed to the next step.
|
|
2
|
Press <Store & Finish>.
The save destination folder is displayed on the computer.
|
|
NOTE
|
About the save destination folderBy default, the scanned data is saved to the [Pictures] or [My Pictures] folder. A subfolder named with the scanning date is created, and the data is saved to that folder.
To change the save destination, see Configuring Storing Settings.
|