Adding an Image Scanned via Network Scanner to a Document
Color Network ScanGear 2 is software for scanning from a machine on the network. It can be started from applications compatible with TWAIN (such as Adobe Photoshop, Adobe Acrobat, and Office 2000 or later versions of Microsoft Word/Excel/PowerPoint).
Benefits of Using Color Network ScanGear 2
You can make adjustments when scanning.
You can adjust the brightness and density as well as specify the scanning area.
You can adjust the brightness and density as well as specify the scanning area.
You can store the scanned data in various formats.
You can process scanned images and store the images with a specified format (such as BMP/JPG/PDF) using application software.
You can process scanned images and store the images with a specified format (such as BMP/JPG/PDF) using application software.
|
Required Condition
|
|
Color Network ScanGear 2 is installed on the computer.
Your machine (scanner) and computer are connected to the network.
|
This section describes how to add images scanned using Color Network ScanGear 2 to a document.
The screens may differ, depending on the model of the machine and on attached optional products.
Follow the procedures below.
Selecting a Scanner with Color Network ScanGear 2
Turning the Scanner Online from the Machine
Scanning with Color Network ScanGear 2
Selecting a Scanner with Color Network ScanGear 2
When using Color Network ScanGear 2 for the first time, it is necessary to select the scanner using Color Network ScanGear 2 Tool.
If a scanner has already been selected, proceed to the procedure in "Turning the Scanner Online from the Machine."
|
IMPORTANT
|
|
Color Network ScanGear 2 Tool cannot be used at the same time as the Color Network ScanGear 2 driver.
|
1.
Start Color Network ScanGear 2 Tool on Windows.
For Windows XP
Click [Start] → [All Programs] → [Color Network ScanGear 2] → [Color Network ScanGear 2 Tool].
For Windows 7
Click [ ] (Start) → [All Programs] → [Color Network ScanGear 2] → [Color Network ScanGear 2 Tool].
] (Start) → [All Programs] → [Color Network ScanGear 2] → [Color Network ScanGear 2 Tool].Color Network ScanGear 2 Tool starts.
2.
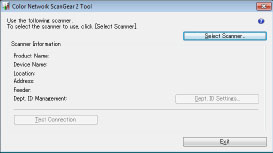
Click [Discover] to automatically search for the scanner to use.
The scanners that are found are displayed in [Select Scanner from List].
|
NOTE
|
|
If you select to automatically search for scanners, scanners on the subnet (network with the same network ID) are displayed in the list.
You can also specify the scanner to use by clicking [Address] and entering the IP address or host name of the machine.
|
3.
Select the scanner to use → click [Select].
|
NOTE
|
|
To check whether you can use the selected scanner, click [Test Connection].
|
4.
Click [Exit].
Turning the Scanner Online from the Machine
1.
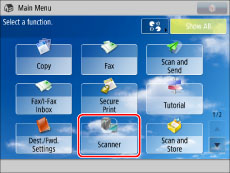
Press [Scanner] on the Main Menu screen.
|
NOTE
|
|
If the Main Menu screen is not displayed, press [Main Menu].
|
2.
Press [Online].
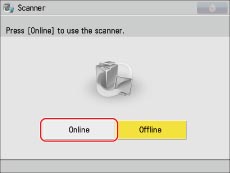
The scanner is now online.
Scanning with Color Network ScanGear 2
Start Color Network ScanGear 2 from an application and paste the scanned image to the document.
1.
Open the document to paste the image to in the application.
2.
Start Color Network ScanGear 2 from the application.
For Microsoft Office 2007/2010
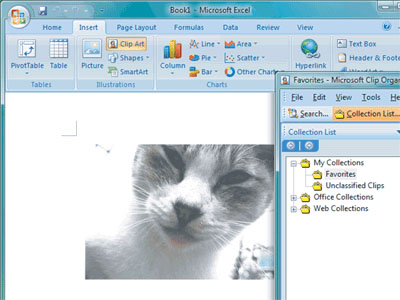
(1) Click [] (Start)/[Start] → [All Programs] → [Microsoft Office] → [Microsoft Office Tool] → [Microsoft Clip Organizer].
] (Start)/[Start] → [All Programs] → [Microsoft Office] → [Microsoft Office Tool] → [Microsoft Clip Organizer].(2) Click [File] → [Add Clips to Organizer] → [From Scanner or Camera].
(3) Select Color Network ScanGear 2 from [Device] → click [Custom Insert].
For Adobe Photoshop
Click [File] → [Scan] → [Color Network ScanGear 2].
For Adobe Acrobat
(1) Click [File] → [Create PDF] → [From Scanner].
(2) Select [Color Network ScanGear 2] in [From Scanner] → click [Scanner Options].
(3) Select [Show Scanner's Native Interface] in [User Interface] → click [OK].
(4) Click [Scan].
3.
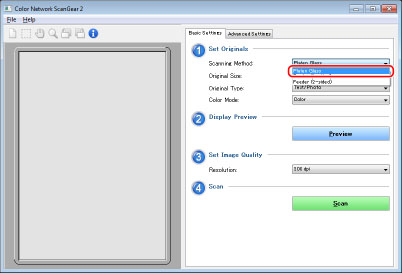
Select [Platen Glass] in [Scanning Method] on the [Basic Settings] page.
|
NOTE
|
|
You can also select the feeder in [Scanning Method] to scan your original from the feeder.
|
4.
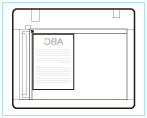
Place your originals on the platen glass. Place your originals with the side to scan face down, as indicated below.
5.
Specify scan conditions such as the colour mode and resolution on the Color Network ScanGear 2 screen.
6.
To preview, click [Preview].
If the preview is successful, the prescanned image is displayed in the preview area.
|
NOTE
|
|
The following operations can be performed using the prescanned image:
You can specify the scanning area.
You can enlarge the displayed image using the toolbar and adjust the image from settings on the [Advanced Settings] sheet.
|
7.
Click [Scan].
Scanning starts.
|
NOTE
|
|
After you click [Scan], do not perform operations on the Color Network ScanGear 2 screen until a dialog box indicating the scanning process appears.
If the Color Network ScanGear 2 screen does not automatically close after scanning is complete, click [
 ]/[ ]/[ ] (End) to close it. ] (End) to close it. |
When scanning is complete, the scanned image is displayed in the document.
For Office 2007/2010, scanned images are saved to [Color Network ScanGear 2] in [My Collections] in Microsoft Clip Organizer. You can select a saved image and drag and drop it to a location in a document to paste the image.