Saving Settings Information to a Computer (Export Individually)
Saving an Address List
You can store an Address List as a file in your computer.
1.
Click [Settings/Registration] → select [Data Management] for <Management Settings>.
2.
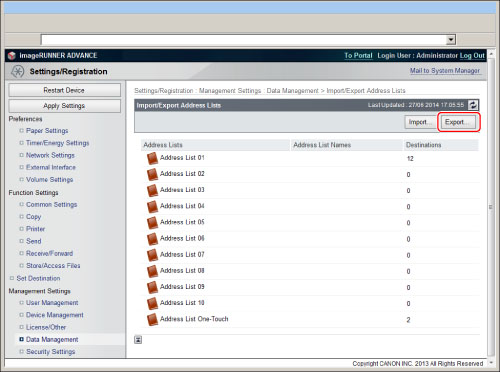
Click [Address Lists] for <Import/Export Individually> → [Export...].

If a PIN is set for the Address List, a dialog box prompting you to enter the PIN appears. Enter the Address List PIN → click [OK].
3.
Select the Address List and the format of the file.
Details of each item are shown below.
|
Address List:
|
Select the Address List to be saved as a file.
|
|
Security Level:
|
Select [Custom Format] as the file format to set the security level.
Level1 supports character encoding such as Shift-JIS. The data can be imported to all imageRUNNER ADVANCE series machines.
Level2 supports Unicode. The data can only be imported to some imageRUNNER ADVANCE series machines (such as the same series as this machine). Since a newer encryption algorithm is used for the password information, security is increased.
|
|
File Format:
|
Select the format of the file that is to be exported.
[Custom Format]: Select this if the file is to be imported into another Canon machine.
[LDAP Format]: Select this if the file is to be used by another application (e.g., Microsoft Internet Explorer, Netscape Navigator, Microsoft Outlook, Eudora, etc.). Import this file as LDAP data from within these applications.
|
|
Password:
|
Enter the password to use for encrypting login information for the Address List.
|
|
Confirm:
|
Enter the password again. If the password you enter here is different from the one you entered for [Password], an error dialog box appears.
|
|
NOTE
|
|
If you select [LDAP Format], only e-mail addresses can be saved. To save all the information stored in the Address List, select [Custom Format].
To import to the fax driver address list, select [Custom Format]. You cannot do so with [LDAP Format] selected.
<Password> and <Confirm> are displayed if the following setting is specified:
[Settings/Registration] → [Set Destination] → [Address Book Export Settings] → [Including Password When Exporting Address Book] is selected.
|
4.
Click [Start Exporting].
5.
In the dialog box that appears, specify the location to save the file → click [Store].
|
NOTE
|
|
The name of the Address List is not exported.
|
Saving the Device Settings
You can store the device settings as a file in your computer. The address book is also included in the device settings. The settings for [Favorite Settings] are also included in the device settings file you export from the machine.
1.
Click [Settings/Registration] → select [Data Management] for <Management Settings>.
2.
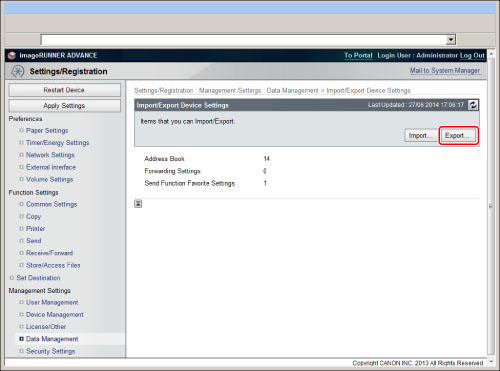
Click [Device Settings (Forwarding Settings, Address Book, Send Function Favorite Settings)] for <Import/Export Individually> → [Export...].

3.
Click [Start Exporting].
4.
In the dialog box that appears, specify the location to save the file → click [Store].
The file extension of the saved file is ".fim."
|
NOTE
|
|
The file extension for saved device settings differs according to the model of your machine. The settings that can be exported also differ according to the file extension.
|
Saving the Web Access Favorites
You can save a list of favorites registered in the web browser to your computer as a file.
For more information, see "Exporting Favorites to a Computer."
Saving the Printer Settings
You can store the Printer Settings as a file in your computer.
1.
Click [Settings/Registration] → select [Data Management] for <Management Settings>.
2.
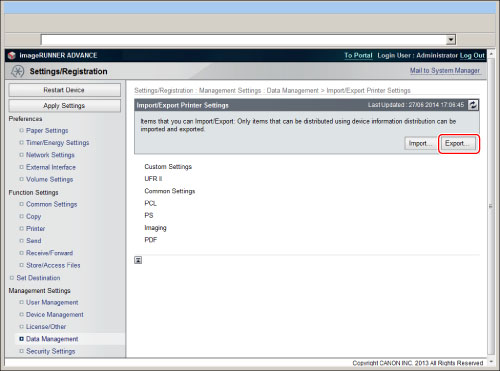
Click [Printer Settings] for <Import/Export Individually> → [Export...].

3.
Click [Start Exporting].
4.
In the dialog box that appears, specify the location to save the file → click [Store].
The default filename is 'printersettings.xml'.
Saving Paper Information Settings
You can store Paper Information Settings as a file in your computer.
1.
Click [Settings/Registration] → select [Data Management] for <Management Settings>.
2.
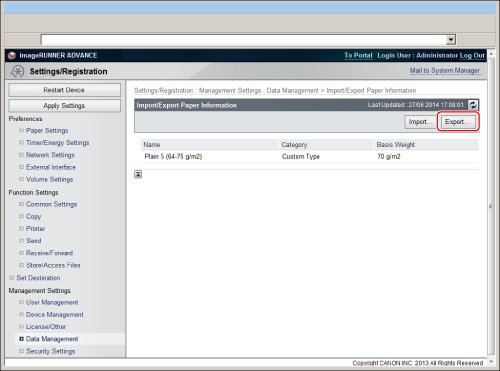
Click [Paper Information] for <Import/Export Individually> → [Export...].

3.
Select the type of paper information.
Details of each item are shown below.
|
Category:
|
Select the category of paper information to save to a file.
|
4.
Click [Start Exporting].
5.
In the dialog box that appears, specify the location to save the file → click [Store].