Adjustment/Maintenance
 |
|
All the settings about adjustment and maintenance are listed with short descriptions. Default settings are marked with a dagger (
 ). ). |
 |
Asterisks (*)Settings marked with "*1" are only available for the MF729Cx / MF628Cw.
Settings marked with "*2" are only available when the optional paper drawer (drawer 2) is attached.
|
Auto Adjust Gradation
Adjust the gradation, density, and color in copies or printouts. Correcting the Gradation
|
Full Adjust
Quick Adjust Adjust Copy Image |
Auto Correction Settings
Select whether to automatically perform a quick gradation adjustment or color shift correction after the machine is turned ON.
Auto Adjust Image Regularly
Select when to make an automatic quick gradation adjustment. If <On> is selected, quick adjustment is automatically made after the machine is turned ON. If <Off> is selected, a quick adjustment is made when the first printing is completed after the machine is turned ON. You can also perform this adjustment manually (Quick Adjust).
|
Off
 On
|
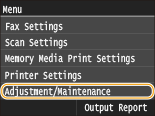
<Menu>  <Adjustment/Maintenance>
  <Auto Correction Settings>
  <Auto Adjust Image Regularly>
  Select <Off> or <On>

 <Adjustment/Maintenance>
  <Auto Correction Settings>
  <Auto Adjust Image Regularly>
  Select <Off> or <On>

Correct Print Color Mismatch When Main Power is ON
Select whether to automatically perform the Correct Print Color Mismatch function after the machine is turned ON. You can also perform this adjustment manually (Correcting "Print Color Mismatch").
|
Off
 On |
<Menu>  <Adjustment/Maintenance>
  <Auto Correction Settings>
  <Correct Print Color Mismatch When Main Power is ON>
  Select <Off> or <On>

 <Adjustment/Maintenance>
  <Auto Correction Settings>
  <Correct Print Color Mismatch When Main Power is ON>
  Select <Off> or <On>

Correct Print Color Mismatch
Use this function if color shift has blurred the image. Correcting "Print Color Mismatch"
Display Timing for Cartridge Preparation Notification 
Set the display timing for the message notifying you that the amount remaining in the toner cartridges is low.
|
Auto
 Custom
1 to 20
 to 99 (%) to 99 (%) |
<Menu>  <Adjustment/Maintenance>
  <Display Timing for Cartridge Preparation Notification>
  <Custom>
  Enter toner level
  <Apply>

 <Adjustment/Maintenance>
  <Display Timing for Cartridge Preparation Notification>
  <Custom>
  Enter toner level
  <Apply>

Black Text Processing for Color
Adjust the threshold value to determine whether to print black text in color documents by using only black toner or by using a mixture of black and color toners. You can set values for the feeder and the platen glass separately. Adjusting Values for Text Color Reproducibility in Color Documents
|
Feeder*1
Seven Levels
Platen Glass
Seven Levels
|
Special Processing
If the print results on special types of paper are not satisfactory, the following settings may improve the quality of the printouts.
Special Paper Processing
When printing on the back side of printed paper, rough paper, or envelopes, the print results may be improved by adjusting the following settings.
Manual Back Side Settings (for 2-Sided Only)
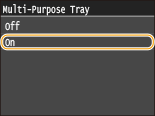
If printouts on the back side of printed paper are too light, select <On>. You can specify this setting separately for each paper source.
|
Multi-Purpose Tray
Off
 On
Drawer 1
Off
 On
Drawer 2*2
Off
 On
|
<Menu>  <Adjustment/Maintenance>
  <Special Processing>
  <Special Paper Processing>
  <Manual Back Side Settings (for 2-Sided Only)>
  Select the paper source
  <On>
<On> 

 <Adjustment/Maintenance>
  <Special Processing>
  <Special Paper Processing>
  <Manual Back Side Settings (for 2-Sided Only)>
  Select the paper source
  <On>
<On> 

Rough Paper Settings
When printing on rough paper, especially when color images are printed too light, select <On>. You can specify the settings separately for each paper source.
|
Multi-Purpose Tray
Off
 On
Drawer 1
Off
 On
Drawer 2*2
Off
 On
|
<Menu>  <Adjustment/Maintenance>
  <Special Processing>
  <Special Paper Processing>
  <Rough Paper Settings>
  Select the paper source
  <On>
<On> 

 <Adjustment/Maintenance>
  <Special Processing>
  <Special Paper Processing>
  <Rough Paper Settings>
  Select the paper source
  <On>
<On> 

Envelope Cling Prevention
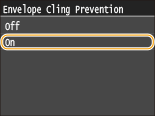
If envelope flaps cling to the envelope bodies when printing, select <On>.
|
Off
 On
|
<Menu>  <Adjustment/Maintenance>
  <Special Processing>
  <Special Paper Processing>
  <Envelope Cling Prevention>
  <On>
<On> 

 <Adjustment/Maintenance>
  <Special Processing>
  <Special Paper Processing>
  <Envelope Cling Prevention>
  <On>
<On> 

Envelope Switch
Adjust this setting if envelope printouts are light, or envelopes do not feed smoothly.
|
Envelope 1
 Envelope 2
|
<Menu>  <Adjustment/Maintenance>
  <Special Processing>
  <Special Paper Processing>
  <Envelope Switch>
  Select <Envelope 1> or <Envelope 2>

 <Adjustment/Maintenance>
  <Special Processing>
  <Special Paper Processing>
  <Envelope Switch>
  Select <Envelope 1> or <Envelope 2>

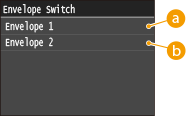
 <Envelope 1>
Prints on envelopes with normal fixing power.
 <Envelope 2>
Prints on envelopes with fixing power stronger than <Envelope 1>.
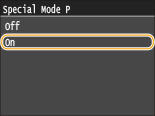
Special Mode P
If the printed paper curls, select <On>.
|
Off
 On
|
<Menu>  <Adjustment/Maintenance>
  <Special Processing>
  <Special Mode P>
  <On>
<On> 

 <Adjustment/Maintenance>
  <Special Processing>
  <Special Mode P>
  <On>
<On> 

Clean Fixing Assembly
Clean the fixing unit after a toner cartridge is replaced or if black streaks appear on printouts. Fixing Unit
Clean ITB
Clean the transfer belt inside the machine to prevent the print quality from deteriorating. Transfer Belt
Clean Feeder *1
Clean the feeder rollers if documents become dirty after being fed through the feeder. Feeder (MF729Cx / MF628Cw)