Adjusting the Secure Watermark Contrast
This mode enables you to adjust the relative contrast (brightness) of the hidden text and the background when using the Secure Watermark mode. The Secure Watermark effect can be tested by making a copy of a sample print.
Specify the following settings in [Adjust Background/Character Contrast]:
[Relative Contrast]: adjusts the relative contrast of the hidden text and the background.
[Set Standard Value]: sets the density of the background.
[Latent Area Density]: sets the density of the text.
1.
Press  (Settings/Registration).
 (Settings/Registration).
2.
Press [Function Settings] → [Common] → [Print Settings].
3.
Press [Secure Watermark Settings] → [Adjust Background/Character Contrast].
4.
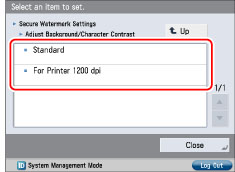
Select the printer type.
If the print resolution is set to Superfine (1200 dpi), select [For Printer 1200 dpi].

5.
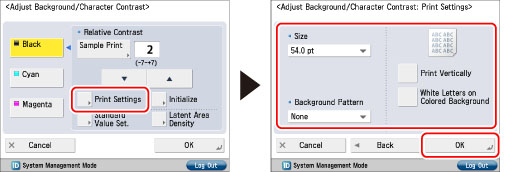
Press [Print Settings] → specify the desired settings → press [OK].

You can set the background pattern, text size, colour, and orientation.
6.
Press [Sample Print] → select the paper to use for the sample print → press [Start Printing].
The sample print is output.
|
NOTE
|
|
The sample print includes the hidden text and the background for each relative contrast value.
|
|
The area within the frame on the sample print is the output sample for the currently set relative contrast value.
|
7.
Copy the sample print.
Check the result of the secure watermark settings.
If you do not want to adjust the contrast for the text/background, proceed to step 10.
8.
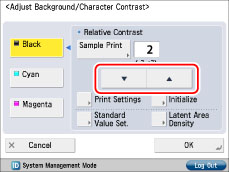
Compare the sample print and the copy, and set the value for the best sample print for [Relative Contrast] using  or
or  .
.
 or
or  .
. 
|
NOTE
|
|
Adjust [Relative Contrast] while comparing the difference between [Set Standard Value] and the current [Latent Area Density], by referring to the sample print.
|
|
If you increase the value for [Relative Contrast], the background gets denser, and if you decrease the value, the background gets lighter. When you select [White Letters on Colored Bk], if you increase the value for [Relative Contrast], the text gets denser, and if you decrease the value, the text gets lighter.
|
|
The setting range for the relative contrast differs according to the standard value you set.
|
|
Standard Value Settings
|
Relative Contrast
|
|
1
|
0 to +7
|
|
4
|
-3 to +7
|
|
8 to 56
|
-7 to +7
|
|
60
|
-7 to +4
|
|
64
|
-7 to 0
|
If you want to adjust the density of the background:
Press [Set Standard Value] → [Sample Print].
To specify the print settings, press [Print Settings] → specify each setting → press [OK].
Select the paper to use for the sample print → press [Start Printing].
A standard value sample print is output.
Refer to the print result and set the standard value indicated for the image which has the most even contrast for the inner and outer squares using  or
or  .
.
 or
or  .
.|
NOTE
|
|
If you increase the value for [Set Standard Value], the background gets denser, and if you decrease the value, the background gets lighter. When you select [White Letters on Colored Backgound], if you increase the value for [Set Standard Value], the text gets denser, and if you decrease the value, the text gets lighter.
|
|
When changing the adjustment area on the sample print for the relative contrast, specify settings for [Set Standard Value].
|
Press [OK].
If you want to adjust the density of the text (latent image):
Press [Latent Area Density] → adjust the density using [-] or [+].
|
NOTE
|
|
If you changed [Set Standard Value], adjust [Latent Area Density] so that the density of the inner square set in [Set Standard Value] for the standard value sample print gets closer.
|
|
To set a background density that differs from the most even secure watermark image in the standard value sample print, it is necessary to adjust [Latent Area Density] to a density close to the background density.
|
|
If you increase the value for [Latent Area Density], the text gets denser, and if you decrease the value, the text gets lighter. When you select [White Letters on Colored Bk], if you increase the value for [Latent Area Density], the background gets denser, and if you decrease the value, the background gets lighter.
|
Press [OK].
9.
If you changed [Set Standard Value] and [Latent Area Density], repeat steps 5 to 8 to adjust [Relative Contrast].
If you did not change the settings, proceed to step 10.
10.
Press [OK].
The contents of the settings changed in [Adjust Background/Character Contrast] are retained until the next time the settings are changed.
|
IMPORTANT
|
|
Load A3, A4, LTR, or 11" x 17" size regular or heavy paper when making sample prints.
|
|
NOTE
|
|
As the default setting, [White Letters on Colored Background] is not selected in the Print Settings screen for printing a sample print. If you select [White Letters on Colored Background], set [Set Standard Value] for the density of the text and [Latent Area Density] for the density of the background.
|