Changing the Print Settings of the Combined File
You can use Canon PageComposer to change the print settings of a file.
This enables you to unify the settings when editing the print settings of multiple files with different page sizes or layouts.
1.
In the list on the Canon PageComposer main screen, double-click the file whose settings you want to change.
You can also open the dialog box by selecting the file in the list then clicking [ ] (Change Print Settings) in the toolbar or [Change Print Settings] in the menu.
] (Change Print Settings) in the toolbar or [Change Print Settings] in the menu.2.
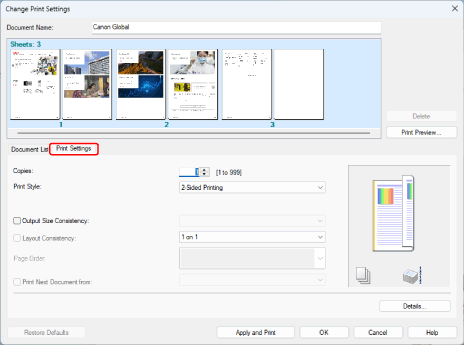
In the displayed dialog box, set a name in [Document Name] if required.
3.
On the [Print Settings] sheet, set the required items.
4.
If combined files are displayed and you want to set where to start printing the next file from, select [Print Next Document from] → select an item.
5.
If you want to specify detailed settings in the print settings screen of the driver, click [Details] → specify the relevant settings → click [OK].
6.
In the [Change Print Settings] dialog box, click [OK].
If you click [Apply and Print], printing starts.