If the printed image is slanted on the particular paper (such as thin paper) only, this feature may enable you to adjust the transferring position of the paper.
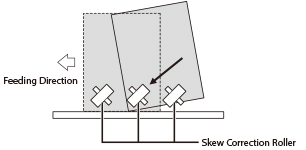
The skew correction roller is located in the feeding unit of the marking engine. It adjusts the registered position of fed paper by pushing the paper diagonally against the wall inside the feeding unit. If the setting of skew correction level is incorrect, the printed image is slanted.
Adjusting the Skew Correction Level of the Fed Paper
1.
Press  (Settings/Registration).
(Settings/Registration).2.
Press [Preferences] → [Paper Settings] → [Paper Type Management Settings].
3.
Select the paper type that you want to edit from the list → press [Details/ Edit].
4.
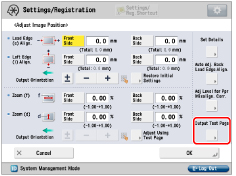
Press [Change] for <Adjust Image Position>.
5.
Press [Do Not Use Scanner].
6.
Press [Output Test Page].
7.
Enter the number of test pages to make → press [Next].
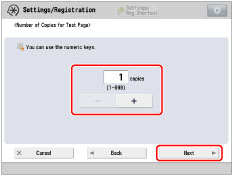
NOTE |
If the image position varies greatly, the accuracy of correction may be improved by printing several test pages and using an average of the measured length. |
8.
Select a paper source that contains a custom paper size → press [Start Printing].
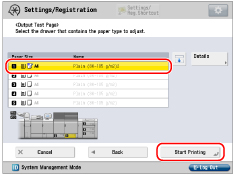
The test page is printed.
9.
Check the front side and back side of the test page.
You can check whether the printed image is skewed, by comparing the length from "i" and "j" register marks to the left side edge of paper to the feeding direction.
10.
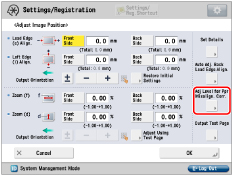
Press [Adj Level for Ppr Misalign. Corr.].
11.
Enter the value by pressing [+] or [-] → press [OK].
To increase the pressure and speed of the skew correction roller to push the paper, as shown below, press [+].Setting the value with too high and too low may cause a paper jam. And if you set the value with too low, the image on the paper such as thin paper may be slanted.
12.
Press [OK].
Print a test page again and check the image position as needed. If you need to make a further adjustment, repeat steps above.