Using the Remote UI
Registering User Data
1.
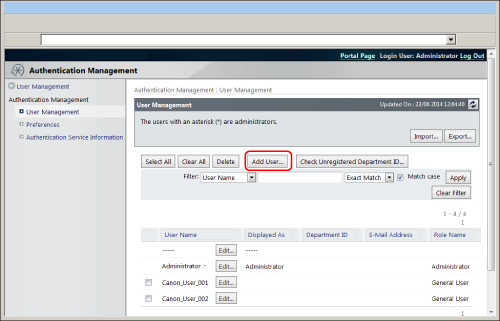
Click [Settings/Registration] → [User Management] → [Authentication Management].
2.
Click [Add User].
3.
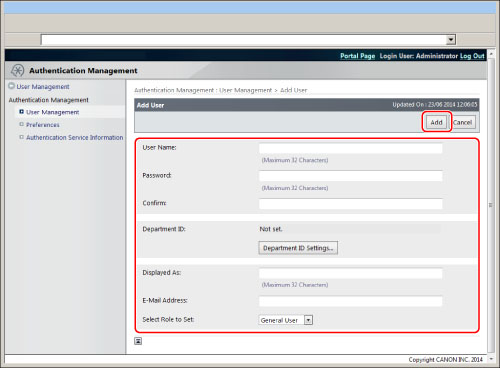
Enter the necessary data → click [Add].
Editing User Data
1.
Click [Settings/Registration] → [User Management] → [Authentication Management].
2.
Click [Edit...] for the user data you want to edit.
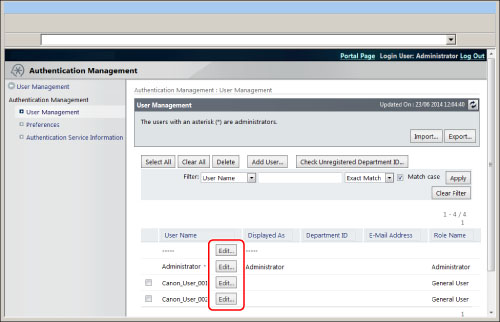
If you find difficult to search the specific user data from a large number of registered users, you can use the filter function to limit the amount of displayed data.
3.
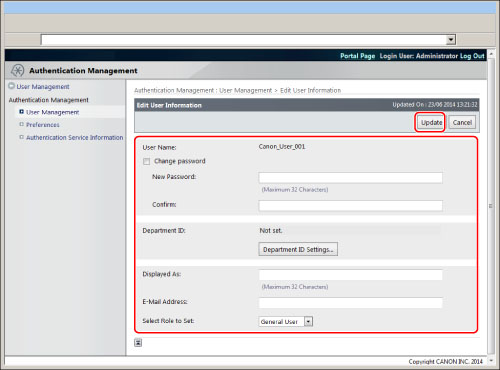
Edit the necessary items → click [Update].
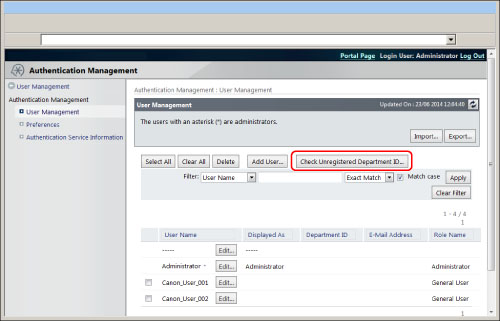
Click [Check Unregistered Department ID...] on the [Authentication Management] screen to cross-check the Department IDs registered as user information with the Department IDs registered in the machine.
If Department IDs not registered in the machine are found, they are registered as new Department IDs.
Deleting User Data
1.
Click [Settings/Registration] → [User Management] → [Authentication Management].
2.
Select the user data you want to delete → click [Delete].

If you find difficult to search the specific user data from a large number of registered users, you can use the filter function to limit the amount of displayed data.
|
NOTE
|
|
To select all registered applications, click [Select All].
|
Importing User Data
You can read and register user data registered in another machine, from a file.
You can also read a new CSV file you have created using the standard format for importing.
For more information on file formats for import, see "File Formats for Local Device Authentication User Information Files."
1.
Click [Settings/Registration] → [User Management] → [Authentication Management].
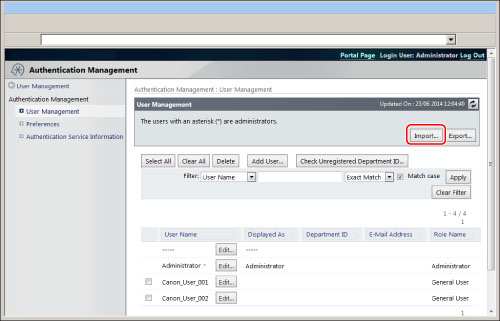
2.
Click [Import...].
3.
Click [Browse…].
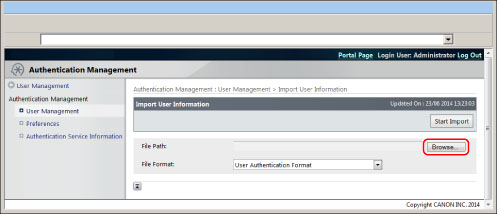
4.
In the dialog box that appears, select the file you want to import → click [OK].
5.
Specify each setting → click [Start Import].
|
[File Format:]:
|
Specify the file format for importing.
|
|
Simple Device Login Format:
|
Imports user information exported from a Canon machine using the Local Device Authentication of SSO-H. The file extension is "ldif."
|
|
User Access Control for Advanced Box Format:
|
Imports user information exported from a Canon machine with Advanced Space user access control. The file extension is "csv."
|
|
User Authentication Format:
|
Imports user information created in the file format that can be used with User Authentication. The file extension is "csv."
|
If a Department ID not registered in the machine is included in the user information to import, a dialog box prompting you to register that Department ID is displayed.
Click [Register department IDs that are not registered in the device] to display a list of the Department IDs that are not registered. Register the Department IDs, as necessary.
Even if you do not register the Department IDs here, you can click [Check Unregistered Department ID...] on the user management screen to register them.
|
IMPORTANT
|
|
If user data with the same name is already registered, the imported user data will overwrite the old data.
|
Exporting User Data
You can save user data registered in the machine to a file in your computer. Use this function when you want to use the user data registered in the machine with another device or when you want to backup the user data.
1.
Click [Settings/Registration] → [User Management]→ [Authentication Management].
2.
Click [Export...].

3.
Specify each setting → click [Start Export].
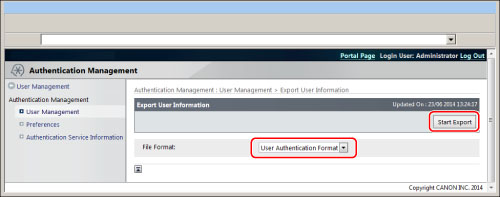
Exports user information created in the file format that can be used with User Authentication. The file extension is "csv."
4.
Follow the instructions on the screen and specify the location to store the file.
|
IMPORTANT
|
|
A maximum of 5,000 users can be registered.
You cannot change the user name.
If you edit user data when that user is logged in, the changes you made are validated only after that user is logged out.
You cannot delete the user data for the user logged in as the Administrator.
Imported user data is registered or overwritten as General User.
|
|
NOTE
|
|
Click [User Name:], [Department ID:] (if [Department ID Management] is set to 'On'), [Displayed As], [E-Mail Address:], or [Select Role to Set:] on the [User Management] page to change the sort order of registered user data.
An asterisk (*) is displayed on the right side of the user name on the [User Management] page for the registered Administrator.
|