Clearing a Paper Jam inside the Top Cover
Check the location of the paper jam, and follow the procedure described below, while referring to the directions that appear on the touch panel display, to remove the jammed paper.
1.
Remove any jammed paper protruding from the output part.
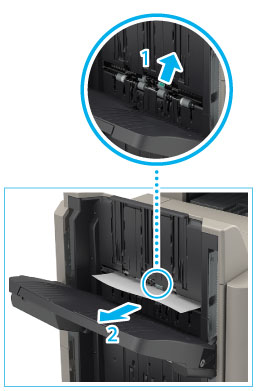 |
1. Lift the area indicated by the label on the output slot. |
2. Remove any jammed paper that is visible.If you cannot see any paper, check whether there is any jammed paper in the output area.
|
|
NOTE
|
|
If a paper jam occurs when you are printing in the Staple mode, do not remove the output sheets that are waiting to be stapled. (Printing and stapling resume after you clear the paper jam.)
|
2.
Open the top cover of the finisher, and remove any jammed paper.
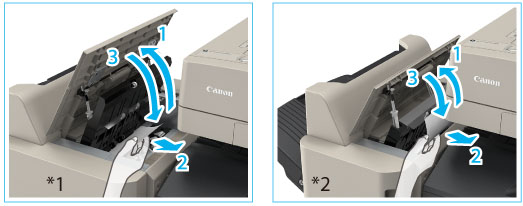 *1 Booklet Finisher-U1
*2 Staple Finisher-U1
|
1. Open the top cover of the finisher. |
2. Remove any jammed paper. |
|
3. Close the top cover of the finisher. |
 CAUTION CAUTION |
|
When closing the cover, be careful not to get your fingers caught, as this may result in personal injury.
|
3.
Follow the instructions on the screen.
|
NOTE
|
|
The screen indicating the directions on how to clear the paper jam is displayed repeatedly until the paper jam is cleared.
|