Clearing a Staple Jam in the Saddle Stitcher Unit
Check the location of the staple jam, and follow the procedure described below, while referring to the directions that appear on the touch panel display, to remove the jammed staple.
|
IMPORTANT
|
|
Make sure to close all covers and paper drawers of the machine before clearing any staple jams.
Before clearing a staple jam in the saddle stitcher unit, remove all paper that has been output to the booklet tray.
|
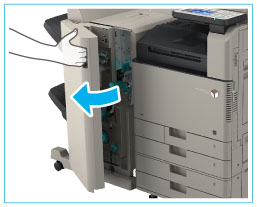
1.
Open the front cover of the finisher.
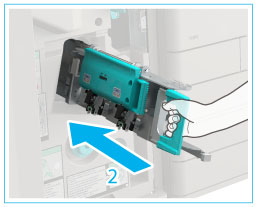
2.
Pull out the saddle stitcher unit.
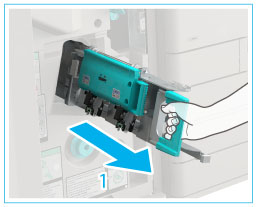 |
1. Grip the handle of the saddle stitcher unit, and pull out until it stops. |
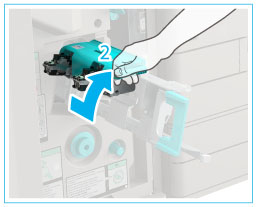 |
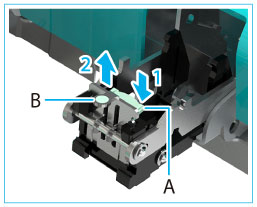
2. Pull the stapler unit of the saddle stitcher unit towards you, and then push it up. |
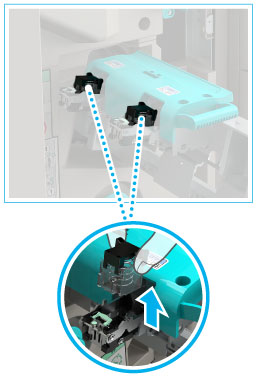
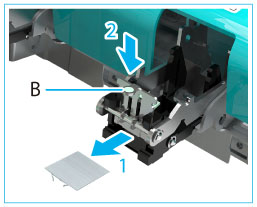
3.
Pull out the staple case containing the jammed staples, holding it by its left and right sides.
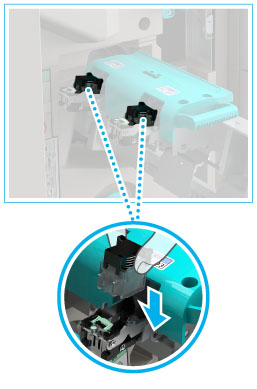
4.
Push down the tab on the staple case.
5.
Remove any jammed staples.
 CAUTION CAUTION |
|
Take care not to be injured by staples.
|
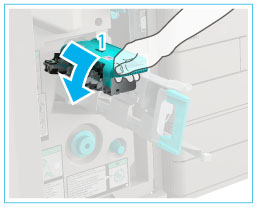
6.
Return the staple case to its original position.
Push the staple case in until it clicks into place.
7.
Gently push the saddle stitcher unit back into its original position.
 |
1. Pull the stapler unit towards you, and then push it down into its original position. |
 |
2. Grip the handle of the saddle stitcher unit, and return it to its original position. |
|
CAUTION |
|
When returning the saddle stitcher unit to its original position, be careful not to get your fingers caught, as this may result in personal injury.
|
8.
Close the front cover of the finisher.
|
CAUTION |
|
When closing the cover, be careful not to get your fingers caught, as this may result in personal injury.
|
|
NOTE
|
|
When you have cleared the staple jam, be sure to manually reposition the staples in the saddle stitcher unit. (See "Saddle Stitch Staple Repositioning.")
|