Setting up LDAP Server
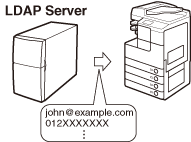
If the information for an LDAP (Lightweight Directory Access Protocol) server is registered in the machine, you can search for e-mail addresses and fax numbers via the LDAP server. E-mail addresses and fax numbers obtained via the server can be specified as destinations or stored in the Address Book.
|
NOTE
|
|
The following types of LDAP servers can be used with this machine:
Windows 2000 Server with Active Directory
Windows Server 2003 with Active Directory
Windows Server 2008 with Active Directory
Lotus Notes R5 to R8
For more information, contact your local authorized Canon dealer.
You can register up to five LDAP servers.
|
Registering LDAP Server
Specify the relevant information for the LDAP server, such as the server name and address.
1
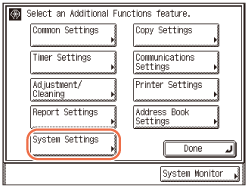
Press  (Additional Functions) → [System Settings].
 (Additional Functions) → [System Settings].
2
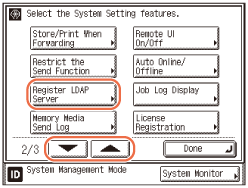
Press [ ] or [
 ] until [Register LDAP Server] appears → press [Register LDAP Server].
 ] or [
 ] until [Register LDAP Server] appears → press [Register LDAP Server].
3
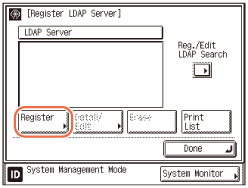
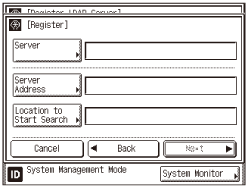
Press [Register].
4
Specify the LDAP server information.
|
1
|
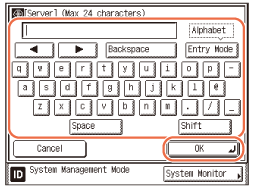
Press [Server] → enter a server name → press [OK].
 |
|
2
|
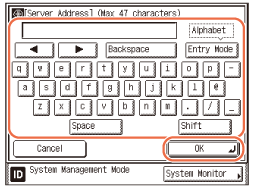
Press [Server Address] → enter the server’s address → press [OK].
 NOTE:
If <Login Information> is set to ‘Use (security authent.)’ for the LDAP server and Reverse DNS Lookup (a function that looks up the host name from the IP address) is not supported, enter a host name instead of an IP address.
|
|
3
|
Press [Location to Start Search] → enter the location to start searching → press [OK].
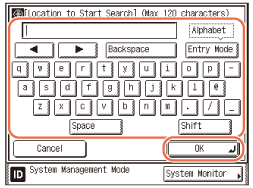 Enter the location to start searching according to the type of LDAP server you are using, or as described below. You can leave this field blank.
NOTE:
If you are using Windows 2000 Server, Windows Server 2003, or Windows Server 2008 with Active Directory:
Add “DC=” to each dot separated series of characters in the Active Directory domain name, and separate each series of characters by a comma.
Example: If <team1.salesdept.canon.co.jp> is the domain name in Active Directory: DC=team1, DC=salesdept, DC=canon, DC=co, DC=jp
If you are using Lotus Notes Domino R5 or later:
Enter the dn (Distinguished Name) of the node on the directory tree, such as “ou=team1”, “ou=salesdept”, “o=canon”, or “c=jp”.
If the server’s LDAP version is 3, you do not have to specify [Location to Start Search]. (If the LDAP version is 3, the machine automatically retrieves settings from the server, and sets the location to start searching.) If the server’s LDAP version is 2, you have to specify [Location to Start Search].
|
5
Press [Next].
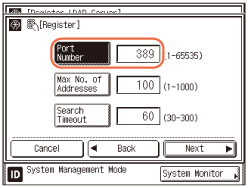
6
Press [Port Number] → enter a port number using  -
-  (numeric keys).
 -
-  (numeric keys).
7
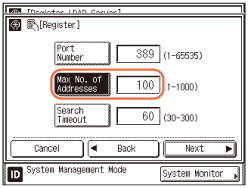
Press [Max. No. of Addresses] → enter the maximum number of addresses to search using  -
-  (numeric keys).
 -
-  (numeric keys).
8
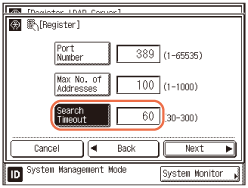
Press [Search Timeout] → enter the timeout time, in seconds, using  -
-  (numeric keys).
 -
-  (numeric keys).
IMPORTANT:
Depending on the conditions such as authentication methods you are using, the timeout time may be shorter than designated.
9
Press [Next].
10
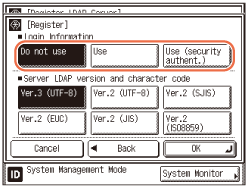
Select [Do not use], [Use], or [Use (security authent.)] for <Login Information>.
NOTE:
[Use (security authent.)] can be selected only if the LDAP server is running on Windows 2000 Server, Windows Server 2003, or Windows Server 2008 with Active Directory.
If you entered an IP address in step 4, and Reverse DNS Lookup (a function that looks up the host name from the IP address) is not supported, select either [Do not use] or [Use].
If <Login Information> is set to ‘Use (security authent.)’, and if Date & Time Settings in Timer Settings (from the Additional Functions screen) is different from the time settings on the LDAP server, the machine may not be able to connect to the LDAP server.
If [Do not use] is selected:
|
1
|
Select the Server LDAP version and character code → press [OK].
Select the LDAP version and character code according to the LDAP server’s environment. 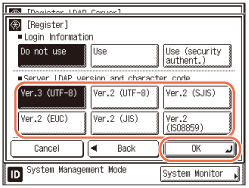 |
If [Use] is selected:
|
1
|
Select the LDAP version and character code according to the LDAP server’s environment → press [Next].
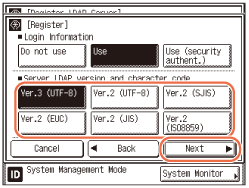 |
|
2
|
Press [User] → enter the user name according to the type of LDAP server you are using → press [OK].
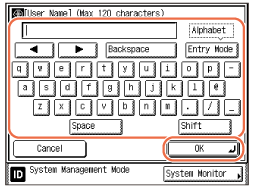 NOTE:
If you are using Windows 2000 Server, Windows Server 2003, or Windows Server 2008 with Active Directory:
Press [User] → enter “Windows domain name/Windows user name”.
Example: If <team1> is the Windows domain name, and <user1> is the Windows user name: team1/user1
If you are using Lotus Notes Domino R5 or later:
Press [User] → enter the dn (Distinguished Name) of the user, such as “cn=admin”, “ou=team1”, or “ou=salesdept”.
|
|
3
|
Press [Password] → enter a password → press [OK].
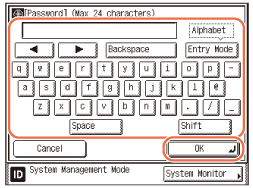 After pressing [OK], the password that you entered appears as asterisks (********) on the Register screen.
|
|
4
|
Select [On] or [Off] for <Display authentication screen>.
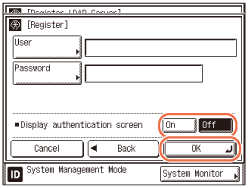 [On]: When searching for information on the server, a login information dialog box is displayed even if a password is not required.
[Off]: When searching for information on the server, a login information dialog box is not displayed.
|
|
5
|
Press [OK].
|
NOTE:
If Authentication at Send is activated, <Carry Over Send Auth. Info.> appears on the top of the Register screen. Press [On] to use the same user name and password as the login information for Authentication at Send or [Off] to use the user name and password registered at this step.
If [Use (security authent.)] is selected:
|
1
|
Press [Next].
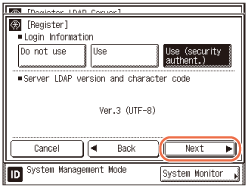 |
|
2
|
Press [User] → enter a user name → press [OK].
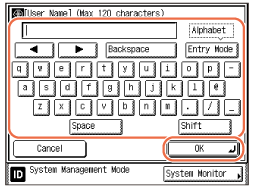 Example: If <user1 > is the Windows user name:
user1 |
|
3
|
Press [Password] → enter a password → press [OK].
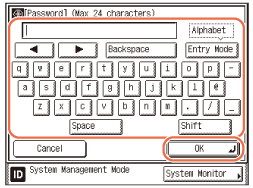 After pressing [OK], the password that you entered appears as asterisks (********) on the Register screen.
|
|
4
|
Press [Domain Name] → enter a domain name → press [OK].
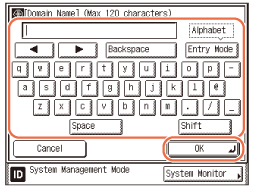 Enter the directory tree name of the Active Directory, such as <team1.salesdept.canon.co.jp>.
|
|
5
|
Select [On] or [Off] for <Display authentication screen>.
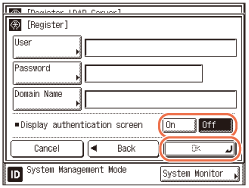 [On]: When searching for information on the server, a login information dialog box is displayed even if a password is not required.
[Off]: When searching for information on the server, a login information dialog box is not displayed.
|
|
6
|
Press [OK].
NOTE:
If Authentication at Send is activated, <Carry Over Send Auth. Info.> appears on the top of the Register screen. Press [On] to use the same user name and password as the login information for Authentication at Send or [Off] to use the user name and password registered at this step.
|
11
Press  (Reset) to return to the top screen.
 (Reset) to return to the top screen.
Changing LDAP Server Setting
You can change the settings for a stored LDAP server.
1
Press  (Additional Functions) → [System Settings].
 (Additional Functions) → [System Settings].
For help, see step 1 in Registering LDAP Server.
2
Press [ ] or [
 ] until [Register LDAP Server] appears → press [Register LDAP Server].
 ] or [
 ] until [Register LDAP Server] appears → press [Register LDAP Server].
For help, see step 2 in Registering LDAP Server.
3
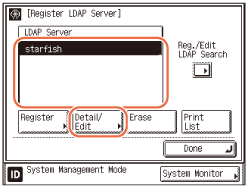
Select the LDAP server whose settings you want to change → press [Detail/Edit].
4
Change the necessary settings → press [OK].
For details about each setting, see Registering LDAP Server.
5
Press  (Reset) to return to the top screen.
 (Reset) to return to the top screen.
Deleting LDAP Server
You can delete a stored LDAP server.
1
Press  (Additional Functions) → [System Settings].
 (Additional Functions) → [System Settings].
For help, see step 1 in Registering LDAP Server.
2
Press [ ] or [
 ] until [Register LDAP Server] appears → press [Register LDAP Server].
 ] or [
 ] until [Register LDAP Server] appears → press [Register LDAP Server].
For help, see step 2 in Registering LDAP Server.
3
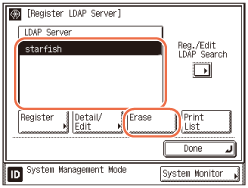
Select the LDAP server that you want to erase → press [Erase].
4
Press [Yes].
If you do not want to erase the LDAP server, press [No].
The selected LDAP server is erased.
5
Press  (Reset) to return to the top screen.
 (Reset) to return to the top screen.
Registering/Editing LDAP Search Attributes
You can register or edit the LDAP search attributes.
1
Press  (Additional Functions) → [System Settings].
 (Additional Functions) → [System Settings].
For help, see step 1 in Registering LDAP Server.
2
Press [ ] or [
 ] until [Register LDAP Server] appears → press [Register LDAP Server].
 ] or [
 ] until [Register LDAP Server] appears → press [Register LDAP Server].
For help, see step 2 in Registering LDAP Server.
3
Press [Reg./Edit LDAP Search].
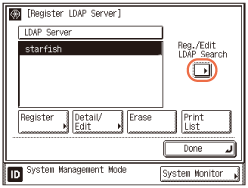
4
Register or edit the LDAP search attributes.
If you want to register a search attribute:
|
1
|
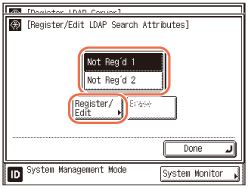
Press [Not Reg’d 1] or [Not Reg’d 2] → [Register/Edit].
 |
|
2
|
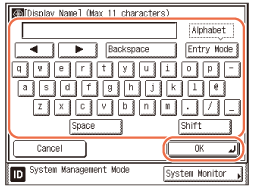
Press [Display Name] → enter the name to display → press [OK].
 |
|
3
|
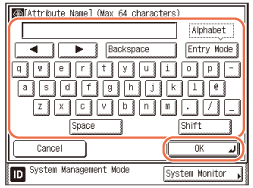
Press [Attribute Name] → enter the attribute name → press [OK].
 |
|
4
|
Press [OK].
|
If you want to edit a search attribute:
|
1
|
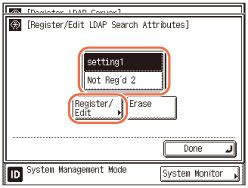
Select the search attribute that you want to edit → press [Register/Edit].
 |
|
2
|
Press [Display Name] → edit the name to display → press [OK].
|
|
3
|
Press [Attribute Name] → edit the attribute name → press [OK].
|
|
4
|
Press [OK].
|
If you want to erase a search category:
|
1
|
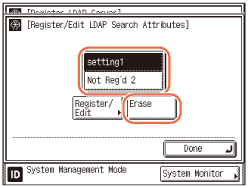
Select the search attribute that you want to erase → press [Erase].
 |
|
2
|
Press [Yes].
|
5
Press  (Reset) to return to the top screen.
 (Reset) to return to the top screen.
Printing LDAP Server Settings
You can print the LDAP server settings.
1
Press  (Additional Functions) → [System Settings].
 (Additional Functions) → [System Settings].
For help, see step 1 in Registering LDAP Server.
2
Press [ ] or [
 ] until [Register LDAP Server] appears → press [Register LDAP Server].
 ] or [
 ] until [Register LDAP Server] appears → press [Register LDAP Server].
For help, see step 2 in Registering LDAP Server.
3
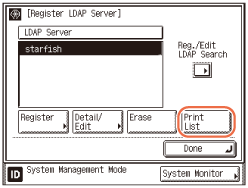
Press [Print List].
NOTE:
The Registered LDAP Server List can be printed only if LTR, LGL, or LTRR (plain, recycled, or color paper) is loaded in the paper sources whose settings in Other in Drawer Eligibility For APS/ADS in Common Settings (from the Additional Functions screen) are set to ‘On’. (Configuring the Machine's Basic Settings)
4
Press [Yes].
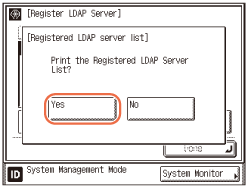
The LDAP Server settings list is printed.
5
Press  (Reset) to return to the top screen.
 (Reset) to return to the top screen.