Handling Junk Faxes
You can set the machine to not print out junk faxes received by the machine.
The Confidential Fax Inbox, like the Memory RX Inbox, temporarily stores documents received via Fax, Internet Fax, or Intranet Fax.
However, unlike the Memory RX Inbox, you can store received documents in one of up to 50 folders in the Confidential Fax Inbox, based on the sender's registration number. You can also restrict access to each folder by assigning a password.
The Confidential Fax Inbox is a fax solution which offers comprehensive security, ensuring only authorized individuals can view received documents. Users with access to the received documents can perform the operations shown below.
Benefits from Not Printing Junk Faxes
Conserves paper
By not printing junk faxes that will be thrown away without being read, you can save paper resources.
|
Required Condition
|
|
Fax can be used.
You are logged in as the administrator.
|
This section describes how to set the machine to store all received junk faxes in a "Junk Fax" box in the Confidential Fax Inboxes without printing them, and only print out faxes received from known business partners after saving them in a "Work" box.
The screens may differ, depending on the model of the machine and on attached optional products.
Follow the procedures below.
Naming the Confidential Fax Inboxes
Setting the Forwarding Conditions for the "Junk Fax" Box
Setting the Forwarding Conditions for the "Work" Box
Naming the Confidential Fax Inboxes
1.
Press  (Settings/Registration) → [Function Settings] → [Receive/Forward] → [Common Settings] → [Set Fax/I-Fax Inbox] → [Set/Register Confidential Fax Inboxes].
(Settings/Registration) → [Function Settings] → [Receive/Forward] → [Common Settings] → [Set Fax/I-Fax Inbox] → [Set/Register Confidential Fax Inboxes].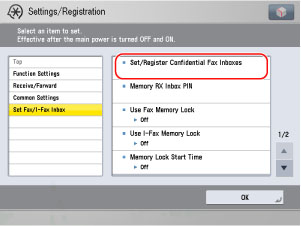
2.
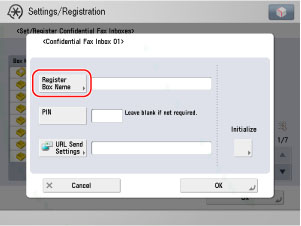
Press the number for the Confidential Fax Inbox to rename to "Junk Fax" → press [Register Box Name].
3.
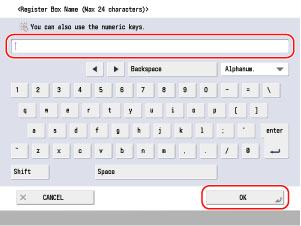
Enter <Junk Fax> on the keyboard screen → press [OK] → [OK].
4.
Press the number for another Confidential Fax Inbox to rename to "Work" → press [Register Box Name].
5.
Enter <Work> on the keyboard screen → press [OK] → [OK] → [Close].
Setting the Forwarding Conditions for the "Junk Fax" Box
1.
Press (Settings/Registration) → [Function Settings] → [Receive/Forward] → [Common Settings] → [Forwarding Settings].
(Settings/Registration) → [Function Settings] → [Receive/Forward] → [Common Settings] → [Forwarding Settings].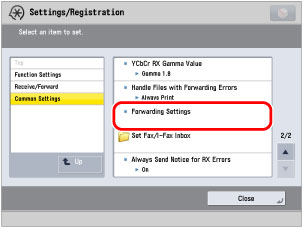
2.
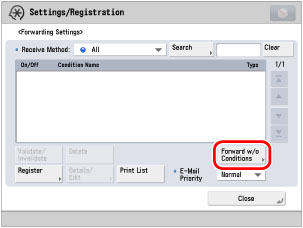
Press [Forward w/o Conditions].
3.
Select [Fax: Line 1] for the receiving method.
4.
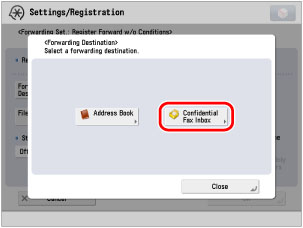
Press [Forwarding Destination] → [Confidential Fax Inbox].
5.
Select "Junk Fax" → press [OK] → [OK].
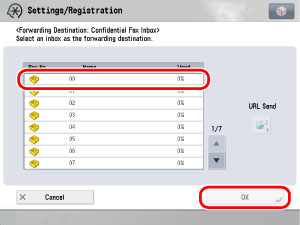
All received faxes are now set to be moved to the "Junk Fax" box without being printed to paper.
Setting the Forwarding Conditions for the "Work" Box
You can operate this procedure using the touch panel display or the Remote UI.
Using the Touch Panel Display
1.
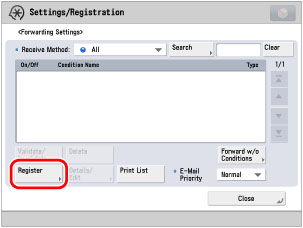
Press [Register].
2.
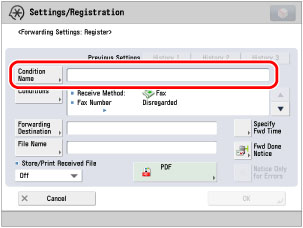
Press [Condition Name] → enter an appropriate name for the condition → press [OK].
3.
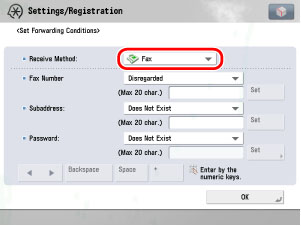
Press [Conditions] → select [Fax: Line 1] for the receiving method.
4.
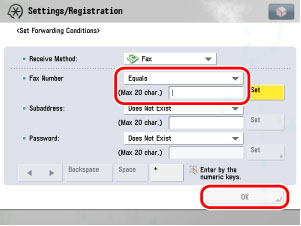
Select [Equals] for the destination number → enter the fax number of the business partner → press [OK].
5.
Press [Forwarding Destination] → [Confidential Fax Inbox].
6.
Select [On] for saving/printing received files.
7.
Select "Work" → press [OK] → [OK].
8.
Select the registered forwarding condition → press [Validate/Invalidate].
The forwarding condition is enabled, and the specified faxes are now set to be moved to the "Work" box.
9.
From this point on, it is recommended that you periodically check the "Junk Fax" box, and if you find any required faxes, add forwarding conditions so that those faxes are forwarded to the "Work" box.
Using the Remote UI
You can specify the forwarding settings using the Remote UI.
1.
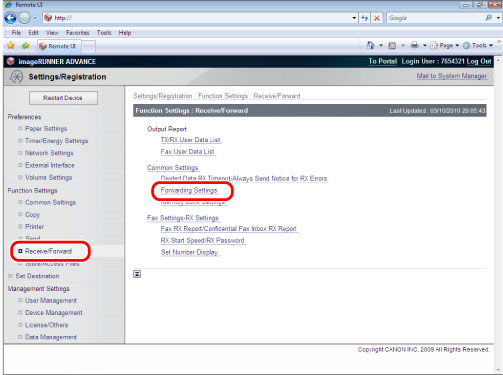
Access the Remote UI → click [Settings/Registration] → [Receive/Forward] → [Forwarding Settings].
2.
Click [Add New Conditions...] → specify the forwarding settings.

Reference Information
Print List
Follow the procedures below to print out the information of the forwarding settings.
|
1.
|
Press
(Settings/Registration) → [Function Settings] → [Receive/Forward] → [Common Settings] → [Forwarding Settings]. |
|
2.
|
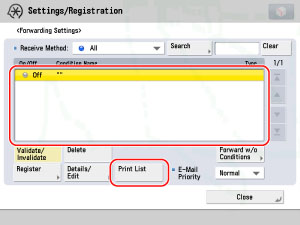
Select the forwarding condition to print → press [Print List].
 |
|
3.
|
Press [Yes] on the confirmation screen to print the list of forwarding settings.
|