Handling Files with Forwarding Errors
Generally, you turn OFF your computer when you are out of the office or before you go home. If the forwarding destination computer is turned OFF before the fax is completed forwarding, the job is handled as a forwarding error.
When a forwarding error occurs, the machine processes the fax as shown below.
|
Forwarding Error Handling Methods
|
Delete Failed TX Jobs
|
Handle Files with Forwarding Errors
|
Memory Lock Settings
|
Stored To
|
|
Clear
|
ON
|
OFF
|
-
|
-
|
|
Store
|
OFF
|
-
|
-
|
[Send] for Job Status
|
|
ON
|
Store/Print
|
ON
|
Memory RX Inbox
|
|
|
Print
|
ON
|
Always Print
|
-
|
-
|
|
ON
|
Store/Print
|
OFF
|
-
|
Benefits of Printing for "Handle Files with Forwarding Errors"
Printing for "Handle Files with Forwarding Errors" enables you to reduce fax-related errors.
It is best suited for uses such as the following: to record and manage operation errors using printouts, and to aid users unaccustomed to operating a keyboard.
Benefits of Storing Data for "Handle Files with Forwarding Errors"
Storing data enables you to view, output, delete, and forward files from the Remote UI, enhancing the efficiency of fax operations and reducing fax-related expenses.
This section describes how to print, store, and verify jobs with forwarding errors.
The screens may differ, depending on the model of the machine and on attached optional products.
Printing Jobs with Forwarding Errors
You can select either [Store/Print] or [Always Print].
1.
Press  (Settings/Registration) → [Function Settings] → [Send] → [Common Settings] → [Delete Failed TX Jobs].
(Settings/Registration) → [Function Settings] → [Send] → [Common Settings] → [Delete Failed TX Jobs].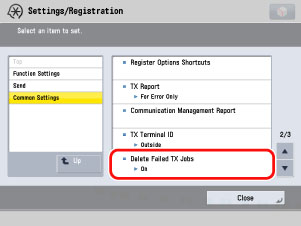
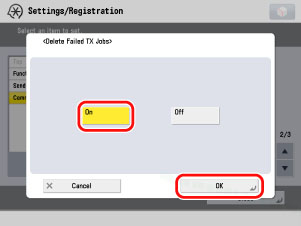
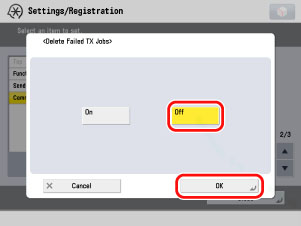
2.
Press [On] → [OK].
3.
Press (Settings/Registration) → [Function Settings] → [Receive/Forward] → [Common Settings] → [Handle Files with Forwarding Errors] → select [Store/Print] or [Always Print] → press [OK].
(Settings/Registration) → [Function Settings] → [Receive/Forward] → [Common Settings] → [Handle Files with Forwarding Errors] → select [Store/Print] or [Always Print] → press [OK].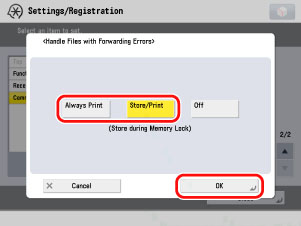
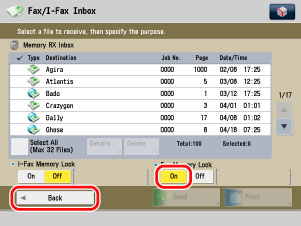
Storing Jobs with Forwarding Errors in the Memory RX Inbox
You can specify the Memory Lock and Handle Files with Forwarding Error settings. Memory Lock settings must be specified in both Settings/Registration and the Memory RX Inbox screen.
You can manually print jobs with forwarding errors that are stored in the Memory RX Inbox using the control panel or the Remote UI.
1.
Press (Settings/Registration) → [Function Settings] → [Receive/Forward] → [Common Settings] → [Set Fax/I-Fax Inbox].
(Settings/Registration) → [Function Settings] → [Receive/Forward] → [Common Settings] → [Set Fax/I-Fax Inbox].
2.
Press [Use Fax Memory Lock] → [On].
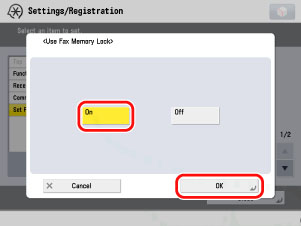
3.
Press [OK].
4.
Press (Settings/Registration) → [Function Settings] → [Receive/Forward] → [Common Settings] → [Handle Files with Forwarding Errors] → select [Store/Print] → press [OK].
(Settings/Registration) → [Function Settings] → [Receive/Forward] → [Common Settings] → [Handle Files with Forwarding Errors] → select [Store/Print] → press [OK].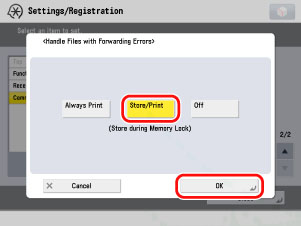
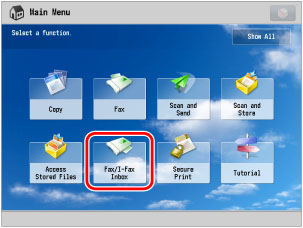
5.
Select [Fax/I-Fax Inbox] from the Main Menu screen.
|
NOTE
|
|
If the Main Menu screen is not displayed, press
 (Main Menu). (Main Menu). |
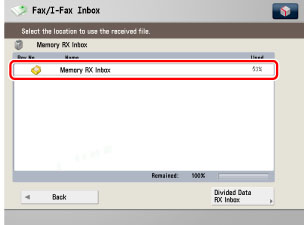
6.
Press [Memory RX Inbox].
7.
Press [Memory RX Inbox].
8.
Press [On] for <Fax Memory Lock> → [Back].
Displaying Jobs with Forwarding Errors in Job Status
You can attempt to resend a job if a forwarding error occurs due to reasons such as the forwarding destination computer being turned OFF before forwarding is completed.
1.
Press (Settings/Registration) → [Function Settings] → [Receive/Forward] → [Common Settings] → [Delete Failed TX Jobs].
(Settings/Registration) → [Function Settings] → [Receive/Forward] → [Common Settings] → [Delete Failed TX Jobs].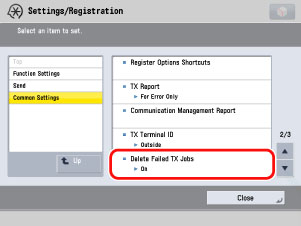
2.
Press [Off] → [OK].
3.
Press  (Status Monitor/Cancel) → [Send] → [Job Status].
(Status Monitor/Cancel) → [Send] → [Job Status].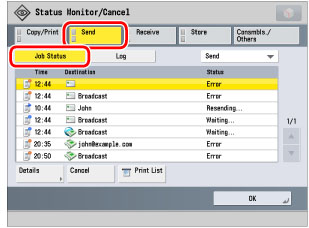
The status of all send jobs (fax, internet fax, file transmission, e-mail, and forward) are displayed, and <Error> appears for forwarding errors in the same way as other transmission errors.
Select [Details] to display the detailed job information. Select [Cancel] to stop the job.
|
NOTE
|
|
All transmission errors are displayed on the same screen, making forwarding errors indistinguishable from other transmission errors.
Jobs are stored in the machine's internal hard disk, and are not deleted even if you turn OFF the main power.
|
Reference Information
Resending Jobs with Errors
Select the job to resend → press [Details] → [Resend].
By selecting [Change Destination] you can change the destination to one of the same type (i.e. you can only replace an e-mail address with a different e-mail address).
Receiving E-Mail Notification of Forwarding Errors
You can set to send e-mail notification only when a forwarding error occurs. Select a forwarding condition → press [Details/Edit] → select [Fwd Done Notice] and [Notice Only for Errors].
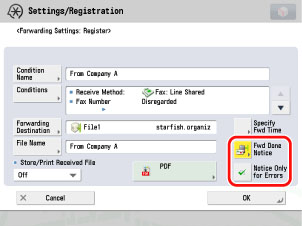
To send an e-mail, you must have e-mail access and specify e-mail settings on the machine. You can select only one e-mail address registered in the Address Book for the destination of a forwarding done notice.
Avoiding Forwarding Errors Using Delayed Send
By selecting [Specify Fwd Time], you can set to validate/invalidate forwarding settings based on the day or time. For example, you can set to invalidate forwarding at times when the computer is turned OFF, such as during evening hours and non-working days.
For [Everyday]:
Forwarding settings are valid for the same time period everyday.
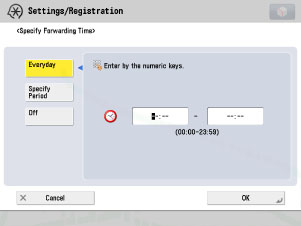
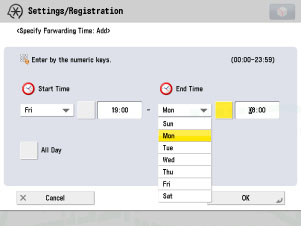
For [Specify Period]:
Forwarding settings are valid for the specified dates and times.
|
Example:
|
Set to only perform forwarding during the non-working period between 19:00 on Friday and 8:00 on Monday of the following week.
|
|
Start Time: Friday, 19:00
End Time: Monday, 8:00
You can store up to seven different combinations of start and end times.
|