Sending a Document via Internet Fax
Internet Fax (I-fax) is a function that enables you to send and receive images via internet and not a telephone line.
Benefits from Using the I-Fax
Reduce transmission cost
G3 FAX transmission cost increases with transmission time and distance. If a line with fixed rate is installed, you can control the transmission cost because the cost of I-fax is fixed regardless of the transmission time and distance. It is recommended that you use this when sending and receiving documents with large number of pages.
High resolution transmission
You can send and receive at a resolution of up to 600 dpi. (for Full mode)
Confirm transmission
Confirmation result notice can be sent to the sender to check whether the document was sent to the recipient.
|
Required Condition
|
|
The Send function is available for use.
Network settings are set.
The recipient's machine can receive I-fax.
|
This section describes how to send I-fax via Full mode from the IPv4 environment.
The screens may differ, depending on the model of the machine and on attached optional products.
Follow the procedures below.
Preparations for Sending I-Fax
DNS settings
E-mail/I-fax settings
Send I-Fax Using the Touch Panel Display
Preparations for Sending I-Fax
You can operate this procedure using the touch panel display or the Remote UI.
Using the Touch Panel Display
1.
Follow the procedures below to check whether the DNS server address settings are set.
Press  (Settings/Registration) → [Preferences] → [Network] → [TCP/IP Settings] → [DNS Settings] → [DNS Server Address Settings].
(Settings/Registration) → [Preferences] → [Network] → [TCP/IP Settings] → [DNS Settings] → [DNS Server Address Settings].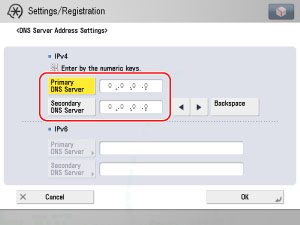
If it is not set, contact the System Manager and set the IP address for DNS primary server and DNS secondary server.
|
NOTE
|
|
DNS server is a server that converts the computer's domain name into an IP address.
|
2.
Check whether the host name and domain name are set in [DNS Host/Domain Name Settings] for <IPv4> on the DNS Settings screen.
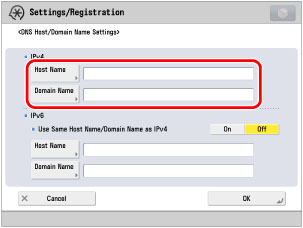
If it is not set, contact the System Manager and set the host name and domain name. For the domain name, enter the domain name of the network to which the machine belongs to.
3.
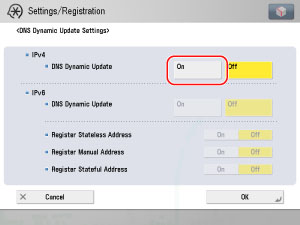
If dynamic DNS server is set, press [On] for <DNS Dynamic Update> in <DNS Dynamic Update Settings> on the DNS settings screen.
4.
Follow the procedures below to check whether the e-mail server is set.
Press (Settings/Registration) → [Function Settings] → [Send] → [E-Mail/I-Fax Settings] → [Communication Settings].
(Settings/Registration) → [Function Settings] → [Send] → [E-Mail/I-Fax Settings] → [Communication Settings].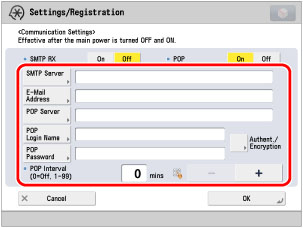
If it is not set, contact the System Manager and set each settings.
|
[SMTP Server]:
|
The IP address or host name of the e-mail server used to for transmission
|
|
[E-Mail Address]:
|
The e-mail address set on the machine
|
|
[POP Server]:
|
The IP address and host name of the e-mail server used to send and receive in "POP before SMTP" send authentication format
|
|
[POP Login Name]:
|
The log in name used to access the POP server
|
|
[POP Password]:
|
The password used to access the POP server
|
|
[POP Interval]:
|
The time interval in which the machine checks the e-mail on the e-mail server
|
|
NOTE
|
|
It is recommend that you set [POP Interval] to an interval other than '0'.
|
5.
If the sending server requires authentication, check the authentication system by pressing [Authent./Encryption].
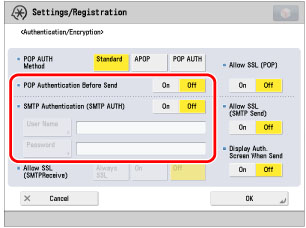
If it is not set, contact the System Manager and set each settings.
|
[POP Authentication Before Send]:
|
If the provider is in the "POP before SMTP" send authentication system, set this setting to 'On'.
|
|
[SMTP Authentication (SMTP AUTH)]:
|
If the environment of the e-mail server requires SMTP authentication, set this setting to 'On' and enter the user name and password.
|
6.
Follow the procedures below to set the settings such as the maximum data size.
Press (Settings/Registration) → [Function Settings] → [Send] → [E-Mail/I-Fax Settings] → [Maximum Data Size for Sending].
(Settings/Registration) → [Function Settings] → [Send] → [E-Mail/I-Fax Settings] → [Maximum Data Size for Sending].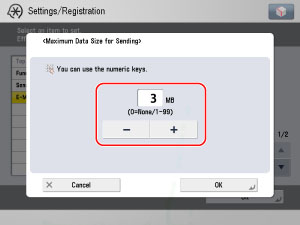
The maximum data size for sending should not exceed the maximum data size for the e-mail server.
7.
Follow the procedures below to specify the TX timeout settings.
Press (Settings/Registration) → [Function Settings] → [Send] → [E-Mail/I-Fax Settings] → [Full Mode TX Timeout].
(Settings/Registration) → [Function Settings] → [Send] → [E-Mail/I-Fax Settings] → [Full Mode TX Timeout].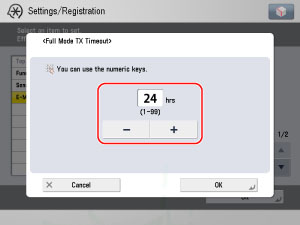
8.
If you want to print the TX report when the notice e-mail for TX report is sent, follow the procedures below to set [Print MDN/DSN upon Receipt] to 'On'.
Press (Settings/Registration) → [Function Settings] → [Send] → [E-Mail/I-Fax Settings] → [Print MDN/DSN upon Receipt].
(Settings/Registration) → [Function Settings] → [Send] → [E-Mail/I-Fax Settings] → [Print MDN/DSN upon Receipt].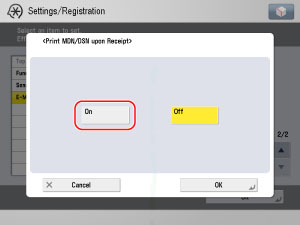
9.
Follow the procedures below to set [Use Send via Server] to 'On'.
Press (Settings/Registration) → [Function Settings] → [Send] → [E-Mail/I-Fax Settings] → [Use Send via Server].
(Settings/Registration) → [Function Settings] → [Send] → [E-Mail/I-Fax Settings] → [Use Send via Server].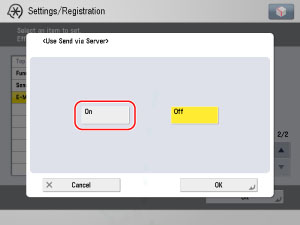
Using the Remote UI
You can specify the settings using the Remote UI.
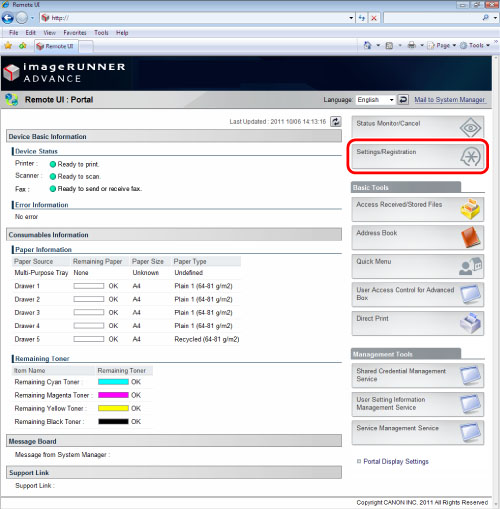
1.
Access the Remote UI → click [Settings/Registration].
|
NOTE
|
||||
|
If an error message is displayed and you cannot access the Remote UI, follow the procedures below.
Page Not Found:
HTTP 404 File Not Found:
Confirm that the IP address is correct.
Confirm the IP address setting range in "Network." |
Updating DNS Automatically
|
(1)
|
Click [Network Settings] for <Preferences> → [DNS Settings (IPv4)].
|
|
(2)
|
On the [DNS Settings (IPv4)] screen, check [Host Name] and [Domain Name].
|
|
(3)
|
If dynamic DNS server is set, select [Perform DNS Dynamic Update].
|
|
(4)
|
Click [OK].
|
Checking E-Mail Server Settings
|
(1)
|
Click [Send] for <Function Settings> → [Network Settings - E-Mail/I-Fax Settings].
|
|
(2)
|
If the sending server requires authentication, click [Authentication/Encryption Settings] → check the authentication system.
|
|
(3)
|
Click [OK].
|
Setting Maximum Data Size for Sending
|
(1)
|
Click [Send] for <Function Settings> → [Communications Settings - E-Mail/I-Fax Settings].
|
|
(2)
|
Click [E-Mail/I-Fax Common Settings] → enter the value in <Maximum Data Size for Sending>.
|
|
(3)
|
Click [OK].
|
Specifying TX Timeout Settings
|
(1)
|
Click [Send] for <Function Settings> → [Communications Settings - E-Mail/I-Fax Settings].
|
|
(2)
|
Click [I-Fax Settings] → enter the value in <Full Mode TX Timeout>.
|
|
(3)
|
Click [OK].
|
Printing the TX Report when the Notification E-Mail Is Sent
|
(1)
|
Click [Send] for <Function Settings> → [Communications Settings - E-Mail/I-Fax Settings].
|
|
(2)
|
Click [I-Fax Settings] → select <Print MDN/DSN upon Receipt>.
|
|
(3)
|
Click [OK].
|
Using Send via Server
|
(1)
|
Click [Send] for <Function Settings> → [Communications Settings - E-Mail/I-Fax Settings].
|
|
(2)
|
Click [I-Fax Settings] → select <Send via Server>.
|
|
(3)
|
Click [OK].
|
Preparation for sending I-fax is completed.
|
NOTE
|
|
Depending on the provider, port number 25 for send may be close to countermeasure junk mail. For more information, contact your provider.
|
Send I-Fax Using the Touch Panel Display
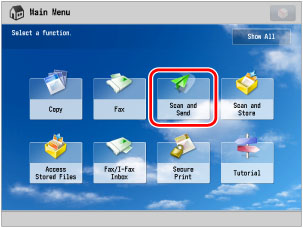
1.
Place your originals on the platen glass or in the feeder → press [Scan and Send] on the Main Menu screen.
|
NOTE
|
|
If the Main Menu screen is not displayed, press
 (Main Menu). (Main Menu). |
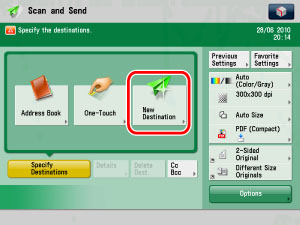
2.
Press [New Destination].
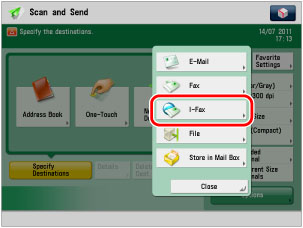
3.
Press [I-Fax].
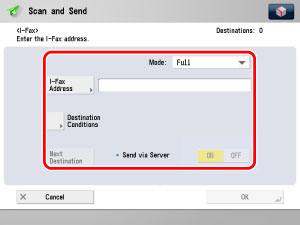
4.
Select [Full] from mode selection → select I-fax address → press recipient's condition. Enter the recipient's e-mail address as the I-fax address. Set [Send via Server] to 'On'.
5.
Specify recipient's condition → press [OK].
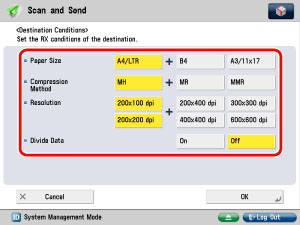
Specify the settings for paper size, compression method, and resolution according to the specification of the recipient's machine.
If the compression size is unknown, it is recommended that all of the compression methods (MH, MR, and MMR) are selected.
6.
Press  (Start).
(Start). 7.
Press  (Status Monitor/Cancel) → [Send] → [Log] → check that the job was sent successfully.
(Status Monitor/Cancel) → [Send] → [Log] → check that the job was sent successfully.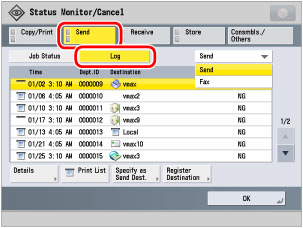
If the result is <OK>, the job was sent successfully.
If the result is <NG>, the job was not sent because of an error.
|
NOTE
|
|
One of the causes for failing to send is port number 25 for sending may be closed to countermeasure junk mail, depending on the provider. For information on changing the port of the machine, contact your local authorized Canon dealer.
|
Reference Information
Difference between Simple Mode and Full Mode
You cannot check whether the data was sent correctly to the recipient in the Simple mode. However, you can check whether the data was sent correctly to the recipient in the Full mode. Thus, it is recommended that the Full mode is set when you are sending a data.
Communication Activity Report
You can also confirm transmission by pressing (Settings/Registration) → [Function Settings] → [Send] → [Common Settings] → [TX Report].
(Settings/Registration) → [Function Settings] → [Send] → [Common Settings] → [TX Report].Intranet Fax
By using the Intranet Fax that uses office LAN for TCP/IP protocol for IP transmission instead of e-mail server, you can reduce the transmission cost. (If the intranet fax is used, the address is <name in alphanumeric characters@IP address>.) Also, if the intranet fax is used, data is received when send transmission is completed.
As Intranet Fax can be used for transmitting data without using e-mail, the similar setting to e-mail is unnecessary.
|
Intranet Fax
|
I-Fax
|
|
|
Primary DNS Server
|
Not Required
|
Required
|
|
Secondary DNS Server
|
Not Required
|
Required
|
|
Host Name
|
Not Required
|
Required
|
|
Domain Name
|
Not Required
|
Required
|
|
SMTP Receive
|
On
|
-
|
|
POP
|
-
|
On
|
|
SMTP Server
|
Not Required
|
Required
|
|
E-Mail Address
|
Printed as the fax sender (e.g. mfp01@canon.com)
|
Required
|
|
POP Server
|
-
|
Required
|
|
POP Password
|
-
|
Required
|
|
POP Interval
|
-
|
Required
|
To use Intranet Fax, set [Use Send via Server] in [Function Settings] (Settings/Registration) to 'On', and set [Use Send via Server] in the I-Fax Address Settings screen to 'Off'.
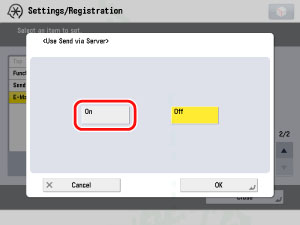
Function Settings (Settings/Registration) Screen
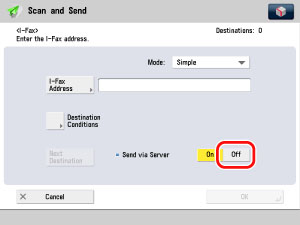
I-Fax Address Settings Screen