Document Scan Lock
This section describes the Document Scan Lock settings using a TL code.
By using a TL code, you can embed scan lock information on the output to restrict unauthorized copying. You can also embed tracking information on the output.
Scan Lock Information
You can embed TL code on the output to restrict unauthorized copying. You can select the following four types of restriction.
Allow All
The output can be copied.
Prohibit All
Copying of outputs is restricted. You cannot copy an output for which Prohibit All is detected.
Password Authentication
Copying of outputs is restricted. You can copy only if the authentication process is successful.
User Authentication
Copying of outputs is restricted. You can set User Authentication restriction if the Department ID Management or authentication by SSO-H is set. You can copy only if the Department ID or user name matches.
|
NOTE
|
|
When copying documents set with [Password Auth.] or [User Authentication], the embedded information on the first page is used for authentication. In the following case, the job will be cancelled:
When the embedded information on the first page differs from the embedded information on the second and subsequent pages (for example, when copying a document with the password '1234567' embedded on the first page, and the password '9876543' embedded on the second page).
|
1.
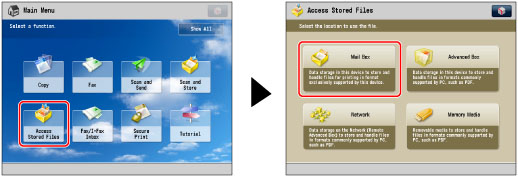
Press [Access Stored Files] → [Mail Box].
2.
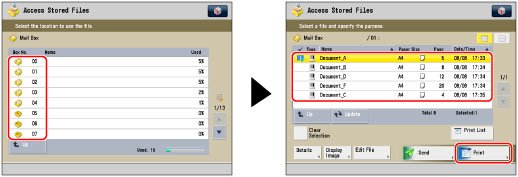
Select the desired Mail Box → select the desired file → press [Print].
3.
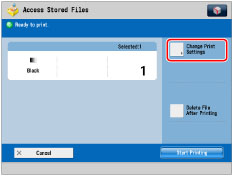
Press [Change Print Settings].
4.
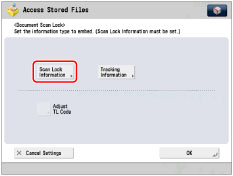
Press [Options] → [Document Scan Lock].

5.
Press [Scan Lock Information].
6.
Select the Scan Lock condition.

If [User Authentication] is selected, the Department ID and PIN which are currently being used to log in to the machine are embedded on the output. For SSO-H, the user name and password are embedded.
If [Password Auth.] is selected, press [Password] → enter the password → press [Next]. Enter the same password to confirm the password → press [OK].
7.
Press [OK].
8.
Press [OK] → [Close].
Tracking Information
You can embed text such as user name, date/time, and device name on the output. You can analyze who, when, and with which machine the file was output using Document Scan Code Analyzer for MEAP.
1.
Press [Access Stored Files] → [Mail Box].
2.
Select the desired Mail Box → select the desired file → press [Print].
3.
Press [Change Print Settings].
4.
Press [Options] → [Document Scan Lock].
5.
Press [Tracking Information].

6.
Press [Set].

Information such as ID/user name, date/time, and device name is embedded.
To set custom text, press [Custom Characters] → enter the text → press [OK].
7.
Press [OK].
8.
Press [OK] → [Close].
Adjusting the TL Code
You can adjust the size, density, and colour of the dots for the TL code to be embedded on the output.
1.
Press [Access Stored Files] → [Mail Box].
2.
Select the desired Mail Box → select the desired file → press [Print].
3.
Press [Change Print Settings].
4.
Press [Options] → [Document Scan Lock].
5.
Set the information to embed → press [Adjust TL Code].

|
NOTE
|
|
For instructions on setting the information to embed, see the following:
|
6.
Adjust the dots.
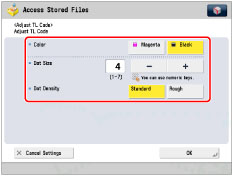
If you want to adjust the size of the dots:
Press [-] or [+] to set the size of the dots.
The appropriate dot size differs according to the environment or the content of the file. We recommend that you check documents embedded with a TL code to see whether you can correctly analyze the tracking information and whether the TL code restricts copying.
If you want to adjust the density of the dots:
Select [Standard] or [Rough].
If there are many illustrations or images in the file, we recommend that you select [Standard].
7.
Press [OK].
8.
Press [OK] → [Close].
|
IMPORTANT
|
|
For information on the modes which cannot be set in combination with this mode, see "Unavailable Combination of Functions."
You cannot adjust the print density while printing with [Document Scan Lock] set.
Printing performance may not be optimal, depending on the file content and combination of settings.
|
|
NOTE
|
|
The Document Scan Lock mode does not guarantee restriction of unauthorized copying. You may not be able to restrict unauthorized copying or analyze tracking information, depending on the combination of settings and the output such as a document with an image on the entire page.
|