Storing Forwarding Settings
1.
Press  (Settings/Registration).
(Settings/Registration).2.
Press [Function Settings] → [Receive/Forward] → [Common Settings].
3.
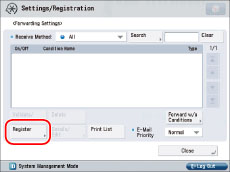
Press [Forwarding Settings].
4.
Press [Register].
To recall the forwarding settings of a received file that you have stored, press [History 1], [History 2], or [History 3].

|
IMPORTANT
|
|
The forwarding settings are stored in memory if you press [OK] on the Register screen or the Edit screen.
Identical forwarding settings are stored only once in memory.
|
|
NOTE
|
|
The three most recent forwarding settings that were stored in memory are not deleted, even when the power is turned OFF.
Forwarding settings for received files not stored in memory are not displayed, even if you press a button for <Previous Settings>.
|
5.
Press [Condition Name].
6.
Enter the condition name → press [OK].
|
NOTE
|
|
If you do not specify a file name, the first 24 characters of the condition name are used as the file name. However, you can change the name of the file at any time.
|
7.
Press [Conditions].
8.
Press the <Receive Method:> drop-down list → select the desired mode.
If the fax board is not installed, this step is not necessary. However, depending on the fax board installed, you can make the following selections:
If only the Super G3 FAX Board installed: Line 1
If the Super G3 FAX Board and Super G3 2nd Line Fax Board are installed: Line 1, Line 2
If the Super G3 FAX Board, Super G3 2nd Line Fax Board, and Super G3 3rd/4th Line Fax Board are installed: Line 1, Line 2, Line 3, Line 4
9.
Set the forwarding conditions.
If the fax board is not installed, or you select [I-Fax] for <Receive Method:>:
Press the <To:>, <From:>, or <Subject:> drop-down list → select the desired search criteria.
The available criteria are:
* <To:>: To (recipient machine)
* <From:>: From (sending machine)
* <Subject:>: Subject
Example:
If the I-fax received by this machine is forwarded, <To:> will become this machine, and <From:> will become the machine from which the I-fax was received.
The available criteria are:
|
[Disregarded]:
|
Disregards the To, From, or Subject information as forwarding conditions.
|
|
[Equals]:
|
Forwards the document if the From or Subject information matches all of the characters entered.
|
|
[Differs from]:
|
Forwards the document if the To, From, or Subject information differs from the characters entered.
|
|
[Begins with]:
|
Forwards the document if the To, From, or Subject information begins with the characters entered.
|
|
[Ends with]:
|
Forwards the document if the To, From, or Subject information ends with the characters entered.
|
|
[Contains]:
|
Forwards the document if the To, From, or Subject information contains the characters entered.
|
|
[Does Not Contain]:
|
Forwards the document if the To, From, or Subject information does not contain the characters entered.
|
[Equals] is not an option for <To:>.
Press [Set] → enter the forwarding condition.
If you want to change the criteria for the forwarding conditions without changing the forwarding condition for the To, From, and Subject drop-down lists, press [Set] next to the criteria you want to change → enter the new criteria → press [OK].
|
NOTE
|
|
If you select [Disregarded] as the forwarding condition, you cannot enter any criteria.
|
If the fax board is installed, and you select [Fax] for <Receive Method:>:
Press the <Fax Number>, <Subaddress:>, or <Password:> drop-down list → select the desired search criteria.
The available criteria are:
|
[Disregarded]:
|
Disregards the To, From, or Subject information as forwarding conditions.
|
|
[Does Not Exist]:
|
The Subaddress or Password information does not exist for the received document.
|
|
[Equals]:
|
Forwards the document if the From or Subject information matches all of the characters entered.
|
|
[Differs from]:
|
Forwards the document if the To, From, or Subject information differs from the characters entered.
|
|
[Begins with]:
|
Forwards the document if the To, From, or Subject information begins with the characters entered.
|
|
[Ends with]:
|
Forwards the document if the To, From, or Subject information ends with the characters entered.
|
|
[Contains]:
|
Forwards the document if the To, From, or Subject information contains the characters entered.
|
|
[Does Not Contain]:
|
Forwards the document if the To, From, or Subject information does not contain the characters entered.
|
[Does Not Exist] is not an option for <Fax Number>.
[Does Not Exist] and [Equals] are the only forwarding conditions that you can select for <Subaddress:> and <Password:>.
Press [Set] → enter the forwarding condition.
Details of each item are shown below.
  : : |
Press to move the position of the cursor.
|
|
[Backspace]:
|
Press to delete the last number entered.
|
|
[Space]:
|
Press to insert a space between numbers.
|
|
[+]:
|
Use to insert a country code. Press [+] after the country code, before the fax number.
|
If you want to change the criteria for forwarding conditions without changing the forwarding condition for the <Fax Number>, <Subaddress:>, and <Password:> drop-down lists, press [Set] next to the criteria you want to change → enter the new criteria.
If you select password as a forwarding condition, press [Set] → <Password:> → enter a password using  -
-  (numeric keys),
  , and
, and  . Press [Confirm] → enter the PIN again for confirmation → press [OK].
- (numeric keys), , and . Press [Confirm] → enter the PIN again for confirmation → press [OK].You can enter the following characters for the <Fax Number>, <Subaddress:>, and <Password:> forwarding criteria.
|
Fax Number:
|
0 to 9, [Space], [+]
|
|
Subaddress:
|
0 to 9, *, #, [Space]
|
|
Password:
|
0 to 9, *, #, [Space]
|
|
NOTE
|
|||||||||||||||
|
If you select [Disregarded] or [Does Not Exist] as the forwarding condition, you cannot enter any criteria.
You cannot set the following combinations of conditions:
|
10.
Press [OK].
11.
Select [Forwarding Destination] → select the forwarding destination.
Details of each item are shown below:
|
[Address Book]:
|
Select to forward the received document to another machine or to an Advanced Space opened as an SMB server or WebDAV server.
|
|
[Confidential Fax Inbox]:
|
Select to store the received document in a Confidential Fax Inbox.
|
|
NOTE
|
|
If the selected destination is a group address which contains a mail box, the file you are sending will not be forwarded to (and stored in) that mail box.
For instructions on registering an Advanced Space as a destination in the Address Book, see "Registering an Advanced Space Address."
If you select [I-Fax] for <Receive Method:>, you cannot specify a WebDAV server as the forwarding destination. If the selected destination is a group address which contains a WebDAV server, the document is not forwarded to the WebDAV server.
|
If you select [Address Book]:
Select the forwarding destination → press [OK].
If a screen prompting you to enter an access number is displayed, press [Access No.] → enter the access number. (See "Registering an E-Mail Address" and "Storing Fax Numbers.")
You can restrict the types of destinations displayed in the results list by pressing the drop-down list and selecting the desired type of destination.
Use the Address List drop-down list to display each address book (Address Lists 1 to 10 and one-touch buttons). Address lists categorize the addresses stored in the Address Book.
You can specify e-mail, I-fax, file server, and group destinations as forwarding destinations.
You can specify the Remote Address Book as forwarding destinations by pressing [To Remote Add. Book]. For more information on the Remote Address Book, see "Specifying Destinations Using the Address Book (Remote)."
|
NOTE
|
|
Advanced Space destinations are indicated by
 . .To cancel a selected destination, select the destination again.
To view the detailed information for a selected destination, select the destination → press [Details].
Register destinations in the Address Book in advance. (See "Register Destinations.")
[Access No.] appears on the screen only if [Manage Address Book Access Numbers] is set to 'On' in [Set Destination] (Settings/Registration). (See "Managing the Address Book with Access Numbers.")
If you select a fax number as the forwarding destination, the subaddress and password registered in the Address Book are ignored.
You cannot select multiple destinations at the same time. To forward to multiple destinations, select a group address.
If the fax board is installed or the Remote Fax Kit is activated, you can specify fax numbers and group addresses which contain fax destinations as forwarding destinations.
If a forwarding error occurs when the address in the Remote Address Book is registered as the forwarding destination, confirm that the address is not deleted from the Remote Address Book.
|
If you select [Confidential Fax Inbox]:
Select the desired Confidential Fax Inbox → press [OK].
If you want to send a link to a Confidential Fax Inbox via e-mail, press [URL Send].
A message <Fax Inbox Incoming Notice> is inserted into the body of the e-mail message stating the link to the Confidential Fax Inbox.
|
IMPORTANT
|
|
You cannot store received documents in memory in the cases below. These numbers may vary depending on the remaining capacity of the hard disk.
When more than 2,000 documents or images are stored in all of the mail boxes.
When a total of approximately 20,000 pages of documents or images are stored in all of the mail boxes.
|
|
NOTE
|
|
If you select the Confidential Fax Inbox, you cannot use the following settings:
[File Name]
[Store/Print Received File]
[Forwarding Done Notice]
[File Format]
To send a link via e-mail to the Confidential Fax Inbox in which the document is stored, you must register an e-mail address in the Confidential Fax Inbox beforehand. For instructions on storing an e-mail address in the machine, see "Specifying the Fax/I-Fax Inbox Settings."
You cannot select multiple Confidential Fax Inboxes.
|
12.
Press [File Name].
If you selected a Confidential Fax Inbox as the forwarding destination, proceed to step 16.
13.
Enter a file name → press [OK].
The condition name is automatically entered as the document's name by default. However, you can change this name.
14.
Press the <Store/Print Received File> drop-down list → specify the settings.
Select [On] if you want to store or print received files.
|
NOTE
|
|
If you set both <Store/Print Received File> and the Memory Lock mode to 'On', the received file is stored in the Memory RX Inbox. If you set Memory Lock to 'Off', the received file is printed automatically. (See "Specifying the Fax/I-Fax Inbox Settings.")
|
15.
Press [Specify Fwd Time].
16.
Select the conditions.
|
IMPORTANT
|
|
You cannot set the same time for both the start time and end time.
|
If you select [Everyday]:
Enter the start time and end time using - (numeric keys) → press [OK].
- (numeric keys) → press [OK].The time is displayed in 24-hour notation. Enter the time as a four digit number including zeros.
|
NOTE
|
|
If the end time is set earlier than the start time, the received documents will stop being forwarded at the specified end time on the following day.
Examples: Start time: 22:00, end time: 21:00 →The end time is 21:00 on the following day.
|
If you select [Specify Period]:
Press [Add].
Press the <Start Time> drop-down list → select the day of the week to start forwarding.
Press  next to the Start Time drop-down list → enter the time at which to start forwarding using - (numeric keys).
next to the Start Time drop-down list → enter the time at which to start forwarding using - (numeric keys).The time is displayed in 24-hour notation. Enter the time as a four digit number including zeros.
If you press [All Day], the start and end times are automatically set to '00:00'. The day for the end time is automatically set to the day following the day for the start time.
Set the end time in the same way as the start time → press [OK] → [OK].
You can store up to seven different combinations of start and end times.
To change previously stored settings, select the setting that you want to change → press [Edit].
To delete previously stored settings, select the setting that you want to delete → press [Delete].
|
NOTE
|
|
If the end time is set earlier than the start time, and both the start time and the end time are set for the same day of the week, the received files will stop being forwarded at the specified end time on the specified day of the following week.
Examples: Start time: Monday 22:00, end time: Monday 21:00 →The end time is 21:00 on Monday of the following week.
|
If you select [Off]:
Press [OK].
17.
Press [Fwd Done Notice] → select the destination to send the forwarding done notice → press [OK].
If you selected a Confidential Fax Inbox as the forwarding destination, proceed to step 19.
If you want to select a destination that is stored with an access number, press [Access No.] → enter the access number. (See "Registering an E-Mail Address" and "Storing Fax Numbers.")
Use the Address List drop-down list to display each address book (Address Lists 1 to 10 and one-touch buttons). Address lists categorize the addresses stored in the Address Book.
|
NOTE
|
|
To cancel a selected destination, select the destination again.
To view the detailed information for a selected destination, select the destination → press [Details].
You cannot select multiple destinations at the same time.
Register destinations in the Address Book in advance. (See "Register Destinations.")
[Access No.] appears on the screen only if [Manage Address Book Access Numbers] is set to 'On' in [Set Destination] (Settings/Registration). (See "Managing the Address Book with Access Numbers.")
|
18.
Select whether to check [Notice Only for Errors].
If you want the forwarding done notice to be sent only when an error occurs, press [Notice Only for Errors].
If you want the forwarding done notice to be sent every time a received file is forwarded, do not press [Notice Only for Errors].
19.
Press file format → select the file format of the image you want to forward → press [OK].
This part of the procedure is not necessary if any of the following is true:
A fax number is specified as the forwarding destination
An I-fax address is specified as the forwarding destination
A Confidential Fax Inbox is specified as the forwarding destination
File formats:
If Receive Type is set to 'Fax', the file formats that you can select are as follows:
|
[TIFF]:
|
Sends the file in the TIFF format.
|
|
[PDF]:
|
Sends the file in the PDF format. You can also select [OCR (Text Searchable)], [Reader Extensions], or [Add Digital Signatures]. If you want to add a digital signature, you can select [Device Signature].
|
|
[XPS]:
|
Sends the file in the XPS format. You can also select [OCR (Text Searchable)] and/or [Add Device Signature].
|
Refer to the following for information on setting each type of PDF:
[OCR (Text Searchable)]: Searchable PDF/XPS/OOXML
[Add Digital Signatures]: Adding a Digital Signature to a PDF or XPS
[Reader Extensions]: Reader Extensions
If you want to separate multiple images and send them as a separate file per page, press [Divide into Pages]. The key lights. If you want to send multiple images as a single file without dividing them, do not press [Divide into Pages]. The key remains unlit.
|
NOTE
|
|
For more information on file formats, see "Glossary."
|
20.
Press [OK].
|
IMPORTANT
|
|
You cannot set multiple forwarding conditions that contain the same subaddress setting.
|
21.
Press the <E-Mail Priority> drop-down list → specify the settings.
This setting is necessary only if the forwarding destination is an e-mail address.
22.
Press [Close].