Cleaning the Machine
Clean the machine regularly to prevent deterioration in printing quality and to ensure safe and trouble-free operation. Carefully read the safety instructions before you start cleaning. Maintenance and Inspections
Where to Clean
 |
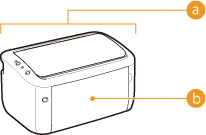
 Exterior of the machine and ventilation slots Exterior of the machine and ventilation slots Internal fixing unit Internal fixing unit |
Exterior
Regularly wipe the exterior of the machine to keep it in good condition. Wipe the ventilation slots regularly to keep it free of dust.
1
Turn OFF the machine, and unplug the power plug from the AC power outlet.
When you turn OFF the machine, data that is waiting to be printed is deleted.
2
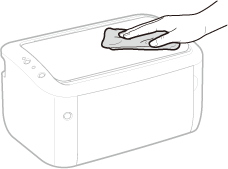
Wipe the exterior of the machine and the ventilation slots.
Use a soft, well-wrung-out cloth dampened with water or a mild detergent diluted with water.
For the location of the ventilation slots, see Back Side.

3
Wait for the exterior of the machine to dry completely.
4
Plug the power cord back into the AC power outlet.
Fixing Unit
Dirt may adhere to the fixing unit inside the machine and cause smudges and black streaks to appear on printouts. If this occurs, proceed as follows to clean the fixing unit. Note that you cannot clean the fixing when the machine has documents waiting to be printed. To clean the fixing unit, you need normal A4 size paper. Before starting, load A4 size paper in the multi-purpose tray. Loading Paper in the Multi-Purpose Tray
1
Select the machine by clicking  in the system tray.
 in the system tray.
2
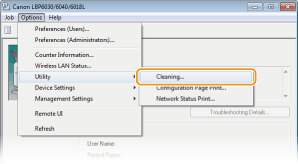
Select [Options]  [Utility]
  [Cleaning].
 [Utility]
  [Cleaning].
3
Click [OK].

 |
The paper is fed slowly into the machine, and cleaning starts. The cleaning is done when the paper is completely ejected.
Cleaning cannot be cancelled once it starts. Wait until it finishes (approx. 140 seconds).
|
 |
Cleaning from the Remote UIYou can also clean the fixing unit from the [Utility Menu] page of the Remote UI. Cleaning
|