Document Insertion Unit-N1
If the Add Cover, Insert Sheets, Job Separator, or Booklet mode is set, you can use the paper loaded in the document insertion unit as a cover or sheet insertion. If the Document Insertion Unit-N1 is attached to the Staple Finisher-W1 PRO/Booklet Finisher-W1 PRO, you can use paper different to the main document pages for a cover or sheet insertion.
Parts and Their Functions
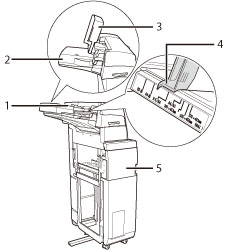
1. | Upper Tray You can load paper you want to use as a cover, sheet insertion, or job separator, etc. |
2. | Lower Tray You can load paper you want to use as a cover, sheet insertion, or job separator, etc. |
3. | Tray Cover Lift to load paper in the lower tray. |
4. | Slide Guides Adjust the slide guides to match the width of the original. |
5. | Front Cover Open this cover to remove jammed paper. (See "Document Insertion Unit-N1 (Optional).") |
Insertion Unit
Document Insertion
If the Add Cover, Insert Sheets, Job Separator, or Booklet mode is set, you can use the paper loaded in the Document Insertion Unit-N1 as a cover or sheet insertion. If the Document Insertion Unit-N1 is attached to the Staple Finisher-W1 PRO/Booklet Finisher-W1 PRO, you can use paper different to the main document pages for a cover or sheet insertion.
IMPORTANT |
Paper which has been rolled or curled must be straightened out before placing it into the Document Insertion Unit-N1. (See "Caution for Paper Curl.") Do not place the following types of paper into the Document Insertion Unit-N1. Doing so may cause a paper jam. Insertion sheets with tears Severely curled or wrinkled paper Clipped or stapled insertion sheets Transparencies or other highly transparent insertion sheets Labels Envelope Some types of paper cannot be used with the Document Insertion Unit-N1. For more information, contact your local authorized Canon dealer. |
NOTE |
For information on the available paper, see "Available Paper Stock." |
Document Insertion Unit Staple Settings and Output Results Table
How to Place the Cover Sheet/Original | Staple Settings/Output Result | ||
Document Insertion Unit-N1*1 | Feeder | Platen Glass | |
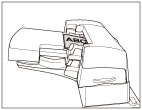 |  |  | Corner: Upper Left Double: Left  A4 |
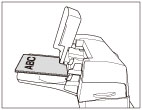 |  |  | Corner: Lower Left Double: Left  A3 |
 |  | Corner: Upper Right Double: Right  A3 | |
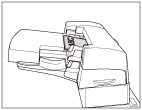 |  |  | Corner: Lower Left Double: Left  A4 |
 |  | Corner: Upper Right Double: Right  A4 | |
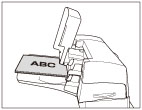 |  |  | Corner: Upper Left Double: Left  A3 |
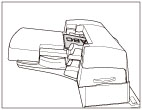 |  |  | Corner: Upper Right Double: Right  A4 |
 |  |  | Corner: Upper Left  A3 |
 |  | Corner: Lower Right  A3 | |
 |  |  | Corner: Upper Left  A4 |
 |  | Corner: Lower Right  A4 | |
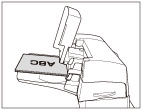 |  |  | Corner: Upper Right Double: Right  A3 |
 |  |  | Saddle Stitch  |
*1 Paper can be loaded into both the upper and lower trays. Load the paper facing the same side for both the upper and lower trays.
NOTE |
For instructions on loading paper into the Document Insertion Unit-N1, see "Loading Paper into the Document Insertion Unit-N1 (Optional)." |