Configuring Printing Protocols and WSD Functions
Configure the protocols that are used for printing documents from a networked computer. The protocols supported by the machine include LPD, RAW, IPP/IPPS, WSD (Web Services on Devices), and FTP. This section describes the settings of LPD, RAW, IPP/IPPS, and WSD. To use FTP, see Using FTP Clients.
1
Start the Remote UI and log on in Management Mode. Starting Remote UI
2
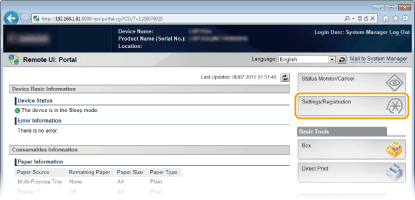
Click [Settings/Registration].
3
Click [Network]  [TCP/IP Settings].
 [TCP/IP Settings].
4
Configure printing protocols.
 Configuring LPD settings
|
1
|
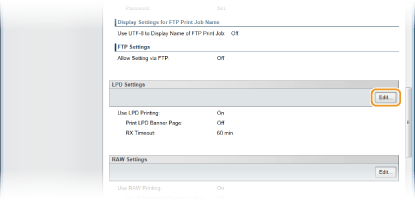
Click [Edit] in [LPD Settings].
 |
|
2
|
Configure the settings as necessary.
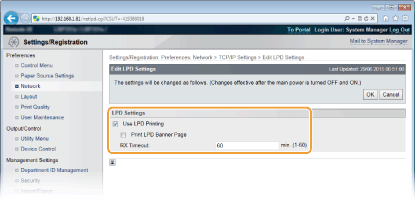 [Use LPD Printing]
When using LPD for printing, select the check box. When not using, clear the check box.
[Print LPD Banner Page]
Select the check box to include the information such as user names and file names on printouts. When not printing the information, clear the check box.
[RX Timeout]
Set the time period after which the print job automatically ends when print data cannot be received due to a communication error or some other problem.
|
|
3
|
Click [OK].
|
 Configuring RAW settings
|
1
|
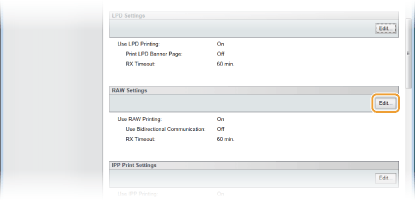
Click [Edit] in [RAW Settings].
 |
|
2
|
Configure the settings as necessary.
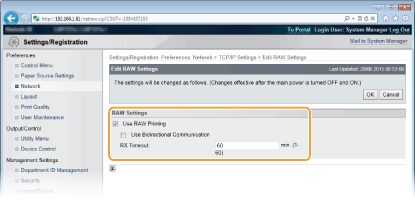 [Use RAW Printing]
When using RAW for printing, select the check box. When not using, clear the check box.
[Use Bidirectional Communication]
When using bidirectional communication to notify the computer of machine status and print completion, select the check box. When not using, clear the check box.
[RX Timeout]
Set the time period after which the print job automatically ends when print data cannot be received due to a communication error or some other problem.
|
|
3
|
Click [OK].
|
 Configuring IPP/IPPS settings
|
1
|
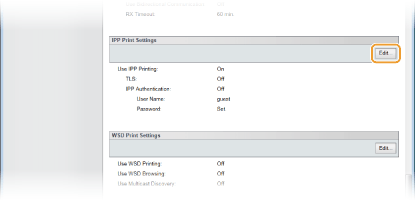
Click [Edit] in [IPP Print Settings].
 |
|
2
|
Configure the settings as necessary.
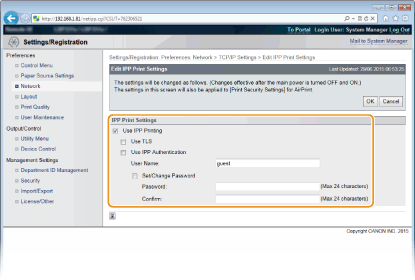 [Use IPP Printing]
When using IPP/IPPS for printing, select the check box. When not using, clear the check box.
[Use TLS]
When using IPPS (IPP Print with TLS encrypted communication), select the check box. When not using, clear the check box.
 When using IPPS, enable the TLS encrypted communication function. Using TLS for Encrypted Communications
[Use IPP Authentication] When using the user authentication function for IPP Print, select the check box and set the user name and password. When not using, clear the check box.
[User Name]
Enter up to 24 alphanumeric characters for the user name used in IPP authentication.
[Set/Change Password]
To set or change the password, select the check box and enter up to 24 alphanumeric characters for the password in the [Password] text box. For confirmation, enter the same password in the [Confirm] text box.
|
|
3
|
Click [OK].
|
 Configuring WSD settings
|
1
|
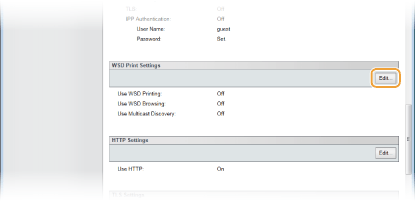
Click [Edit] in [WSD Print Settings].
 |
|
2
|
Configure the settings as necessary.
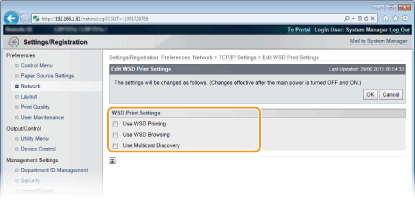 [Use WSD Printing]
When using WSD for printing, select the check box. When not using, clear the check box.
[Use WSD Browsing]
Select the check box to obtain information about the machine from a computer via WSD. This check box is automatically selected when the [Use WSD Printing] check box is selected.
[Use Multicast Discovery]
Select the check box to set the machine to reply to multicast discovery messages. If the check box is cleared, the machine stays in sleep mode even when multicast discovery messages are flowing on the network.
|
|
3
|
Click [OK].
|
5
Perform a hard reset.
Click [Device Control], select [Hard Reset], and then click [Execute].
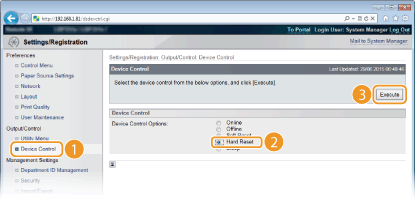
The settings are enabled after the hard reset is performed.
 |
Using the operation panelYou can also enable or disable LPD print, RAW print, and IPP print from the setting menu of the operation panel.
WSD settings can also be accessed from the setting menu of the operation panel. WSD
|
|
Setup procedures on your computer
|
|
After the setting in the machine is completed, you may need to configure settings or install applications on your computer as well. Configure settings in your computer as necessary.
Configuring printer ports
Printing errors can occur when the IP address of the machine has been changed, or when a printer has been added via the Windows printer folder. These errors are typically caused by incorrect printer port settings. For example, an incorrect port number or port type may have been specified in the computer. To fix this type of problem, configure the printer port settings by following the procedure for changing the standard TCP/IP port described in the "Printer Driver Installation Guide". Setting up WSD network devices on Windows Vista/7/8/10
Install the printer driver by following the procedure for installation with the WSD port described in the "Printer Driver Installation Guide". |