Restricting USB Functions
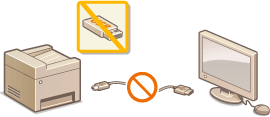
USB is a convenient way of connecting peripheral devices and storing or relocating data, but USB can also be a source of information leakage if it is not properly managed. Be especially careful when handling USB memory devices. This section describes how to restrict connection via the USB port of the machine and how to prohibit use of USB memory devices.

Restricting the USB Connection with a Computer
You can disable the computer connection USB port located on the back side of the machine. If this port is disabled, the machine cannot communicate with a computer via USB. This setting does not affect the front USB port, which is for attaching USB memory devices.
1
Tap <Menu> in the Home screen.
2
Tap <System Management Settings>.
If the logon screen appears, enter the correct ID and PIN using the numeric keys, and then press  . Logging on to the Machine
 . Logging on to the Machine
3
Tap <Use as USB Device>.
4
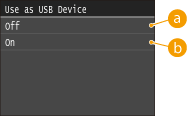
Tap <Off>.

 <Off>
<Off>You cannot connect the machine and a computer via USB port.
 <On>
<On>You can connect the machine and a computer via USB port.
5
Restart the machine.
Turn OFF the machine, wait for at least 10 seconds, and turn it back ON.
Restricting the Scan to USB Function
You can disable storing scanned document data into a USB memory device.
1
Tap <Menu> in the Home screen.
2
Tap <System Management Settings>.
If the logon screen appears, enter the correct ID and PIN using the numeric keys, and then press  . Logging on to the Machine
 . Logging on to the Machine
3
Tap <Store to USB Memory>.
4
Tap <Off>.

 <Off>
<Off>Prohibits data from being stored into a USB memory device. Scanned data cannot be stored into the USB memory device.
 <On>
<On>Permits data being stored into a USB memory device.
5
Restart the machine.
Turn OFF the machine, wait for at least 10 seconds, and turn it back ON.
Restricting the Memory Media Print Function
You can disable printing data from a USB memory device. The data in the USB memory device cannot be printed.
1
Tap <Menu> in the Home screen.
2
Tap <System Management Settings>.
If the logon screen appears, enter the correct ID and PIN using the numeric keys, and then press  . Logging on to the Machine
 . Logging on to the Machine
3
Tap <Memory Media Print On/Off>.
4
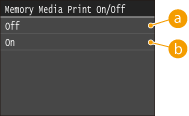
Tap <Off>.

 <Off>
<Off>Disables the function to read the data from a USB memory device. The data in the USB memory device cannot be printed.
 <On>
<On>Enables the function to print the data stored in a USB memory device.
5
Restart the machine.
Turn OFF the machine, wait for at least 10 seconds, and turn it back ON.