[Start]
 select [Control Panel]
  [Printer].
 select [Control Panel]
  [Printer].
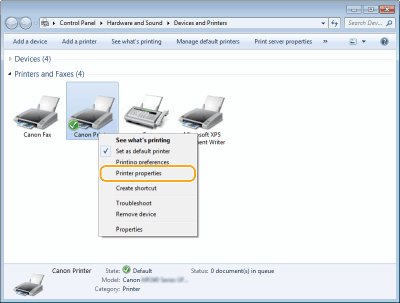
 select [Devices and Printers].
 select [Control Panel]
  [View devices and printers].
 select [Control Panel]
  [View devices and printers].
 ]
]  select [Control Panel]
  [Hardware and Sound]
  [Devices and printers].
 select [Printers and Faxes].
 select [Control Panel]
  double-click [Printers].
 ]
]  select [Control Panel]
  [Hardware]
  [Devices and printers].
 select [Control Panel]
  [View network status and tasks]
  select [Turn on network discovery] under [Network discovery].
 select [Control Panel]
  [View network status and tasks]
  [Change advanced sharing settings]
  select [Turn on network discovery] under [Network discovery].
 select [Control Panel]
  [View network status and tasks]
  [Change advanced sharing settings]
  select [Turn on network discovery] under [Network discovery].
 select [Control Panel]
  [View network status and tasks]
  [Change advanced sharing settings]
  select [Turn on network discovery] under [Network discovery].
 ]
]  select [Control Panel]
  [View network status and tasks]
  [Change advanced sharing settings]
  select [Turn on network discovery] under [Network discovery].
 select [Control Panel]
  double-click [Network and Sharing Center]
  select [Turn on network discovery] under [Network discovery].
 ]
]  select [Control Panel]
  [View network status and tasks]
  [Change advanced sharing settings]
  select [Turn on network discovery] under [Network discovery].
 select [All Programs] or [Programs]
  [Accessories]
  [Windows Explorer].
 select [File Explorer].
 select [File Explorer].
 ]
]  select [File Explorer].

 enter "D:\MInst.exe" in [Search programs and files] or [Start Search]
  press the [ENTER] key.
 [Run]
[Run]  enter "D:\MInst.exe"
  click [OK]
 [Run]
[Run]  enter "D:\MInst.exe"
  click [OK]
 click [D:\MInst.exe] displayed as the search result.
 [Run]
[Run]  enter "D:\MInst.exe"
  click [OK]
 ]
]  enter "D:\MInst.exe"
  click [D:\MInst.exe] displayed as the search result.

 select [Control Panel].
 select [Control Panel].
 select [Control Panel].
 [System].
 ]
]  select [Settings]
  [System]
  [About].
1 | Display [Control Panel]. Windows Vista/7/Server 2008 [Start]  select [Control Panel]. select [Control Panel].Windows 8/Server 2012 Right-click the lower-left corner of the screen  select [Control Panel]. select [Control Panel].Windows 8.1/Server 2012 R2 Right-click [Start]  select [Control Panel]. select [Control Panel].Windows 10 Click [  ] ]  select [Windows System] select [Windows System]  [Control Panel]. [Control Panel].Windows Server 2016 Right-click [  ] ]  select [Control Panel]. select [Control Panel]. |
2 | Display [System]. Windows Vista/7/8/10/Server 2008 R2/Server 2012/Server 2016 Click [System and Maintenance] or [System and Security]  [System]. [System].Windows Server 2008 Double-click [System]. |
3 | Check the computer name.  |
1 | [Start]  select [Control Panel] select [Control Panel]  [System]. [System]. |
2 | Click [Change] in [Computer Name] tab. |
3 | Check the computer name. |


 |
If you are using a network connection and have changed the machine's IP addressIf [Description] for the selected port is [Canon MFNP Port], and the machine and the computer are on the same subnet, then the connection will be maintained. You do not need to add a new port. If it is [Standard TCP/IP Port], you need to add a new port. Configuring Printer Ports |


 ,
,  , or
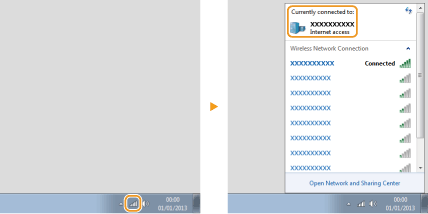
, or  in the system tray to display the SSID of the connected wireless LAN router.