Importing Using a Scanner
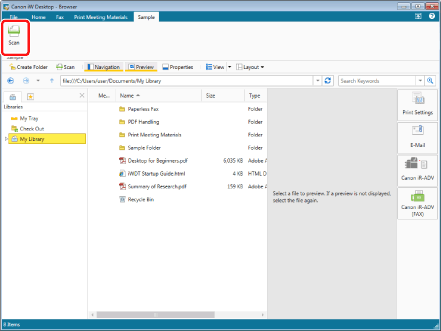
In the Desktop Browser screen, you can perform scanning of a paper document and import (register) the scanned document into a folder in a library.
When a paper document is scanned, the scanned data will be converted to the storage format specified in the [Scan Settings] dialog box, and then be registered as a scanned document in a folder currently opened in the Desktop Browser screen.
|
NOTE
|
|
You need to configure your scanner in advance.
When you select one of the following locations as the import destination, you cannot use scanners to import.
Recycle Bin
Checked out folders
|
1.
In the Navigation Window, select a library or folder to import scanned data.
2.
Click  (Scan) on the ribbon.
 (Scan) on the ribbon.
Or, follow one of the steps described below.
Click  for
for  (Scan) on the ribbon, and select [Scan]
 for
for  (Scan) on the ribbon, and select [Scan]
Click  for
for  (Scan) on the ribbon
 for
for  (Scan) on the ribbon
Select the [File] menu > [Scan] > [Scan]

The settings screen is displayed, based on the scanner you specified.
|
NOTE
|
|
The settings screen displayed here varies depending on the scanner you use.
If commands are not displayed on the ribbon of Desktop Browser, see the following to display them.
This operation can also be performed with the tool buttons on the toolbar. If tool buttons are not displayed on the toolbar of Desktop Browser, see the following to display them.
|
3.
Change the settings as required, and execute scanning.
Scanning is performed according to the settings in Desktop, and the scanned data is stored in the selected folder with the storage format specified in the [Scan Settings] dialog box.