Placing Documents
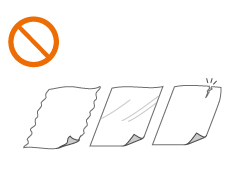
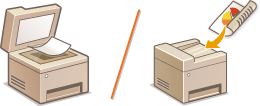
Place documents on the platen glass or in the feeder. Use the platen glass when scanning thick or bound documents such as books. You can load two or more sheets of documents in the feeder so that they can be scanned continuously. For information about the types of documents that can be placed on the platen glass or in the feeder, and information about the scannable area of a document, see Document Type or Scan Area.
|
IMPORTANT
|
||||
|
||||
|
NOTE
|
To scan documents more accuratelyDocuments placed in the feeder are scanned while being fed into the machine. On the other hand, documents placed on the platen glass remain in a fixed position while they are scanned. To ensure more accurate scanning results, placing documents on the platen glass is recommended.
To scan tracing paper or transparenciesTo scan transparent documents (for example, tracing paper or transparencies), place them on the platen glass.
|
Placing Documents on the Platen Glass
1
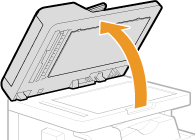
Open the feeder or the platen glass cover.
2
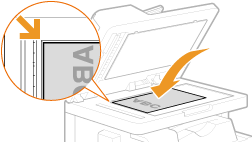
Place the document face down on the platen glass.
Align the corner of the document with the top-left corner of the platen glass.
NOTE:
To scan transparent documents (for example, tracing paper or transparencies), cover them with plain white paper.
3
Gently close the feeder or the platen glass cover.
The machine is ready to scan the document.
When scanning is complete, remove the document from the platen glass.
Placing Documents in the Feeder (imageRUNNER 1435iF / 1435i Only)
1
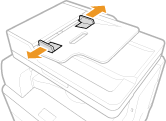
Spread the document guides apart.
Slide the document guides outward until they are slightly farther apart than the actual document width.
2
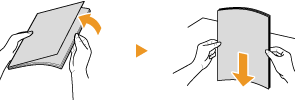
Fan the document stack and align the edges.
Fan the document stack in small batches, and align the edges by lightly tapping the stack on a flat surface a few times.
3
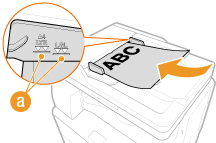
Place the document face up in the feeder.
Make sure that the document stack does not exceed the load limit lines ( ).
).
 ).
).
IMPORTANT:
Do not load documents of various sizes at the same time.
Up to 50 sheets can be loaded at a time. If 51 or more sheets are loaded, scanning may stop or a paper jam may occur.
4
Align the document guides against the edges of the document.
Slide the document guides inward until they are aligned securely against the edges of the document.
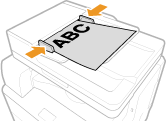
The machine is ready to scan the document.
IMPORTANT:
Align the document guides securely against the edges of the document
Align the document guides securely against the edges of the document
Document guides that are too loose or too tight can cause misfeeds or paper jam.
While documents are being scanned
Do not add or remove documents.
When scanning is complete
Remove the scanned documents from beneath the feeder to prevent paper jams.
