Registering Scanned File Destinations in the Address Book
This section describes how to register the e-mail and file server destination using the Remote UI. File server destinations can only be registered via Remote UI.
|
NOTE
|
|
You can change the settings only when you have logged on in System Manager Mode.
|
1
Start the Remote UI. Starting the Remote UI
2
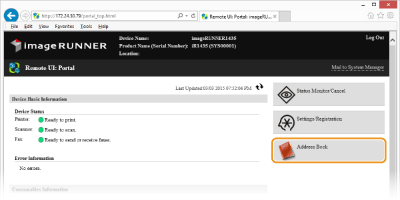
Click [Address Book].
NOTE:
If the enter PIN page is displayed
If the enter PIN page is displayed
The Address Book is protected by a PIN. Enter the PIN in [PIN:] and click [OK].
3
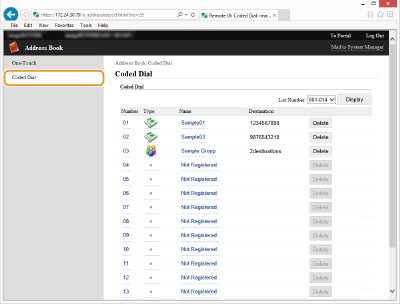
Click [Coded Dial].
You can also register destinations in the one-touch keys. In this case, click [One-Touch] instead of [Coded Dial]. Registering the Address Book (imageRUNNER 1435iF / 1435i Only)
4
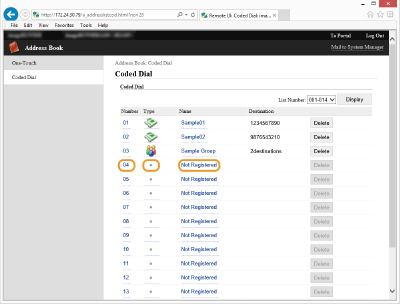
Click the text link under [Number], [Type], or [Name] for an item named "Not Registered."
NOTE:
You can edit a registered destination by clicking the corresponding text link under [Number], [Type], or [Name].
You can delete a registered destination by clicking [Delete].
5
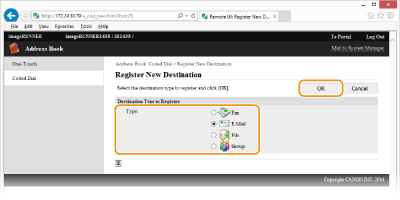
Select [E-Mail] or [File] in [Destination Type to Register] and click [OK].
6
Specify the required settings and click [OK].
 Registering an e-mail address
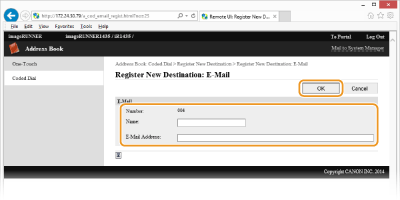
[Name]
Enter the name you want to register.
Enter the name you want to register.
[E-Mail Address:]
Enter the e-mail address of the destination.
Enter the e-mail address of the destination.
 Registering a file server address
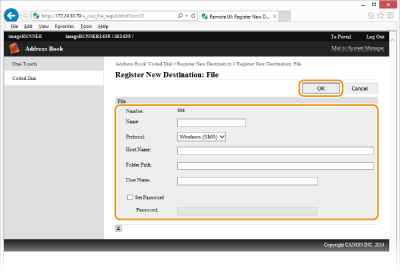
[Name]
Enter the name you want to register.
Enter the name you want to register.
[Protocol:]
Select [Windows (SMB)] or [FTP].
Select [Windows (SMB)] or [FTP].
[Host Name:]
Specify the host name or the IP address of the destination.
Specify the host name or the IP address of the destination.
[Folder Path:]
Enter the folder path of the file server.
Enter the folder path of the file server.
[User Name:] / [Password:]
If access restrictions are set to the folder, the user name and password is needed. If you need a password, select the check box and enter the password.
If access restrictions are set to the folder, the user name and password is needed. If you need a password, select the check box and enter the password.