Replacing the Drum Cartridge
The machine displays a message in the Printer Status Window when the amount remaining in the drum cartridge is low. Note that the print quality may suffer if you continue printing without resolving this issue. You can check the amount remaining in the drum cartridges in the Printer Status Window (Checking the Remaining Amount of Consumables).
When a Message Appear
The message that is displayed depends on the amount remaining in the drum cartridges. Depending on which message is displayed, prepare a new drum cartridge (Consumables) or replace the current drum cartridge with a new one (Procedure for Replacing the Drum Cartridge).
[The drum cartridge needs to be replaced soon.] 
This message notifies you that the drum cartridge needs to be replaced soon. Make sure that you have a replacement drum cartridge ready. Replace the drum cartridge if you see this message before you start to print a large job.

 When this message is displayed
When printing, you can continue printing the original.
When replacing the drum cartridge
Note that the toner cartridge supplied with the replacement drum cartridge has a short lifetime since its purpose is simply to activate the replacement drum cartridge. Therefore, it is recommended to purchase a new toner cartridge, and have it ready for replacement.
When replacing the drum cartridge, make sure to replace the toner cartridge as well, and avoid reusing the toner cartridge.
|
|
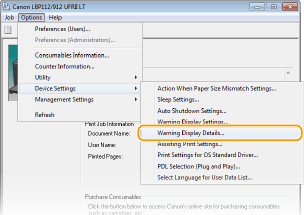
Specifying When This Message Is Displayed
|
||||||||||
|
You can set any value as the percentage of the amount remaining in the drum cartridge that triggers this message.

|
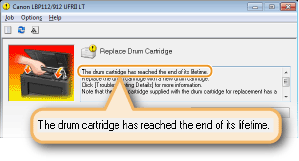
[The drum cartridge has reached the end of its lifetime.] 
This message notifies you that a drum cartridge has reached the end of its lifetime. Replace the drum cartridge with a new one.
 When replacing the drum cartridge
Note that the toner cartridge supplied with the replacement drum cartridge has a short lifetime since its purpose is simply to activate the replacement drum cartridge. Therefore, it is recommended to purchase a new toner cartridge, and have it ready for replacement.
When replacing the drum cartridge, make sure to replace the toner cartridge as well, and avoid reusing the toner cartridge.
|
When Printouts are Poor in Quality
If your printouts begin to show any of the following features, your drum cartridge is consumed. Replace the nearly empty drum cartridge even if no message is displayed. Procedure for Replacing the Drum Cartridge
|
Streaks Appear/Printing is Uneven
|
|
Partially faded
|
|
Uneven density
|
|
White Spots Appear
|
 |
 |
 |
 |
|
Toner smudges and splatters appear
|
|
Blank space of originals becomes grayish in printouts
|
|
Afterimages Appear in Blank Areas
|
 |
 |
 |
Procedure for Replacing the Drum Cartridge
1
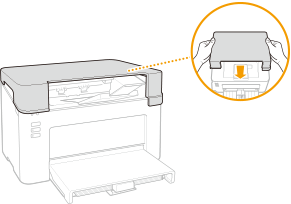
Remove the output cover.

2
Close the paper stopper, and then open the toner cover.

3
Remove the drum cartridge.
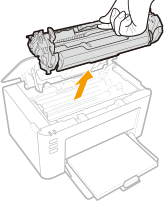

Do not shake or tilt the drum cartridge. Also, make sure to avoid applying shocks to the drum cartridge, such as by hitting it against something. Doing so may cause the toner left in the drum cartridge to leak. Remove the drum cartridge gently at the same angle as the slot.
4
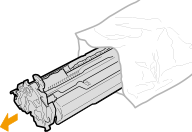
Remove the new drum cartridge from the protective bag.
5
Shake the drum cartridge 5 or 6 times as shown below to evenly distribute the toner inside the drum cartridge, and then place it on a flat surface.

6
Replace the drum cartridge.

7
Close the toner cover.
8
Replace the output cover.
 in the system tray.
 [Device Settings]