Placing Originals
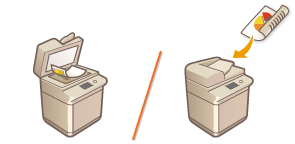
Place your originals on the platen glass or in the feeder. For originals such as books and thick/thin paper which cannot be loaded in the feeder, place the original on the platen glass. If you want to scan 2-sided originals or continue to scan several sheets of originals, place them in the feeder. For information on loadable sizes, etc., see Available Paper.
 | |||
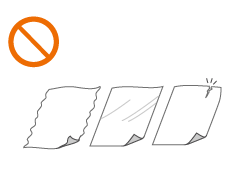
Use originals that are completely dryWhen placing originals, make sure that any glue, ink, or correction fluid on the originals has completely dried. To avoid paper jamsDo not place the following types of originals in the feeder as this may cause paper jams:
|
 |
To scan originals more accuratelyOriginals placed in the feeder are scanned while being fed into the machine. On the other hand, originals placed on the platen glass remain in a fixed position while they are scanned. To ensure more accurate scanning results, placing originals on the platen glass is recommended. To scan tracing paper or transparenciesTo scan transparent originals (for example, tracing paper or transparencies), place them on the platen glass and cover them with plain white paper. |
Placing Originals on the Platen Glass
1
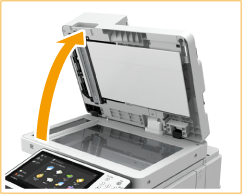
Open the feeder.
2
Place the original face down on the platen glass.
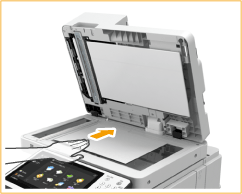
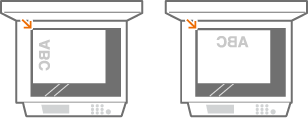
Align the corner of the original with the top-left corner of the platen glass, and place the original so that the top and the bottom are properly positioned, as shown in the following illustration.
3
Gently close the feeder.
The original is ready for scanning.
Before starting the scanning, specify the paper size and scanning size to match the size of the original.
When scanning is complete, remove the original from the platen glass.
 |
When closing the feeder, take care that your eyes are not exposed to light emitted through the platen glass. |
 |
If a thick original such as a book or magazine is placed on the platen glass, do not press down hard on the feeder. |
Placing Originals in the Feeder
 |
Do not place items in the original output tray, as doing so may cause damage to your originals. |
1
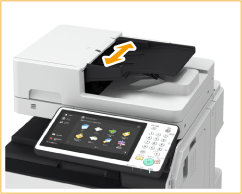
Spread the slide guides apart.
Move the slide guides outward until they are slightly farther apart than the actual width of the original.
2
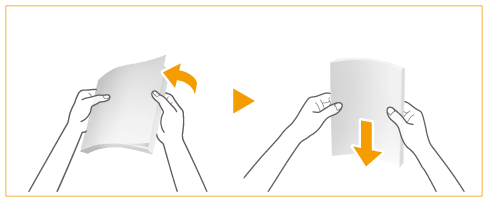
Fan the original stack and align the edges.
Fan the original stack in small batches, and align the edges by lightly tapping the stack on a flat surface a few times.
3
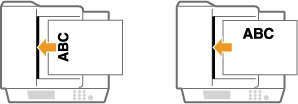
Place the originals face up and as far into the feeder as they will go.
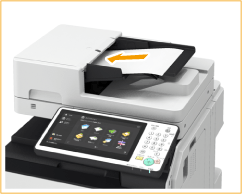
Place the original so that its top and bottom are properly positioned, as shown in the following illustration.
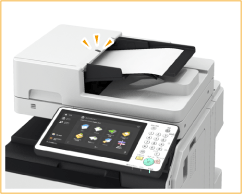
When insertion depth is sufficient, the Original Set Indicator lights up.

Make sure that the original stack does not exceed the load limit lines ( ). If you place originals that exceed the limit, they may not be scanned or may cause a paper jam.
 ). If you place originals that exceed the limit, they may not be scanned or may cause a paper jam.
Always smooth out any folds in your originals before placing them into the feeder.
Thin originals may become creased, if used in a high temperature or high humidity environment.
4
Align the slide guides against the edges of the original.
Move the slide guides inward until they are aligned securely against the edges of the original.
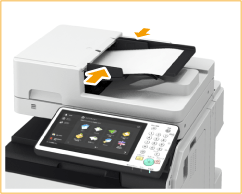
Originals are ready for scanning.
Before starting the scanning, specify the paper size and scanning size to match the size of the original.

Align the slide guides securely against the edges of the original
Slide guides that are too loose or too tight can cause misfeeds or paper jam.
While originals are being scanned
Do not add or remove originals.
When scanning is complete
Remove the scanned originals from the original output tray to prevent paper jams. To prevent originals from being left in the original output tray, the original output indicator lights while the originals are being output, and blinks for a while after all the originals have been output.
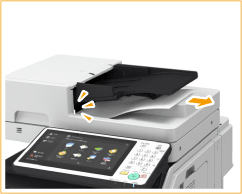
When scanning long strip originals
If you scan long originals (which have a length of up to 24 7/8" (630 mm)), support the originals by hand when scanning and outputting paper.
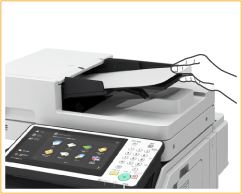
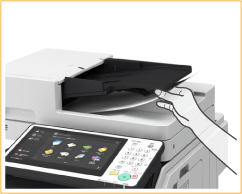
When placing thin paper originals
It may be difficult to place thin paper originals. In this case, lightly bend the paper while placing it.
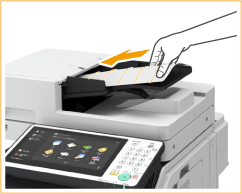
Make sure that you do not push too hard when placing the original. The original may not be fed correctly, or may cause a paper jam.
When repeatedly scanning the same original
It is recommended that you do not repeatedly scan the same original more than five times (this varies depending on paper quality). The original may fold or become wrinkled, or become difficult to send.
Color original scan range
When a color original is scanned with a setting made for automatic color discrimination, it may be identified as a black-and-white document if it contains color portions only in the gray areas as shown in the following figure.
1-sided originals | 2-sided originals | |||||
Front side | Back side | |||||
 Paper feed direction | 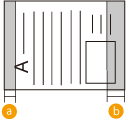 |  | 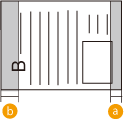 | |||
 :3/8" (10 mm)
 :5/8" (17 mm)
To scan originals as color document, set the machine to Full Color mode.
