Problems with Printing Results
The printed image is displaced or skewed.
 Are the paper guides misaligned?
Match the paper guides with the paper loaded in the paper source.
Images are uneven or faint.
 Is the paper damp?
Turn the Dehumidification switch on. If the problem is still not resolved, load paper that is not damp.
 Are the gradation and density set appropriately?
Perform gradation adjustment.
Black streaks appear.
 Is the document feed scanning area dirty?
Clean the document feed scanning area.
White streaks appear.
 The dust-proof glass may be dirty.
Clean the dust-proof glass.
 Is the document feed scanning area dirty?
Clean the document feed scanning area.
Bleedthrough occurs.
 Is the density of backgrounds set appropriately?
If bleed-through is observed with the print result, adjusting the density of background can improve the problem, giving a fine print.
Images are not printed on the intended side of the paper.
 Is the orientation of the loaded paper correct?
Check the orientation and side of the paper that is facing up. Load the paper again if it is incorrectly orientated.
Images are not printed in the intended size.
 Do the original size and size of the paper that is loaded match?
Replace the paper that is loaded with paper of the size you want to print on.
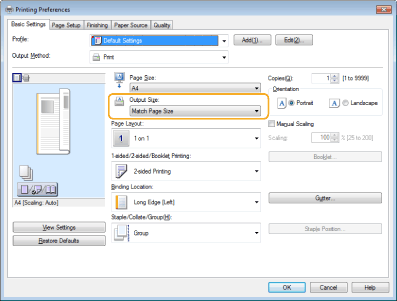
Match [Output Size] in the printer driver with the size of paper to print on.

The orientation does not match on both sides of the paper when using two-sided printing.
 Are the settings for two-sided printing correct?
Follow the procedure below to check the print settings.
1 | Select the orientation of the original on the print settings screen of the application. |
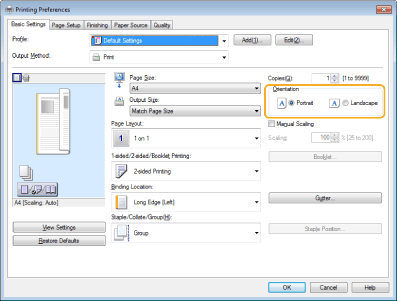
2 | On the [Basic Settings] screen of the driver, set [Orientation] to the same orientation you set in step 1.  |
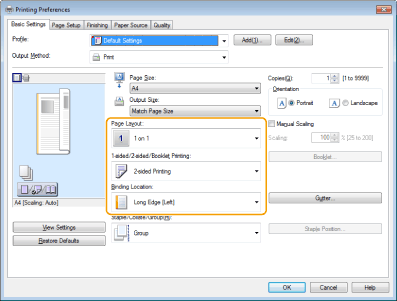
3 | While checking the print preview, set [Page Layout]  [Page Order] [Page Order]  [1-sided/2-sided/Booklet Printing] [1-sided/2-sided/Booklet Printing]  [Binding Location]. [Binding Location]. |
 |
[Page Order] is displayed when [Page Layout] is set to [2 on 1] or higher. |