Registering Multiple Destinations for Group Dial
Multiple destinations can be combined into groups. After a group is registered, you can add or delete destinations.
|
NOTE
|
|
Only destinations of the same type of address can be registered in the same group.
Shared folders cannot be registered in a group as destinations.
|
1
Press  and tap <Address Book>.
 and tap <Address Book>.
2
Tap <Regist Dest.>.
If a screen appears prompting you to enter a PIN, enter the correct PIN using the numeric keys, and tap <Apply>. Setting a PIN for Address Book
3
Tap <Coded Dial>.
Groups can also be registered in One-Touch Dial. Select <One-Touch> to register the group as a One-Touch Dial number.
4
Tap <Group>.
5
Tap <Name>.
Registering <Name> is optional. If you register <Name>, the destination can be searched alphabetically.
6
Enter the name using the numeric keys, and tap <Apply>.
7
Tap <Number of Destinations>.
8
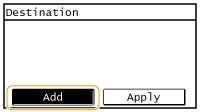
Tap <Add>.

9
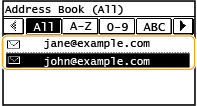
Use  /
/ to select the tab and tap a destination you want to register.
 /
/ to select the tab and tap a destination you want to register.
10
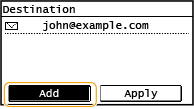
Tap <Add>.

11
Repeat steps 8 and 9 until you have registered all of the destinations that you want to register, and then tap <Apply>.
12
Tap <Apply>.

Editing the Content of Registered Groups
After registering destinations, you can change the content of groups such as names, destinations, and coded dial numbers.
1
Press  and tap <Address Book>.
 and tap <Address Book>.
2
Tap <Details/Edit>.
3
Select < > using
  /
/ , and tap the destination you want to change.
 > using
  /
/ , and tap the destination you want to change.
4
Tap <Edit>.
If a screen appears prompting you to enter a PIN, enter the correct PIN using the numeric keys, and tap <Apply>. Setting a PIN for Address Book
5
Select the item you want to edit, perform editing, and then tap <Apply>.
6
Tap <Apply>.

Deleting a Group
1
Press  and tap <Address Book>.
 and tap <Address Book>.
2
Tap <Details/Edit>.
3
Select < > using
  /
/ , and tap the group you want to delete.
 > using
  /
/ , and tap the group you want to delete.
4
Tap <Delete>.
If a screen appears prompting you to enter a PIN, enter the correct PIN using the numeric keys, and tap <Apply>. Setting a PIN for Address Book
5
Tap <Yes>.