Saving Data to a USB Memory Device
This section describes how to scan the original and save the scanned data to a USB memory device. For more information about the available USB memory devices and how to insert/remove the USB memory device, see Using a USB Memory Device.
 |
|
It is necessary to set <Use Scan Function> to <On>. <Memory Media Settings>
|
1
Place the original(s). Placing Originals
2
Select <Scan> in the Home screen. Home Screen
If the login screen appears, specify the user name, the password, and the authentication server. Logging in to Authorized Send
3
Select <USB Memory> in the Scan Basic Features screen. Scan Basic Features Screen
4
Specify the scanning settings as necessary.
Specifying the Scanning Size of the Original
Selecting a File Format
Specifying Orientation of Your Original
Scanning 2-Sided Originals
Specifying the Scanning Size of the Original
 |
|
You can specify the scanning size of your original.
|
<Scan Size>  Select the original size
 Select the original size
Back to Top
Selecting a File Format
 |
|
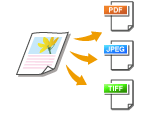
You can select the file format to which originals are scanned from PDF/JPEG/TIFF. For PDF, you can select Compact PDF that reduces the data size or the PDF format that enables a text search by including text data scanned with OCR (optical character recognition). You can also create a PDF file with enhanced security by encrypting data or adding the signature. Enhancing the Security of Electronic Files
|
<File Format>  Select a file format
 Select a file format
 |
|
If you select JPEG in <File Format> and try to scan an original from the platen glass, you can only scan one page. To scan a multiple-page original all at once, use the feeder. Each page of the original is saved as a separate file. If you select TIFF or PDF, you can scan multiple-page originals either from the platen glass or from the feeder. In this case, whether the original is to be saved as a single file or each page as a separate file can be specified in Dividing a PDF File by Page or Dividing a TIFF File by Page.
<PDF (Compact)> and <PDF (Compact/OCR)> compress photos and illustrations on originals more than <PDF> and <PDF (OCR)>. The file will be smaller, but the image quality of some originals or the number of originals that can be scanned at once may be lower.
In <PDF (Compact/OCR)> and <PDF (OCR)> you can configure the settings so that the machine automatically detects the original direction during scanning based on the direction of the text read by the OCR function. <OCR (Text Searchable) Settings>
|
Specify whether to convert the original with multiple pages into a single PDF file or create a separate PDF file for each page. This setting can be configured for each PDF format.
<File Format>  <Set PDF Details>
  Select the PDF format
  <Divide into Pages>
  Select <Off> or <On>
 <Set PDF Details>
  Select the PDF format
  <Divide into Pages>
  Select <Off> or <On>
Specify whether to convert the original with multiple pages into a single TIFF file or create a separate TIFF file for each page.
<File Format>  <Set TIFF Details>
  <Divide into Pages>
  Select <Off> or <On>
 <Set TIFF Details>
  <Divide into Pages>
  Select <Off> or <On>
Back to Top
Specifying Orientation of Your Original
 |
|
You can specify portrait or landscape orientation.
|
<Orig. Orientation>  Select the original orientation
 Select the original orientation
Back to Top
Scanning 2-Sided Originals
 |
|
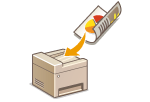
The machine can automatically scan the front and back sides of originals in the feeder.
|
 |
|
The machine cannot scan both sides of originals automatically when the originals are placed on the platen glass.
|
<2-Sided Original>  Select <Book Type> or <Calendar Type>
 Select <Book Type> or <Calendar Type>
<Book Type>
Select for originals whose images on the front and back sides face the same direction.
Select for originals whose images on the front and back sides face the same direction.
<Calendar Type>
Select for originals whose images on the front and back sides face in opposite directions.
Select for originals whose images on the front and back sides face in opposite directions.
Back to Top

For information about other scan settings, see Scanning Clearly or Adjusting Balance between File Size and Image Quality (Data Size).
5
Select <Start>.
Scanning of the original starts.
If you want to cancel, select <Cancel>  <Yes>. Canceling Sending Documents
 <Yes>. Canceling Sending Documents
 When placing originals in the feeder in step 1
When scanning is complete, the saving process starts.
 When placing originals on the platen glass in step 1
When scanning is complete, follow the procedure below (except if you selected JPEG as a file format).
|
1
|
If there are additional pages of originals to be scanned, place the next original on the platen glass, and select <Scan Next>.
Repeat this step until you finish scanning all of the pages.
When there is only one page to be scanned, proceed to the next step.
|
|
2
|
Select <Finish>.
The saving process starts.
|

A new folder is created on the USB memory device, and the scanned document is stored in that folder. The file name of a scanned document is automatically assigned based on the following format: the characters SCAN followed by a four-digit number.file extension name.
 |
|
If you always want to scan with the same settings: Changing the Default Settings for Functions
If you want to register a combination of settings to use when needed: Registering Frequently Used Settings
|