Watermark Printing
This mode enables you to print the selected watermark on outputs. You can also add user-defined text to the watermark.

IMPORTANT |
This mode can be used only for printing a file stored in a mail box. |
1.
Press  → [Access Stored Files] → [Mail Box].
→ [Access Stored Files] → [Mail Box]. 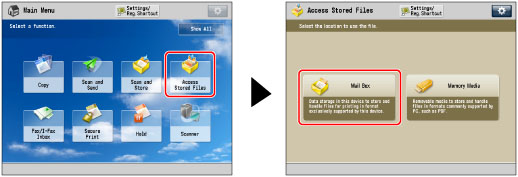
2.
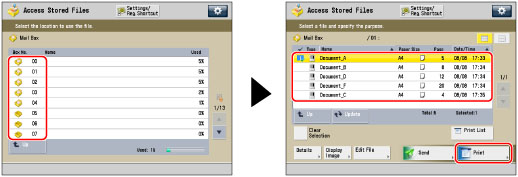
Select the desired Mail Box → select the desired file → press [Print].
3.
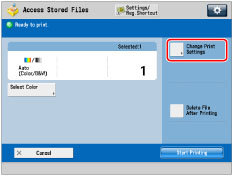
Press [Change Print Settings].
4.
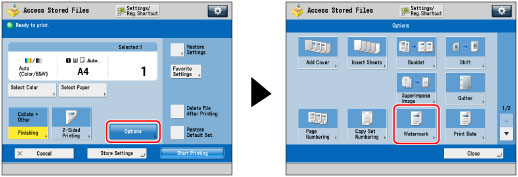
Press [Options] → [Watermark].
5.
Set the image orientation and print position.
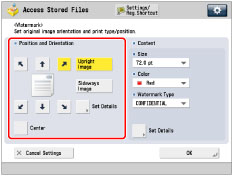
Orientation:
[Upright Image]: | Prints the image upright on the paper. |
[Sideways Image]: | Prints the image sideways on the paper. |
Upright Image | Sideways Image | ||
 |  |  |  |
If you select [Center] for the print position, the watermark is printed on the center of the paper.
NOTE |
If you set any two of [Page Numbering], [Copy Set Numbering], or [Print Date] to print in the same position, a confirmation message appears when you press  . . |
You can press [Set Details] to adjust the printing position.
To adjust the printing position, press [X] or [Y] → adjust the printing position with [-] or [+] → press [OK].
To set the printing position for the back side when performing two-sided printing, select [Opposite to Front Side] or [Same as Front Side] → press [OK].
6.
Specify the print settings for the watermark.
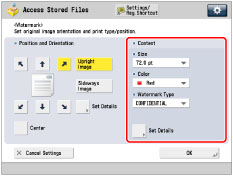
Press the <Size> drop-down list → select the size of the watermark.
Select the size of the watermark from [10.5 pt], [12.0 pt], [14.0 pt], [24.0 pt], [36.0 pt], [54.0 pt], and [72.0 pt].
Press the <Color> drop-down list → select the color of the watermark.
Press the <Watermark Type> drop-down list → select the type of watermark.
If you select [Custom], press [Enter] and enter the custom text → press [OK] → [OK].
IMPORTANT |
Text that you enter in [Custom] is not automatically saved. If you want to register text to be selected with watermarks whenever necessary, press [Register] → enter the text to be registered. |
NOTE |
You can also select text that has been registered in [Register Characters for Page No./Watermark]. (See "Registering/Editing/Deleting User-Defined Text for Page Numbers and Watermarks.") |
7.
To specify detailed watermark settings, press [Set Details].
If you do not want to specify other settings, proceed to step 8.
Setting the pages to print the watermark:
Press [Pages to Print].
Select the pages to print the watermark → press [OK] → [OK].
Setting the print type:
Press [Print Type].
Select the print type → press [OK] → [OK].
If you select [Transparent], press [Light] or [Dark] to adjust the halftone density.
8.
Press [OK] → [Close].
IMPORTANT |
Printing performance may not be optimal, depending on the file content and combination of settings. If you use [Watermark] with [Add Cover], [Insert Sheets], or [Job Separator], the watermark will not be printed on the inserted pages. |
NOTE |
The Watermark Printing mode cannot be used with files including images with resolutions of less than 600 x 600 dpi. |