Registering an Address Obtained via an LDAP Server
You can store an e-mail address obtained by searching the directory listings on the network using LDAP (Lightweight Directory Access Protocol) servers.
You can also register e-mail addresses you obtain as I-fax addresses.
NOTE |
You may have to set up the LDAP servers beforehand, depending on the network environment. For more information on setting the LDAP servers, see "Registering an LDAP Server." |
1.
Press  → [Scan and Send] → [Address Book].
→ [Scan and Send] → [Address Book].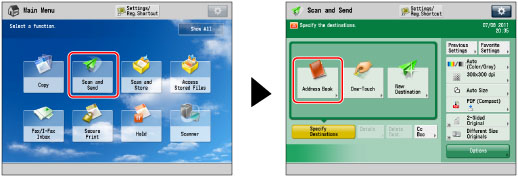
2.
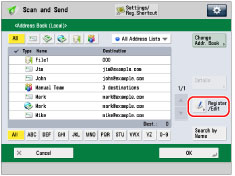
Press [Register/Edit].
3.
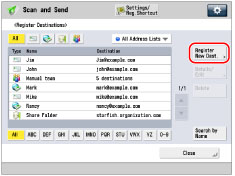
Press [Register New Dest.].
4.
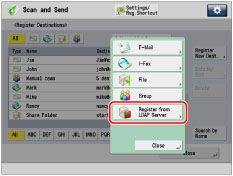
Select [Register from LDAP Server].
5.
Search for the desired destinations.
Perform the procedure in steps 4 to 9 of "Specifying Destinations Using the Address Book (LDAP Server)."
6.
Select the destination from the search results → press [Next].
You can select multiple destinations.
If you want to select the first 256 destinations, press [All (Max 256)].
If you press [Register E-Mail as I-Fax], the key lights to show that this setting is turned on, and the selected e-mail address can be registered as an I-fax destination. To register e-mail addresses as I-fax addresses, register one e-mail address at a time.
NOTE |
To cancel a selected destination, select the destination again. |
7.
Register the selected destinations.
IMPORTANT |
The information that can be obtained via the LDAP server is only names and e-mail address. |
If you select only one destination:
Check the destination → press [OK].
Edit the contents of the destination as necessary.
If you are managing Address Book access numbers, perform the procedure in step 11 of "Registering an E-Mail Address."
If you select multiple destinations:
Select the Address List in which to store the destinations → press [OK].
If you are managing Address Book access numbers, perform the procedure in step 11 of "Registering an E-Mail Address."
If you want to register the selected destination as an I-fax address:
Check the destination → press [OK].
Edit the contents of the destination as necessary.
If you are managing Address Book access numbers, perform the procedure in step 11 of "Registering an E-Mail Address."
8.
Press [Close] → [OK].