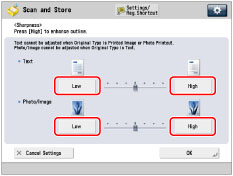
Adjusting the Image Sharpness
You can adjust the sharpness to scan text and lines with a sharper contrast. You can also reduce the sharpness for the half-tone dots of printed photos, etc. to scan with a softer image.
Low
If you scan an original containing halftones, such as a printed image, the moiré effect (a shimmering, wavy pattern) may occur. In this case, you can lessen this moiré effect by using [Low] as the setting.
Low Set | Low Not Set | |||
 |  |  |  |
High
This setting enhances the edges of original images so that faint or fine text is reproduced with a sharper contrast. This setting is particularly suited for scanning blueprints and faint pencil drawn images.
High Set | High Not Set | |||
 | |  |  |
As an example, the procedure for selecting a mail box as the storage location is explained in this section.
1.
Press  → [Scan and Store] → [Mail Box].
→ [Scan and Store] → [Mail Box].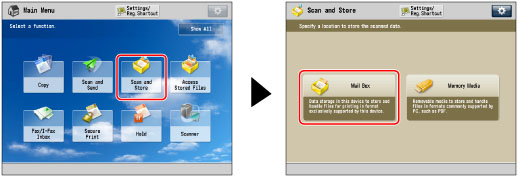
2.
Select the desired Mail Box → press [Scan].
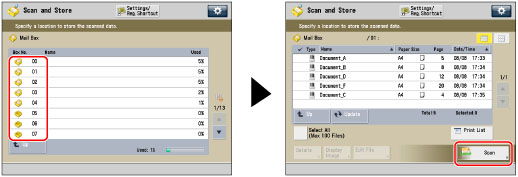
3.
Press [Options] → [Sharpness].
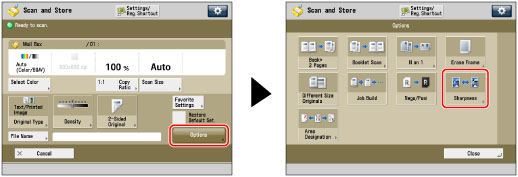
4.
Adjust the sharpness.
If the storage location is the Mail Box:
Press [Low] or [High] to adjust the sharpness for the Text and Photo/Image areas.
To scan text or lines clearly, the setting should be towards [High] for <Text>. To scan originals containing printed photographs or other halftones, the setting should be towards [Low] for <Photo/Image>.
If the storage location is the Memory Media:
Press [Low] or [High] to adjust the sharpness.
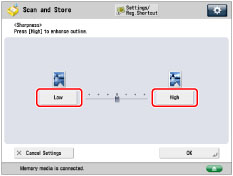
To scan text or lines clearly, the setting should be towards [High]. To scan originals containing printed photographs or other halftones, the setting should be towards [Low].
5.
Press [OK] → [Close].
IMPORTANT |
If you are using the memory media, the setting for [Sharpness] is invalid when all of the conditions below are met. The color mode is Black & White The original type is set to Text The resolution is set to 100 x 100 dpi, 150 x 150 dpi, or 200 x 100 dpi. To activate [Sharpness], change the settings. |