Specifying/Registering Scan Sizes
You can manually specify a scan size when scanning originals that cannot be detected using [Auto]. You can also register the specified scan size.
Specifying a Scan Size
1.
Press  → [Scan and Store] → [Memory Media].
→ [Scan and Store] → [Memory Media].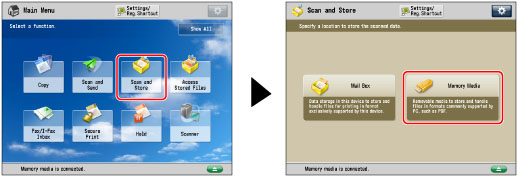
2.
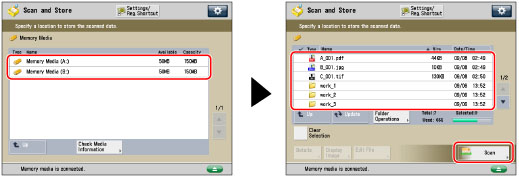
Select the desired memory media → select the destination directory → press [Scan].
3.
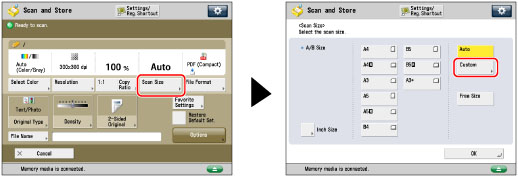
Press [Scan Size] → select a scan size.
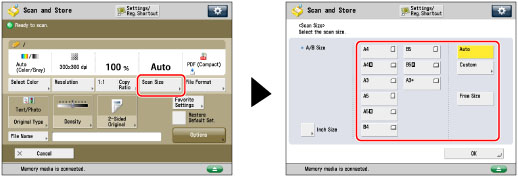
To specify a preset scan size:
Select the scan size you want to specify from the preset scan sizes.
To select a nonstandard scan size:
Press [Free Size].

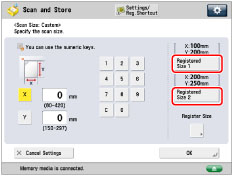
To specify a scan size by entering values:
Press [Custom].
Press [X] or [Y] → enter the scan size in mm.
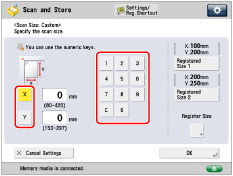
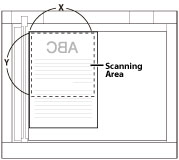
Platen Glass
To select a registered scan size:
Press [Custom] → select [Registered Size 1] or [Registered Size 2].
4.
Press [OK].
Registering a Scan Size
1.
Press → [Scan and Store] → [Memory Media].
→ [Scan and Store] → [Memory Media].2.
Select the desired memory media → select the destination directory → press [Scan].
3.
Press [Scan Size] → [Custom].
4.
Press [Register Size] → select [Registered Size 1] or [Registered Size 2].
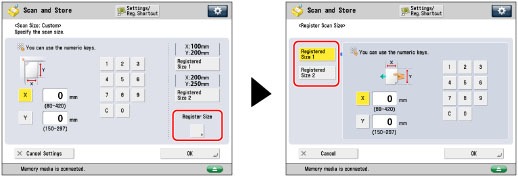
5.
Press [X] or [Y] → enter the scan size in mm.
6.
Press [OK] → [Cancel Settings] → [OK].
IMPORTANT |
You cannot select [Auto] when scanning the following types of originals. Select the desired scan size. Nonstandard size originals Highly transparent originals, such as transparencies Originals with an extremely dark background Originals smaller than A5 or A5R Place your original on the platen glass when [Custom] is set for the scan size. |