Divided Data RX Inbox
When the machine receives a large I-fax file that has been divided into several parts before being sent, the Divided Data RX Inbox stores the divided data. The data is then automatically combined into a single I-fax file. After the file is combined, it is printed, forwarded, or stored in the Memory RX Inbox in the same way as when a regular I-fax file is received.
Checking Divided Data in the Divided Data RX Inbox
You can check the status of divided data, and the remaining capacity of the Divided Data RX Inbox.
1.
Press  → [Fax/I-Fax Inbox] → [Memory RX Inbox].
→ [Fax/I-Fax Inbox] → [Memory RX Inbox].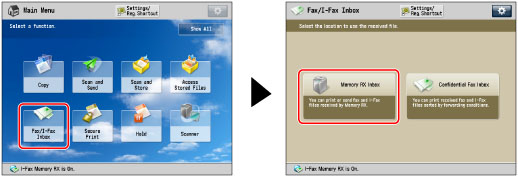
2.
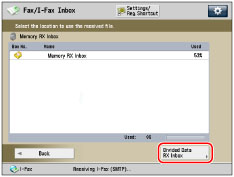
Press [Divided Data RX Inbox].
3.
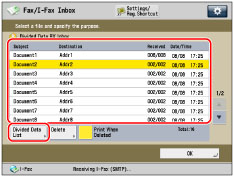
Select a file → press [Divided Data List].
4.
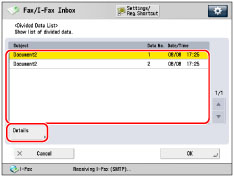
Select the divided data you want to check → press [Details].
Deleting Divided Data in the Divided Data RX Inbox
You delete divided data while it is being received by the machine. You can also set the machine to print a file that is being deleted.
1.
Press → [Fax/I-Fax Inbox] → [Memory RX Inbox].
→ [Fax/I-Fax Inbox] → [Memory RX Inbox].2.
Press [Divided Data RX Inbox].
3.
Select the data that you want to delete → press [Delete].
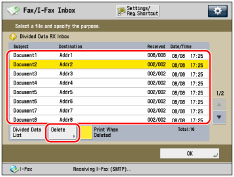
To delete the file without printing it, deselect [Print When Deleted].
If you force the machine to print a file that is being deleted, the machine combines only the data that has already been received to form the file. Data which can be combined to form complete pages is printed, and any remaining data is deleted without being printed.
IMPORTANT |
If you delete divided data, it cannot be combined to form a complete file even if the remaining divided data is received later. As the divided data is not valid image data, it will not print correctly. If divided data is deleted while you are setting forwarding settings or the Memory Lock mode for the data, all processes regarding the forced printing of the image are canceled. |
4.
Press [Yes].
NOTE |
If it takes longer than 24 hours to receive all the data for a divided I-fax, only the data received during that period is processed. You cannot receive any remaining data. For information on the timeout setting, see "Specifying the I-Fax Inbox Settings." If a message prompting you to enter the PIN appears, enter the number registered in [Memory RX Inbox PIN] in [Set Fax/I-Fax Inbox]. (See "Specifying the I-Fax Inbox Settings.") |