
<Adjust Image Quality>
All the settings related to image quality adjustment are listed with descriptions. Default settings are marked with a dagger ( ).
).
). |
Asterisks (*)Settings marked with an asterisk (*) may not be displayed depending on the model you are using, options, or other setting items. |
<Auto Adjust Gradation>
Adjust the gradation, density, and color in copies or printouts. Adjusting Gradation
<Full Adjust> <Quick Adjust> <Adjust Copy Image> |
<Auto Correction Settings>
Configure the settings to automatically perform a quick gradation adjustment or color mismatch correction.
<Auto Adjust Image Regularly>
Select when to make an automatic quick gradation adjustment. If <Off> is selected, quick adjustment is not made automatically. You can also perform this adjustment manually (Quick Adjust).
<Off> <When Turning Main Power ON> <After Printing First Job> |
<Menu>  <Adjustment/Maintenance> <Adjust Image Quality> <Auto Correction Settings> <Auto Adjust Image Regularly> Select <Off> or the adjustment timing
<Correct Print Color Mismatch>
Select the timing at which the Correct Print Color Mismatch function is to be performed automatically after the machine is turned ON. You can also perform this adjustment manually (Correcting "Print Color Mismatch").
<After Printing First Job> <When Turning Main Power ON> |
<Menu> <Adjustment/Maintenance> <Adjust Image Quality> <Auto Correction Settings> <Correct Print Color Mismatch> Select <After Printing First Job> or <When Turning Main Power ON>
<Correct Print Color Mismatch>
Use this function if color shift has blurred the image. Correcting "Print Color Mismatch"
<Black Text Processing for Color>
Select whether the color of black or blackish text in color documents should be reproduced as true black or as a color more or less close to that of the original. For each option, you can adjust the degree of effect. You can set values for the feeder and the platen glass separately. Adjusting Values for Text Color Reproducibility
<Feeder>* Seven Levels <Platen Glass> Seven Levels |
<Adjust Print Position>
Adjust the print position for each paper source. The print position can be adjusted in the range from -0.20" to +0.20" (-5.0 mm to +5.0 mm) in increments of 0.01" (0.1 mm). Adjusting Print Position
<Multi-Purpose Tray> <Adjust Vertically (Front Side)> -0.20" to 0.00" to + 0.20" (-5.0 to 0.0 to + 5.0 (mm))<Adjust Horizontally (Front Side)> -0.20" to 0.00" to + 0.20" (-5.0 to 0.0 to + 5.0 (mm))<Adjust Vertically (Back Side)>* -0.20" to 0.00" to + 0.20" (-5.0 to 0.0 to + 5.0 (mm))<Adjust Horizontally (Back Side)>* -0.20" to 0.00" to + 0.20" (-5.0 to 0.0 to + 5.0 (mm))<Drawer 1> <Adjust Vertically (Front Side)> -0.20" to 0.00" to + 0.20" (-5.0 to 0.0 to + 5.0 (mm))<Adjust Horizontally (Front Side)> -0.20" to 0.00" to + 0.20" (-5.0 to 0.0 to + 5.0 (mm))<Adjust Vertically (Back Side)>* -0.20" to 0.00" to + 0.20" (-5.0 to 0.0 to + 5.0 (mm))<Adjust Horizontally (Back Side)>* -0.20" to 0.00" to + 0.20" (-5.0 to 0.0 to + 5.0 (mm))<Drawer 2>* <Adjust Vertically (Front Side)> -0.20" to 0.00" to + 0.20" (-5.0 to 0.0 to + 5.0 (mm))<Adjust Horizontally (Front Side)> -0.20" to 0.00" to + 0.20" (-5.0 to 0.0 to + 5.0 (mm))<Adjust Vertically (Back Side)> -0.20" to 0.00" to + 0.20" (-5.0 to 0.0 to + 5.0 (mm))<Adjust Horizontally (Back Side)> -0.20" to 0.00" to + 0.20" (-5.0 to 0.0 to + 5.0 (mm)) |
<Special Processing>
If the print results on special types of paper are not satisfactory, the following settings may improve the quality of the printouts.
<Special Paper Processing>
When printing on the back side of printed paper, rough paper, or envelopes, the print results may be improved by adjusting the following settings.
<Manual Back Side Print (2-Sided Only)>
If printouts on the back side of printed paper are too light, select <On>. You can specify this setting separately for each paper source.
<Multi-Purpose Tray> <Off> <On> <Drawer 1> <Off> <On> <Drawer 2>* <Off> <On> |
<Menu> <Adjustment/Maintenance> <Adjust Image Quality> <Special Processing> <Special Paper Processing> <Manual Back Side Print (2-Sided Only)> Select <On> in the paper source to be set <Apply> <Yes>

If you set to <On>, image quality may be affected or a paper jam may occur when a certain length of time elapses after printing on the front side or depending on the ambient humidity.
<Rough Surface Paper Mode>
When printing on rough paper, especially when color images are printed too light, select <On>. You can specify the settings separately for each paper source.
<Multi-Purpose Tray> <Off> <On> <Drawer 1> <Off> <On> <Drawer 2>* <Off> <On> |
<Menu> <Adjustment/Maintenance> <Adjust Image Quality> <Special Processing> <Special Paper Processing> <Rough Surface Paper Mode> Select <On> in the paper source to be set <Apply> <Yes>
If you set to <On>, the printing speed may be slower or image quality may be affected.
<Env. Flap Closing Prevention>
If envelope flaps cling to the envelope bodies when printing, select <On>.
<Off> <On> |
<Menu> <Adjustment/Maintenance> <Adjust Image Quality> <Special Processing> <Special Paper Processing> <Env. Flap Closing Prevention> <On> <Yes>
If you set to <On>, toner may not be fixed sufficiently, resulting in faded printouts.
<Paper Wrinkle Correction>
Printouts may wrinkle depending on the paper to use. In this case, setting this item may solve the problem. The improvement effect is stronger with <Mode 2> than with <Mode 1>.
<Off> <Mode 1> <Mode 2> |
<Menu> <Adjustment/Maintenance> <Adjust Image Quality> <Special Processing> <Special Paper Processing> <Paper Wrinkle Correction> Select the mode <Yes>
For MF746Cdw / MF745Cdw / MF743Cdw / MF741Cdw
This setting is effective for plain paper and thin paper.
Setting a greater improvement effect may result in faded printouts or slower printing speed.
For MF644Cdw / MF642Cdw / MF641Cw
<Mode 1> is effective for envelopes, and <Mode 2>, for envelopes and thin paper.
When <Mode 1> or <Mode 2> is specified, printed images may be blurry.
<Paper Curl Correction>
If the printed paper curls, set this item. The improvement effect is stronger with <Mode 2> than with <Mode 1>. First try with <Mode 1>.
<Off> <Mode 1> <Mode 2> |
<Menu> <Adjustment/Maintenance> <Adjust Image Quality> <Special Processing> <Special Paper Processing> <Paper Curl Correction> Select the mode <Yes>
Setting a greater improvement effect may result in faded printouts or slower printing speed.
<Reduce Ppr. Sticking at Output> *
When performing 2-sided printing in color, paper may stick together at the output. Setting this item will slow down the printing speed of prints that may easily stick together, to reduce sticking.
MF746Cdw / MF745Cdw / MF743Cdw / MF741Cdw
<Off> <On> |
MF644Cdw / MF642Cdw
<Off> <Mode 1> <Mode 2> |
<Menu> <Adjustment/Maintenance> <Adjust Image Quality> <Special Processing> <Reduce Ppr. Sticking at Output> Select the item <Yes>
 |
For MF644Cdw / MF642CdwThe improvement effect is stronger with <Mode 2> than with <Mode 1>. |
<High Humidity Mode>
Print density may be uneven when the machine is used in an environment with high humidity. In this case, setting this item to <On> may solve the problem.
<Off> <On> |
<Menu> <Adjustment/Maintenance> <Adjust Image Quality> <Special Processing> <High Humidity Mode> <On> <Yes>
|
If you set to <On> and use the machine in an environment with low humidity, printed images and text may be blurry. |
<Low Humidity Mode>
When using the machine in an environment with low humidity, printed images and text may be blurry. In this case, setting this item to <On> may solve the problem.
<Off> <On> |
<Menu> <Adjustment/Maintenance> <Adjust Image Quality> <Special Processing> <Low Humidity Mode> <On> <Yes>
|
If you set to <On>, print density may be lower or uneven when the machine is used in an environment with high humidity. |
<Reduce Ghosting 1> *
If the printout reveals a ghost of an image in the same page, setting this item to <On> may solve the problem.
<Off> <On> |
<Menu> <Adjustment/Maintenance> <Adjust Image Quality> <Special Processing> <Reduce Ghosting 1> <On> <Yes>
|
If you set to <On>, toner may not be fixed sufficiently, resulting in faded printouts. |
<Reduce Ghosting 2>
If continuous printing involves generation of ghost images, setting this item to <On> may solve the problem.
<Off> <On> |
<Menu> <Adjustment/Maintenance> <Adjust Image Quality> <Special Processing> <Reduce Ghosting 2> <On> <Yes>
|
If you set to <On>, print density may be uneven. |
<Regularly Clean Fix. Assembly> *
If the fixing assembly is dirty, edges of the paper may get smudged. In this case, changing the setting of this item may solve the problem. The higher level you specify, the higher frequency of regular cleaning is performed.
<Auto> <Level 1> <Level 2> <Level 3> |
<Menu> <Adjustment/Maintenance> <Adjust Image Quality> <Special Processing> <Regularly Clean Fix. Assembly> Select the level <Yes>
|
If a higher level is specified, the printing speed will be slower. |
<Auto Clean Fixing Assembly> *
If the fixing assembly is dirty, edges or the back side of the paper may get smudged. You can configure to perform automatic cleaning of the fixing assembly to prevent smudges. When <On> is specified, a sheet of paper is output each time cleaning is performed. Configure so that paper feed is performed from the paper source in which paper usable for cleaning is loaded.
<Off> <On> <Multi-Purpose Tray> <Off> <On> <Drawer 1> <Off> <On> <Drawer 2>* <Off> <On> |
<Menu> <Adjustment/Maintenance> <Adjust Image Quality> <Special Processing> <Auto Clean Fixing Assembly> <On> <Yes> Set available paper sources to <On> <Apply>
|
You can use the following paper for cleaning. Paper sizes: A4/Letter Paper types: Plain 1 to 3/Recycled 1 or 2 |
<Rdc. Condens. (1-Sd->2-Sd Prt)> *
When performing 2-sided printing after 1-sided printing, the printed images may be faint due to moisture condensation. In this case, setting to <On> may solve the problem.
<Off> <On> |
<Menu> <Adjustment/Maintenance> <Adjust Image Quality> <Special Processing> <Rdc. Condens. (1-Sd->2-Sd Prt)> <On> <Yes>
|
If you set to <On>, the printing speed may be slower. |
<Rdc Condens. (Consec 2-Sd Prt)> *
If the printed images are faint due to moisture condensation when performing 2-sided printing, setting to other than <Off> may solve the problem.
MF746Cdw / MF745Cdw / MF743Cdw / MF741Cdw
<Off> <Mode 1> <Mode 2> |
MF644Cdw / MF642Cdw
<Off> <On> |
<Menu> <Adjustment/Maintenance> <Adjust Image Quality> <Special Processing> <Rdc Condens. (Consec 2-Sd Prt)> Select the item <Yes>
|
For MF746Cdw / MF745Cdw / MF743Cdw / MF741Cdw, the improvement effect is stronger with <Mode 2> than <Mode 1>. If you set to other than <Off>, the print may be faded or the printing speed may be slower. |
<Correct Uneven Gloss> *
When gloss unevenness occurs in the leading edge of paper, setting to <On> may solve the problem.
<Off> <On> |
<Menu> <Adjustment/Maintenance> <Adjust Image Quality> <Special Processing> <Correct Uneven Gloss> <On> <Yes>
|
If you set to <On>, toner may not be fixed sufficiently, resulting in faded printouts. |
<Corr. Void on Paper Back Side> *
When performing 2-sided printing on thin paper, void may occur on the back side of paper in the leading edge. In this case, setting this item to <On> may solve the problem.
<Off> <On> |
<Menu> <Adjustment/Maintenance> <Adjust Image Quality> <Special Processing> <Corr. Void on Paper Back Side> <On> <Yes>
|
If you set to <On>, print quality may be affected. |
<Correct Void> *
If printing on thin paper produces void in the leading edge of the paper, setting this item to <On> may solve the problem.
<Off> <On> |
<Menu> <Adjustment/Maintenance> <Adjust Image Quality> <Special Processing> <Correct Void> <On> <Yes>
|
If you set to <On>, printouts may be faded. |
<Reduce Formation of Waterdrop Pttrn.>
If print density is uneven in a way that the print looks like a water drops pattern, setting this item to <On> may solve the problem.
<Off> <On> |
<Menu> <Adjustment/Maintenance> <Adjust Image Quality> <Special Processing> <Reduce Waterdrop Pattern> <On> <Yes>
|
If you set to <On>, print quality may be affected. |
<Corr. Img. Corrup. by Ppr. Dust> *
Using paper containing much paper dust may result in a faded or streaky printout. In this case, setting this item to <On> may solve the problem.
<Off> <On> |
<Menu> <Adjustment/Maintenance> <Adjust Image Quality> <Special Processing> <Corr. Img. Corrup. by Ppr. Dust> <On> <Yes>
|
If you set to <On>, the printing speed may be slower. |
<Prevent Fogging>
If white areas are lightly colored, setting this item to <On> may solve the problem.
<Off> <On> |
<Menu> <Adjustment/Maintenance> <Adjust Image Quality> <Special Processing> <Prevent Fogging> <On> <Yes>
|
If you set to <On>, print density may be lighter. |
<Correct Color Mismatch> *
If color mismatch occurs, setting to <On> may solve the problem.
<Off> <On> |
<Menu> <Adjustment/Maintenance> <Adjust Image Quality> <Special Processing> <Correct Color Mismatch> <On> <Yes>
|
If you set to <On>, the printing speed may be slower. |
<Reduce Drum Streak>
If streaks appear on printouts, setting to <On> may solve the problem.
<Off> <On> |
<Menu> <Adjustment/Maintenance> <Adjust Image Quality> <Special Processing> <Reduce Drum Streak> <On>
<Reduce Toner Flaking>
Toner may peel off the printed page depending on the paper type or the environmental conditions. In this case, setting this item may solve the problem.
MF746Cdw / MF745Cdw / MF743Cdw / MF741Cdw
<Off> <Mode 1> <Mode 2> |
MF644Cdw / MF642Cdw / MF641Cw
<Off> <On> |
<Menu> <Adjustment/Maintenance> <Adjust Image Quality> <Special Processing> <Reduce Toner Flaking> Select the item <Yes>
|
For MF746Cdw / MF745Cdw / MF743Cdw / MF741CdwThe improvement effect is stronger with <Mode 2> than with <Mode 1>. First try the adjustment with <Mode 1>. Setting a greater improvement effect may result in curled printouts or slower printing speed. For MF644Cdw / MF642Cdw / MF641CwIf you set to <On>, ghost images may appear in blank areas. |
<Reduce Toner Fixing Stain 1> *
When toner stain (spotted stain) appears on the printed paper, the problem may not be solved even if you cleaning the fixing assembly. In this case, setting this item to <On> may solve the problem.
<Off> <On> |
<Menu> <Adjustment/Maintenance> <Adjust Image Quality> <Special Processing> <Reduce Toner Fixing Stain 1> <On> <Yes>
|
If you set to <On>, the printing speed may be slower. |
<Reduce Toner Fixing Stain 2> *
When the machine is used in an environment with high humidity, faded or curled printouts may be output. In this case, changing the setting of this item may solve the problem.
<Auto> <Mode 1> <Mode 2> |
<Menu> <Adjustment/Maintenance> <Adjust Image Quality> <Special Processing> <Reduce Toner Fixing Stain 2> Select the item <Yes>
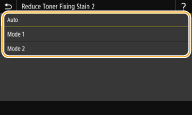
<Auto>
Automatically adjusts toner fixing.
Automatically adjusts toner fixing.
<Mode 1>
If printouts are curled, set to this option.
If printouts are curled, set to this option.
<Mode 2>
If printouts are faded, set to this option.
If printouts are faded, set to this option.
|
If you set to <Mode 1>, printouts may be faded. If you set to <Mode 2>, printouts may be curled. |
<Auto Detect B&W/Color Original>
When black and white print data is mixed with color data, specify whether to prioritize the print speed or to reduce the toner usage of the cyan, magenta, and yellow toner cartridges when printing data.
<Mode 1> <Mode 2> |
<Menu> <Adjustment/Maintenance> <Adjust Image Quality> <Special Processing> <Auto Detect B&W/Color Orig.> Select the mode <Yes>
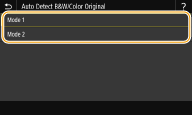
<Mode 1>
Prioritizes the print speed when printing.
Prioritizes the print speed when printing.
<Mode 2>
Reduces the toner usage of toner cartridges when printing.
Reduces the toner usage of toner cartridges when printing.
<Rdc. Faint Print After Rplc. Cart.>
Printouts may be faded immediately after replacement of toner cartridges with new ones. In this case, setting this item to <On> may solve the problem.
<Off> <On> |
<Menu> <Adjustment/Maintenance> <Adjust Image Quality> <Special Processing> <Rdc. Faint Print After Rplc. Cart.> <On> <Yes>
|
If you set to <On>, the setting will become effective with next replacement of toner cartridges. Immediately after cartridge replacement, a certain amount of time is required for toner to be evenly distributed inside the cartridge. |
<Remove Streaks from Scan Area> *
You can configure a setting to prevent stains from being scanned when they are detected in the document feed scanning area. Selecting <On> removes streaks generated by the edge of the original.
<Off> <On> |
<Menu> <Adjustment/Maintenance> <Adjust Image Quality> <Remove Streaks from Scan Area> Select <Off> or <On>
|
When streaks are removed, areas with stains are not scanned. Clean the original scanning area so that the original is scanned satisfactorily. |