Paper Jams in the Main Unit (Fixing Transport Unit)
Check the location of the paper jam on the touch panel display, and follow the procedure described in this section to clear the paper jam.
IMPORTANT |
When the Copy Tray-R is attached, follow the procedure in Paper Jams in the Copy Tray-R to remove jammed paper. |
NOTE |
Confirm before handlingClose any covers that are open. |
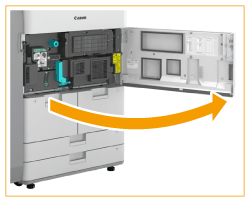
1
Open the front cover of the main unit.
2
Pull out the fixing transport unit.
 | Turn the green lever to the left. |
 | Pull out the fixing transport unit. 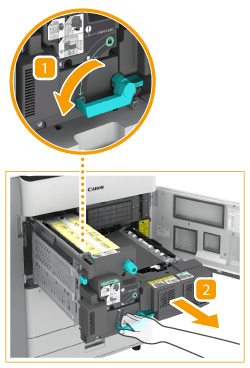 |
3
Check whether paper is jammed in the fixing unit.
IMPORTANT:
If the jammed paper does not come out when you gently pull it, proceed to the next step. Do not forcibly pull out jammed paper, as this may leave torn pieces inside the machine and cause the machine to malfunction.
| Open the left guide. |
| If paper is jammed on the right side of the fixing assembly, gently pull on it. |
 | Turn the knob in the direction of the arrow to remove the jammed paper. 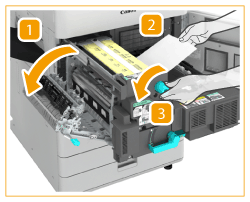 |
 | Gently pull out the paper on the left side of the fixing unit, and remove the jammed paper. 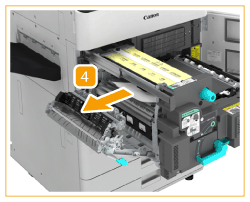 |
4
Check whether paper is jammed in the left guide.
| If paper is jammed, gently pull it out in the direction of the arrow. 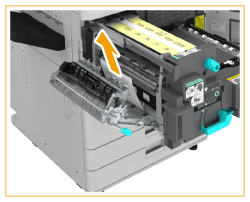 |
| Close the left guide. |
5
Check whether paper is jammed in the lower guide.
| Pull down the green knob to open the lower guide. |
| If paper is jammed, gently pull it out in the direction of the arrow. 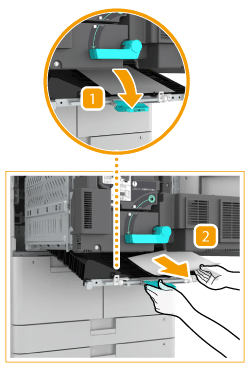 |
| Close the lower guide. |
6
Push the fixing transport unit back into its original position.
| Push the fixing transport unit back into its original position. |
| Return the green lever to its original position. 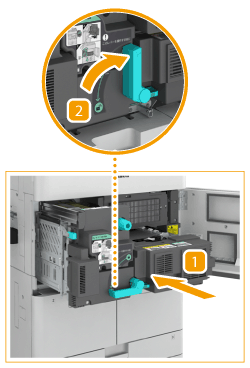 |
7
Close the front cover.
Continue following the instructions on the screen to proceed with the interrupted operation or continue clearing paper jams.