
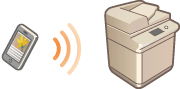
Connecting Directly
Even in an environment without a wireless LAN router, you can still directly connect your mobile device to the machine via "Access Point Mode" or "Wi-Fi Direct," which enable connections between the device and the machine without the need to configure complicated settings. With the Access Point Mode, you can connect even more easily by using Bluetooth or NFC.
|
Optional products are required to use Bluetooth or NFC. System Options |
Preparing to Connect Directly
Establish a connection by using Access Point Mode in the following order.
 |  | Check the network settings of the machine. Press  (Settings/Registration) (Settings/Registration) | ||
 |  | Prepare the mobile device. Configure the mobile device to enable Wi-Fi connection. | ||
 |  | Prepare the machine for connection. Press (Settings/Registration) Press (Settings/Registration) If <Wireless LAN> or <Wired LAN + Wireless LAN> is selected in <Select Interface>, <Wi-Fi Direct> cannot be used in <Direct Connection Type>.<Select Interface> If <Automatically Enable/Disable Direct Connection at Login/Logout> is set to <On> in <Personal SSID and Network Key Settings>, direct connections are possible when logging in without pressing <Mobile Portal> |
|
For details on using Canon PRINT Business, see the related manuals. (http://www.canon.com/gomp/) If the message <Cannot be used with the current settings. Contact the system manager.> is displayed on the top of the touch panel display and <Enable> cannot be pressed, confirm that <Use Direct Connection> is set to <On>. If <Use Direct Connection> is set to <On> but <Enable> cannot be pressed, change the IP address in <IP Address Settings for Direct Connection>. <Use Direct Connection> <IP Address Settings for Direct Connection> When using the Access Point Mode, if the machine is started with <Always Keep Enabled If SSID/Network Key Specified> set to <On>, direct connections are possible without pressing <Mobile Portal> |
Connecting Directly (Access Point Mode)
 |
It may take some time for connection between the machine and the mobile device to be established. |
Connecting Manually
1
With the machine as the connection destination, configure the wireless LAN settings on your mobile device, using the SSID and network key information shown on the touch panel display of the machine.
2
After completing the desired operations, press <Disconnect>.
Connecting with a QR Code
For Canon PRINT Business
1
Start Canon PRINT Business on the mobile device.
2
Read the QR code shown on the touch panel display of the machine.
3
After completing the desired operations, press <Disconnect>.
 |
If you cannot read the QR code, update Canon PRINT Business to the latest version. |
For devices using iOS (iOS11 or later)
1
Start the standard camera app on the iOS device.
2
Read the QR code shown on the touch panel display of the machine.
3
After completing the desired operations, press <Disconnect>.
Connecting with Bluetooth (iOS)
1
Press (Settings/Registration)  <Preferences> <Network> <Bluetooth Settings> set <Use Bluetooth> to <On>.
(Settings/Registration) 2
Start Canon PRINT Business on the mobile device.
3
Configure the mobile device to enable the use of Bluetooth settings.
4
Approach the machine with the mobile device.

The device name and PIN code are shown on the touch panel display. Using this information, perform pairing via the mobile device.
5
After completing the desired operations, press <Disconnect>.
Connecting with NFC (Android)
1
Press (Settings/Registration) <Management Settings> <Device Management> set <Use NFC Card Emulation> to <On>.
(Settings/Registration) 2
Start Canon PRINT Business on the mobile device.
3
Configure the mobile device to enable the use of NFC settings.
4
Place the mobile device near the NFC mark of the machine.
5
After completing the desired operations, press <Disconnect>.
|
For details on linking with mobile devices, see the Setup for Linking with Mobile Devices Administrator Guide. |
TIPS |
To check the connected mobile devices, press <Mobile Dev. Info> on the <Direct Connection> screen. You can enable connection associated with login users by setting <Use Personal SSID and Network Key> to <On> in the <Access Point Mode Settings>. <Access Point Mode Settings> |
|
While connecting via direct connection, you may not be able to connect to the Internet depending on the mobile device you are using. If a wireless connection from a mobile device is not performed within 5 minutes while the SSID and network key are displayed, the status waiting for connection ends. If the status without data transmission between a mobile device and the machine continues during communication by direct connection, the communication may end. Power saving performance of sleep mode degrades while connecting via direct connection. If the machine is used with a wireless LAN, you need to keep the machine connected to the wireless LAN when using direct connection. When the machine is not connected to a wireless LAN or the connection process is not complete yet, the direct connection process cannot begin. If the connection between the machine and the wireless LAN is lost during communication through direct connection, the communication may end. When you finish the desired operation, be sure to terminate the connection between the machine and the mobile device. If they remain connected, power saving performance of sleep mode degrades. If you use the direct connection, do not set the IP address manually on the mobile device. Doing so may prevent proper communication after using the direct connection. |
Connecting Directly (Wi-Fi Direct)
Connecting to the Machine from a Mobile Device
1
Start a direct connection on the mobile device.
Open the Wi-Fi Direct screen from the Wi-Fi settings screen of the mobile device, and tap the machine from the list of Wi-Fi Direct devices that have been detected.
A message indicating that a connection request has been received from the mobile device is displayed on the touch panel display of the machine.
2
Press <Yes> on the touch panel display of the machine.
A connection between the machine and the mobile device is started.
3
After completing the desired operations, press <Disconnect>.
Connecting to a Mobile Device from the Machine
1
Press the name of the device to directly connect to from the list displayed on the touch panel display, and press <Connect>.
A screen for selecting whether to allow a connection to the mobile device is displayed.
2
Tap [Yes] on the screen of the mobile device.
A connection between the machine and the mobile device is started.
3
After completing the desired operations, press <Disconnect>.
|
For details on linking with mobile devices, see the Setup for Linking with Mobile Devices Administrator Guide. |
TIPS |
To check the connected mobile devices, press <Mobile Dev. Info> on the <Direct Connection> screen. |
|
While connecting via direct connection, you may not be able to connect to the Internet depending on the mobile device you are using. The connection standby status ends if a wireless connection is not performed from the mobile device within five minutes of the device name being displayed. If the status without data transmission between a mobile device and the machine continues during communication by direct connection, the communication may end. Power saving performance of sleep mode degrades while connecting via direct connection. When you finish the desired operation, be sure to terminate the connection between the machine and the mobile device. If they remain connected, power saving performance of sleep mode degrades. If you use the direct connection, do not set the IP address manually on the mobile device. Doing so may prevent proper communication after using the direct connection. |