
Loading Envelopes
Load envelopes in the paper drawer or multi-purpose tray. When printing on envelopes, to prevent paper jams and wrinkles, make sure to flatten any curls on envelopes before loading them. Also pay attention to the orientation of envelopes and which side is face up.
 |
This section describes how to load envelopes with the proper orientation, as well as procedures that you need to complete before loading envelopes. For a description of the general procedure for loading envelopes in the paper drawer or multi-purpose tray, see Basic Paper Loading Method. You can also load envelopes in the optional POD Deck Lite-C. POD Deck Lite-C/Paper Deck Unit-E The optional Envelope Feeder Attachment-F is required to load envelopes in the paper drawer. Likewise, the Envelope Feeder Attachment-G is required to load envelopes in the POD Deck Lite-C. Optional Equipment |
Before Loading Envelopes
Follow the procedure below to prepare the envelopes before loading.
 |
Do not use envelopes that have glue attached to their flaps, as the glue may melt due to the heat and pressure of the fixing unit. Envelopes may be creased, depending on the type of envelopes or the conditions in which they are stored, such as a high humidity environment. Streaks may appear where envelopes overlap. |
1
Flatten any curls.
Pick up about five envelopes. Flatten any curls, and loosen the stiff areas in the four corners.
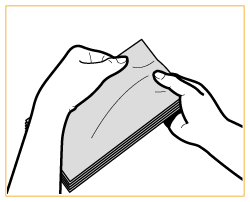
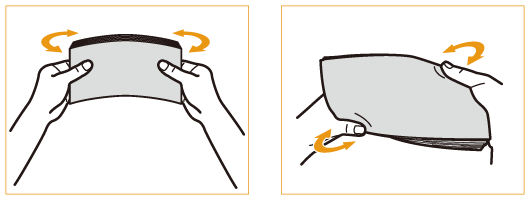
Repeat this step five times for each set of five envelopes.
2
Smooth the envelopes out, and remove any air inside them.
Place the envelopes on a flat surface, and move your hands in the direction of the arrows to remove the air inside the envelopes.
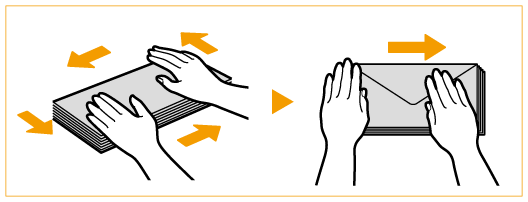
Repeat this step five times for each set of five envelopes.
3
Press down on the four sides.
Press down firmly on all four sides. In particular, carefully press down on the side facing the direction in which the envelopes will be fed. Press down firmly so that the flap stays flat.
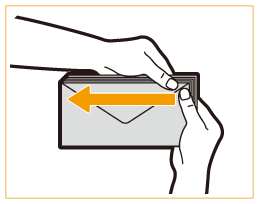

Failure to firmly press down on the flap may result in a paper jam. If this happens, press down firmly on all four sides of each individual envelope.
4
Align the envelopes on a flat surface.
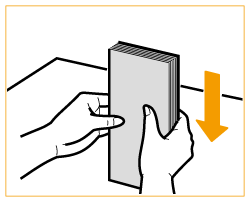

Check that no envelopes are tucked underneath the flap of the envelope above or below them.
Loading the Envelopes in the Paper Drawer
1
Attach the Envelope Feeder Attachment-F to the paper drawer.
 | Prepare the Envelope Feeder Attachment-F. Remove the Envelope Feeder Attachment-F stored in the paper drawer. 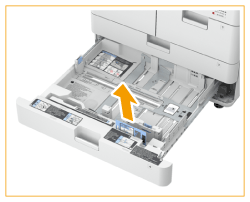 |
 | Attach the Envelope Feeder Attachment-F by aligning the protruding areas of the Envelope Feeder Attachment-F with the holes on paper receptor located on the bottom of the paper drawer. 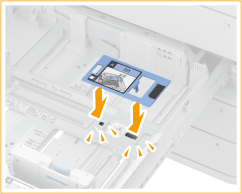 |

When loading Kakugata 2, Nagagata 3, ISO-C5, or custom size envelopes, it is not necessary to attach the Envelope Feeder Attachment-F.
When not using the Envelope Feeder Attachment-F, store it in the storage area of the paper drawer.
2
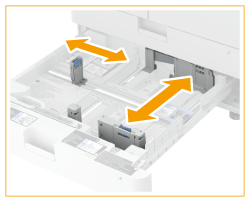
Adjust the position of the paper guides.
3
Load the envelopes.
Load the envelopes as indicated below, with the front side of the envelopes (the side without the glued areas) face down. Load 50 envelopes at a time.
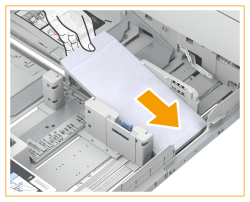
Yougatanaga 3, ISO-C5, Monarch, DL, COM10 No.10
Close the flaps, and load the envelopes so that their flaps are on the far side.
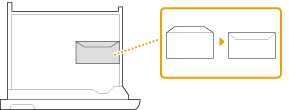
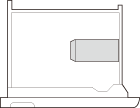
Nagagata 3, Kakugata 2
Load the envelopes so that their flaps are on the left side.
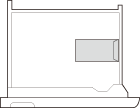
To change the orientation of the envelopes, close the flaps, and load the envelopes so that their flaps are on the right side.

Envelopes may not be able to be fed properly if they are loaded at an angle.
4
Register the type of envelope.
5
Change the paper size label of the paper drawer as necessary.
Loading Envelopes in the Multi-Purpose Tray
Load the envelopes as indicated below, with the front side of the envelopes (the side without the glued areas) face up (recommended).
Yougatanaga 3, ISO-C5, Monarch, DL, COM10 No.10
Close the flaps, and load the envelopes so that their flaps are on the far side.
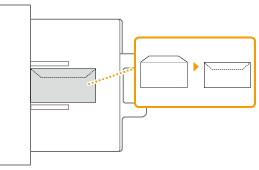
Nagagata 3, Kakugata 2
Load the envelopes so that their flaps are on the right side.
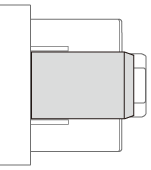
To change the orientation of the envelopes, close the flaps, and load the envelopes so that their flaps are on the left side.
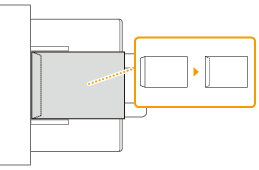
 |
Make sure that the paper stack does not exceed the load limit line (  ). If the envelopes are not fed properly even if they have been prepared according to the procedures, load the envelopes individually in the multi-purpose tray instead of loading several sheets together. ). If the envelopes are not fed properly even if they have been prepared according to the procedures, load the envelopes individually in the multi-purpose tray instead of loading several sheets together.Do not print on the reverse side of the envelopes (the side with the glued areas). |
 |
When using Kakugata 2, if envelopes become wrinkled, fold and insert the flaps into each envelope, and load the envelopes with the long edge of the envelopes facing the machine. |