Registering/Editing User Data for Local Device Authentication
You can register and edit user data for authentication using Local Device Authentication from a Web browser. You can also import and export user data in bulk.
IMPORTANT |
Only the System Administrator (Administrator) can edit the user data. |
NOTE |
Only the Local Device Authentication administrator can register/edit user data on the [User Management] page. General users can only change their own password. It is recommended that you export the registered/edited user data to make a backup copy. |
Registering User Data
1.
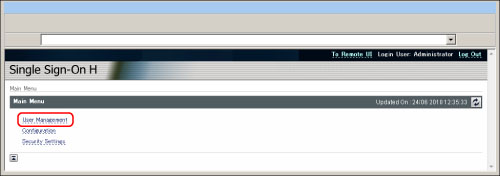
Click [User Management].
2.
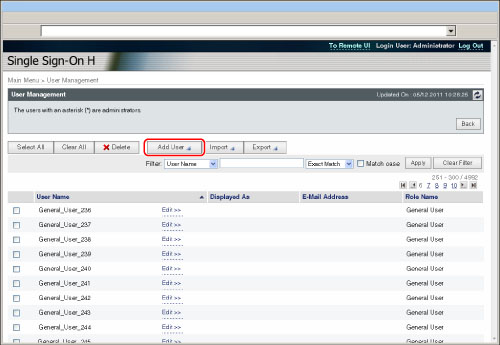
Click [Add User].
3.
Enter the necessary data → click [Add].
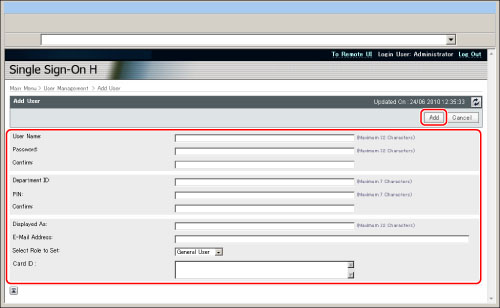
The content and setting conditions that should be entered are as follows:
Item | Setting Content | Setting Conditions | Default Setting |
User Name | Set a user name for Local Device Authentication. | Must be from 1 to 32 characters. You cannot include spaces or the following symbols (\ / : * ? l < > [ ] ; , = + @ ") Case sensitive. You cannot register the same user name that has already been registered. | Administrator |
Password | Set a password for Local Device Authentication. | You can leave this blank or enter up to 32 alphanumeric characters and symbols. Case sensitive. | password |
Confirm | Enter the password you entered for [Password]. | You can leave this blank or enter up to 32 alphanumeric characters and symbols. Case sensitive. | password |
Department ID | Set Department ID to be used when scanning or printing with the machine. | Must be from 1 to 7 digits (this can be omitted if Department ID Management is set to 'Off'). If the number you enter does not contain enough digits, zeros are added to the front of the number. | 0000000 |
PIN | Set PIN corresponding to Department ID. | You can leave this blank or enter up to 7 digits. (This can be omitted if Department ID Management is set to 'Off'). If the number you enter does not contain enough digits, zeros are added to the front of the number. | 0000000 |
Confirm | Enter the PIN you entered for [PIN]. | You can leave this blank or enter up to 7 digits. (This can be omitted if Department ID Management is set to 'Off'). If the number you enter does not contain enough digits, zeros are added to the front of the number. | 0000000 |
Displayed As | Set the user display name (for example, user's full name, user's department name, etc.) | You can leave this blank or enter up to 32 characters. | Administrator |
E-Mail Address | Set the user's e-mail address. | You can leave this blank or enter up to 256 ASCII characters. The format of e-mail addresses is not checked. | Blank |
Select Role to Set | Set the user role (privileges). | You can set the following user roles (privileges): Administrator All operations are possible. General User Operations other than those of the Device Management and Network Management are possible. NetworkAdmin Operations of the Network Management are possible. DeviceAdmin Operations of the Device Management are possible. | Administrator |
Card ID* | If the control card reader is attached, enter the card ID. | You can leave this blank or enter up to 8 characters. You cannot enter only zeros, such as <0000>. | Blank |
*Indicates items that appear only when the control card reader is attached.
IMPORTANT |
If you select [Administrator] for [Select Role to Set], the user name and password can be used when you log in using Local Device Authentication. To set [Department ID Management] to 'On', it is necessary to register the Department ID and PIN as the user information of the administrator for Local Device Authentication beforehand. If [Department ID Management] is set to 'On', the registered information for Local Device Authentication and the registered user data and PIN in the machine's Department ID Management have to be the same. If the Department ID and PIN have been changed due to the delivery of device information, make sure to change the Local Device Authentication settings accordingly. If no e-mail address is registered, you need to set [Allow Unregistered Users to Send E-Mail] in [Function Settings] (Settings/Registration) to 'Off' to send e-mails/I-faxes. The login user name and e-mail address are displayed on the sender field ("from") on the e-mail recipient's machine. However, if an e-mail address that exceeds 194 characters is entered, only the first 193 characters of the address are displayed. The login user's e-mail address is displayed on the sender field on the I-fax recipient's machine. |
NOTE |
Multiple users can share the same Department ID. Multiple users can be registered as a System Administrator (Administrator). Enter the same string for [Password]/[PIN] and [Confirm]. If you enter a different string for [Password]/[PIN] and [Confirm], a message prompting you to re-enter the passwords/PIN appears. |
Editing User Data
1.
Click [User Management].
2.
Click [Edit] for the user data you want to edit.
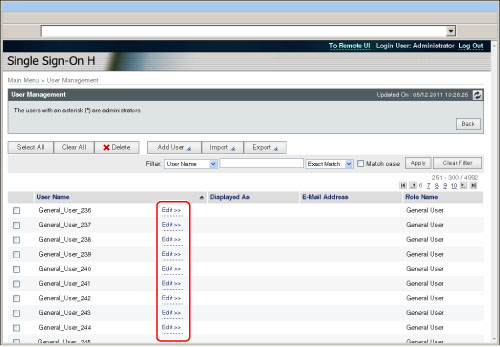
If you find difficult to search the specific user data from a large number of registered users, you can use the function to narrow the amount of displayed information.
Click  ,
,  ,
,  ,
,  , or page numbers to display other pages.
, , , , or page numbers to display other pages.3.
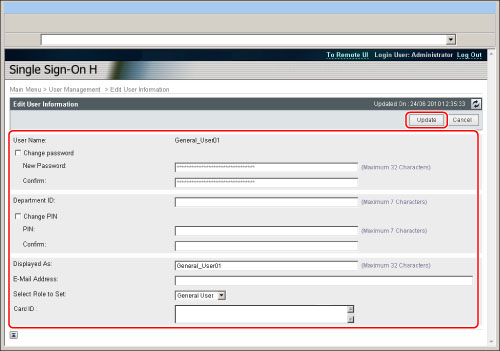
Edit the necessary items → click [Update].
Deleting User Data
1.
Click [User Management].
2.
Select the user data you want to delete → click [Delete].

If you find difficult to search the specific user data from a large number of registered users, you can use the function to narrow the amount of displayed information.
Click , , , , or page numbers to display other pages.
, , , , or page numbers to display other pages.NOTE |
To select all registered applications, click [Select All]. |
Importing User Data
You can read and register user data registered in another machine from a file.
For more information on file formats for import, see "File Formats for Local Device Authentication User Information Files."
1.
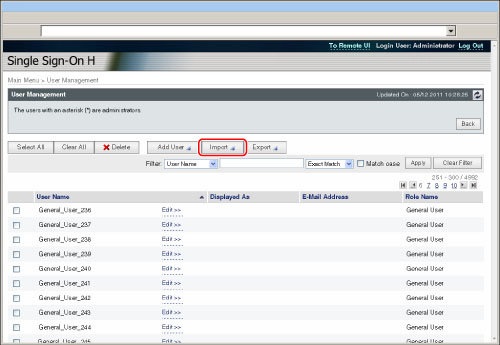
Click [User Management].
2.
Click [Import].
3.
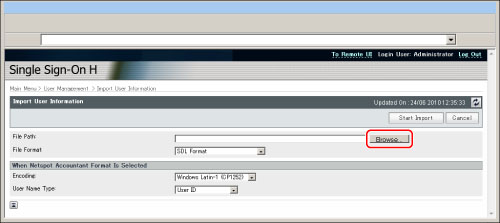
Click [Browse…].
4.
In the dialog box that appears, select the file you want to import → click [OK].
5.
Specify each setting → click [Start Import].
[File Format] | Specify the file format for importing. |
[SDL Format] | Import the user data created in the file format used for SDL and the Local Device Authentication of SSO-H. (File extension: "ldif") |
[NetSpot Accountant 3.x Format] | Import the user data created in NetSpot Accountant 3.x Format. (File extension: "csv") |
[NetSpot Accountant 4.x Format] | Import the user data created in NetSpot Accountant 4.x/iW Accounting Manager Format. (File extension: "csv") |
<When Netspot Accountant Format Is Selected>
[Encoding] | Specify the character code for importing. |
Windows Japanese (CP932) | Import the file written in Windows Japanese Format. Windows Japanese is a character code for Japanese. |
Windows Latin-1 (CP1252) | Import files written in Windows Latin Format. Windows Latin is a character code for European languages. |
[User Name Type] | Select the type of user name used for logging in. |
[User ID] | Use the user ID as the user name for logging in. |
[Windows User Name] | Use User Name in Windows as the user name for logging in. |
IMPORTANT |
If user data with the same name is already registered, the imported user data will overwrite the old data. |
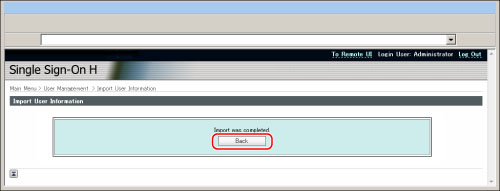
6.
Click [Back].
Exporting User Data
You can save user data registered in the machine to a file in your computer. Use this function when you want to use the user data registered in the machine with another device or when you want to backup the user data.
1.
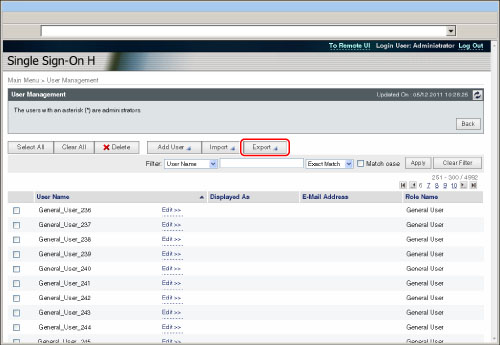
Click [User Management].
2.
Click [Export].
3.
Specify each setting → click [Start Export].
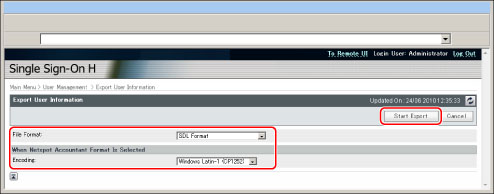
[File Format] | Specify the file format for exporting. |
[SDL Format] | Export the user data in the file format used for SDL and the Local Device Authentication of SSO-H. (File extension: "ldif") |
[NetSpot Accountant 3.x Format] | Export the user data created in NetSpot Accountant 3.x Format. (File extension: "csv") |
[NetSpot Accountant 4.x Format] | Export the user data created in NetSpot Accountant 4.x/iW Accounting Manager Format. (File extension: "csv") |
<When Netspot Accountant Format Is Selected>
[Encoding] | Specify the character code for file exporting. |
Windows Japanese (CP932) | Export the file written in Windows Japanese Format. Windows Japanese is a character code for Japanese. |
Windows Latin-1(CP1252) | Export files written in Windows Latin Format. Windows Latin is a character code for European languages. |
4.
Follow the instructions on the screen and specify the location to store the file.
IMPORTANT |
A maximum of 5,000 users can be registered. You cannot change the user name. If you edit user data when that user is logged in, the changes you made are validated only after that user is logged out. If you want to change the user name, you must delete the user data, create, and register new user data. The user data that is logged in as the System Administrator (Administrator) cannot be deleted. Imported user data is registered or overwritten as the general user. User type of all exported data is saved as the general user. |
NOTE |
Click [User Name], [Department ID] (if [Department ID Management] is set to 'On'), [Displayed As], [Select Role to Set], or [E-Mail Address] on the [User Management] page to change the sort order of registered user data. An asterisk (*) is displayed on the right side of the user name on the [User Management] page for the registered System Administrator (Administrator). |