Send Features of the WSD Scan
This section describes how to use the send features of the WSD Scan.
IMPORTANT | ||||||||
You can use the Push Scan function only in the following conditions:
|
1.
Place your originals.
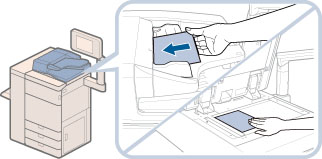
IMPORTANT |
You cannot scan 2-sided originals even if you are using a feeder. Place 1-sided originals. The available scanning size is up to A4. For example, if you set A3 originals, only A4 size is scanned. |
NOTE |
For instructions on placing originals, see "Placera original." |
2.
Press  → [WSD Scan].
→ [WSD Scan].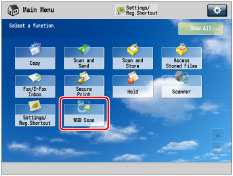
3.
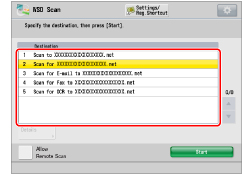
Select the destination.
The computers, which are in the same domain and are equipped with the driver for WSD Scan functions, are listed.
4.
Press [Start].
If the destination [Scan to "computer name"] is selected:
A screen prompting you to select a program is appears. Scanning is complete after selecting the program.
If the destination other than [Scan to "computer name"] is selected:
The Windows Explorer starts and a scanned file is displayed.
NOTE |
Up to 40 destinations are displayed. You cannot use [Send for OCR to "computer name"] when selecting the destination. If you want to use the OCR function, see "Sökbar PDF/XPS/OOXML." |