
Replenishing the Staples for the Staple Finisher and Booklet Finisher
Replacing the Staple Cases in the Stapler Unit
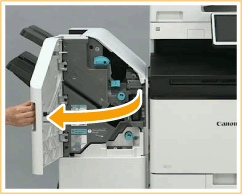
1
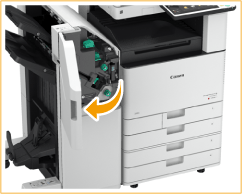
Open the front cover of the finisher.
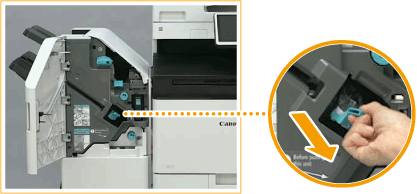
2
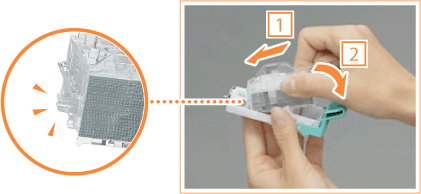
Pull out the staple cartridge.
Hold the green tab on the staple cartridge and pull the cartridge straight out.
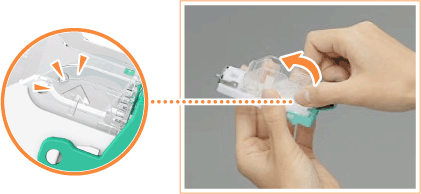
3
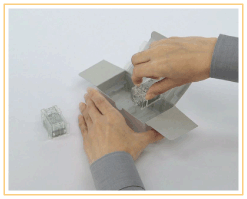
Remove the empty staple case from the staple cartridge.
Hold the staple case around the position of the arrow mark, and remove it in the direction of the arrow.
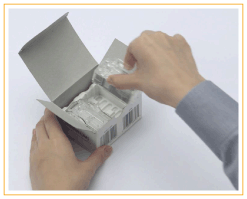
4
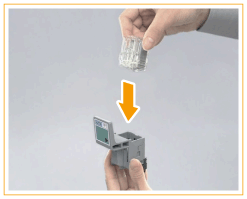
Take out a new staple case from its box.
5
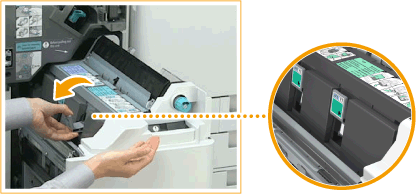
Load the new staple case in the staple cartridge.
Insert the plate protruding from the staple case front end into the staple cartridge, and lower the staple case to place it in the staple cartridge.
6
Hold the green tab on the staple cartridge and push in the cartridge as far as it will go.
7
Close the front cover of the finisher.
Dry stapling may be performed automatically for staple repositioning.
Replacing the Staple Cases in the Saddle Stitch Unit
|
Confirm before handling If there is any paper in the booklet tray, remove it. |
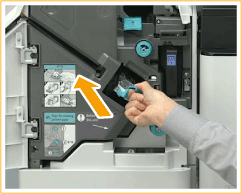
1
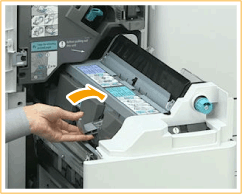
Open the front cover of the finisher.
2
Pull out the saddle stitcher unit.

3
Remove the (two) staple cases while pulling down the lever towards yourself.
4
Remove the empty staple case.
While holding both sides of the top of the empty staple case, lift up the staple case to remove it.

5
Take out a new staple case from its box.
6
Load the new staple case in the staple cartridge.
7
Install the (two) staple cases in the saddle stitch unit.
Push them in as far as they will go.
8
Push in the saddle stitcher unit, and close the front cover of the finisher.

If stapling dose not work after staples are replenished, perform staple repositioning manually. <Saddle Stitch Staple Repositioning>