
Cleaning the Feeder
If streaks appear on originals fed through the feeder, or if smudges appear on printouts, or if a paper jam occurs frequently, then perform feeder cleaning.
Cleaning the Feeder
1
Turn the power OFF, and remove the power plug from the power outlet.

Check the operation status of the machine before turning the power OFF. You can turn the power OFF even if the machine is executing an operation, but this may cause the operation to be interrupted or data to become damaged.
2
Pull the lever, and open the feeder cover.
3
Clean the rollers inside the feeder cover.
Wet a soft cloth with water and wring it out well, then wipe the rollers with it. Afterwards, wipe the rollers with a soft and dry cloth.
If the rollers and surrounding areas are very dirty, clean them out. To do this, wet a cloth with water and wring it out well, then wipe the dirty areas. Afterwards, wipe the areas with a soft and dry cloth.
4
Clean the inside of the inner cover of the feeder.
| Open the inner cover of the feeder. 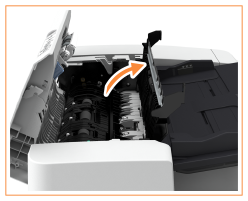 |
 | Wipe the transparent plastic. Wet a soft cloth with water and wring it out well, then wipe the plastic with it. Afterwards, wipe the plastic with a soft and dry cloth. 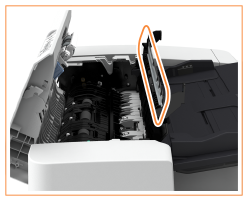 Wait until the moisture has completely dried before proceeding to the next step. |
 | Wipe the rollers (a total of three places) inside the inner cover. Wet a soft cloth with water and wring it out well, then wipe the rollers with it. Afterwards, wipe the rollers with a soft and dry cloth. 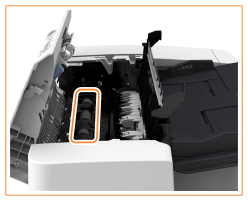 Wait until the moisture has completely dried before proceeding to the next step. |
 | Close the inner cover of the feeder. 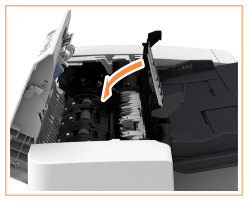 |
When closing the inner cover of the feeder, be careful not to get your fingers caught, as this may result in personal injury.
5
Clean the document feed scanning area (thin glass strip) and the white area (rollers and plate).
| Open the feeder.  |
| Clean the white plate. Wet a soft cloth with water and wring it out well, then wipe the plate with it. Afterwards, wipe the plate with a soft and dry cloth. Wait until the moisture has completely dried before proceeding to the next step. |
| Clean the document feed scanning area. If the cleaning cloth is not included or you cannot remove the dirt, wet a soft cloth with water and wring it out well, then wipe the machine with it. Afterwards, wipe the machine with a soft and dry cloth. Wait until the moisture has completely dried before proceeding to the next step. |
| Close the feeder. |
When closing the feeder, be careful not to get your fingers caught, as this may result in personal injury.

When the glass cleaning sheet is dirty, rinse it with water and spread it out to let it dry.
6
Gently close the feeder cover.
When closing the feeder cover, be careful not to get your fingers caught, as this may result in personal injury.
7
Insert the power plug into the power outlet, and turn the power ON.
 |
If streaks still appear on the originals or paper after the feeder cleaning operation Load about 10 sheets of A4 size paper in the feeder and perform the following procedure to execute (<Clean Feeder>). When a message indicating that cleaning is complete is displayed, try using the feeder to copy an original to check if the problem has been resolved. It takes approximately 15 seconds to clean the feeder. |
If Streaks Still Appear On Paper
If streaks still appear on the paper, load about 10 sheets of LTR size paper in the feeder and perform the following procedure to execute Placing Originals.
1
Select <Menu> in the Home screen. Home Screen
2
Select <Adjustment/Maintenance>  <Maintenance>.
3
Select <Clean Feeder>.
4
Select <Start>.
Cleaning starts. When a message appears notifying that cleaning is complete, press  to return to the Home screen.
to return to the Home screen.