
Replacing the Drum Unit
148Y-040
When the drum unit is nearing the end of its lifetime, a message prompting you to replace the drum unit is displayed on the screen.

 |
Do not remove the orange-colored protective cover until you are instructed to do so in the following procedure. |
 |
For the model number of the drum unit, see Replacement Parts. The drum unit replacement message displayed on the screen differs depending on your contract. |
Procedure for Replacing the Drum Unit
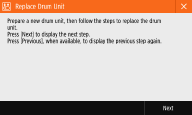
When you perform the following procedure, the screen also displays the instructions for drum unit replacement, which will be helpful for you to be sure of the procedure.
Select <Status Monitor>  <Error Information/Notification>
  <Replace Drum Unit>.
 <Error Information/Notification>
  <Replace Drum Unit>.
1
Open the front cover of the main unit.
2
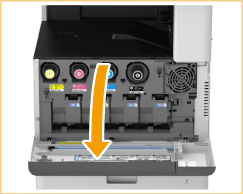
Open the cover of the drum unit.
3
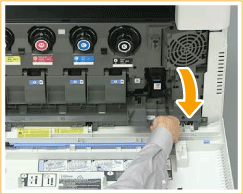
Pull out the drum unit.
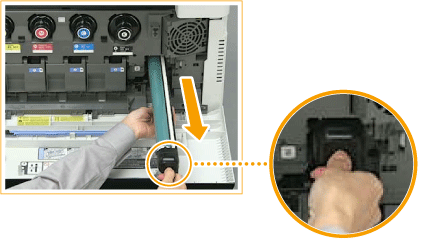

Do not tilt the drum unit. Doing so may cause the toner in the drum to spill.
4
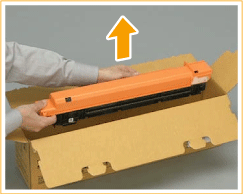
Remove the new drum unit from its box.
5
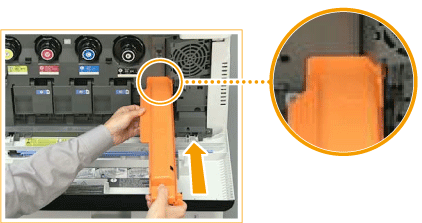
Install the new drum unit.
6
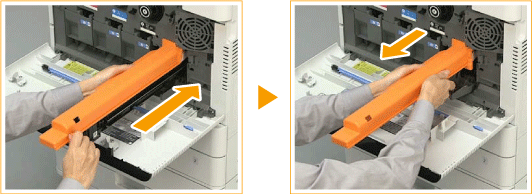
Remove the protective cover.
First push in the slider on the right side of the orange-colored protective cover toward the back of the main unit until it cannot go any further, and then pull out the protective cover.
7
Close the cover of the drum unit.
8
Close the front cover of the main unit.
 |
After the replacement is complete, put the used drum unit in the bag that contained the new drum unit, and store it until the local authorized Canon dealer comes to collect it. |