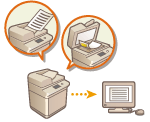
Sending/Saving Separately Scanned Documents Together (Job Build)
 | Even if you have too many originals to be placed in the feeder at the same time, you can scan the originals separately and send/save them as a batch of documents. Originals scanned with both the feeder and the platen glass can also be sent/saved at the same time. |
1
Place the first original. Placing Originals
2
Press <Scan and Send>. <Home> Screen
3
Specify the destination on the Scan Basic Features screen. Scan Basic Features Screen
4
Specify the scan settings as necessary. Basic Operations for Scanning Originals
5
Press <Options>  <Job Build>
  <Close>.
 <Job Build>
  <Close>.
6
Press  (Start) to scan the original.
 (Start) to scan the original.
When scanning is complete, the screen appears prompting you to scan the next original.

If you place your originals in the feeder, remove the originals from the original output area when the scanning of each batch is complete.
7
Place the next original and press  (Start).
 (Start).
Repeat this step until you finish scanning all of the originals.
To change the scan settings, press <Change Settings>.

If you place different size originals in the feeder, set the <Different Size Originals> mode. Sending/Saving Different Size Originals Together (Different Size Originals)
If you want to scan one-sided and two-sided originals and store them as two-sided documents, divide the originals into one-sided and two-sided batches. For example, if the first batch consists of two-sided originals, set the <2-Sided Original> mode. Thereafter, you have to manually set or cancel the <2-Sided Original> mode for each batch of originals that you scan.
It is useful to store scanned images in a mail box first, and print them later using the Merge Files mode if you cannot prepare the originals at one time, or if you want to specify different settings for each original. Printing Files in the Mail Box
The following functions can be used in <Change Settings> of <Scan and Send>: You need to set the necessary scan settings in advance, since you cannot change the other functions during the Job Build mode.
<Select Color>
<Scan Size>
<Copy Ratio>
<2-Sided Original>
<Density>
<Original Type>
The following functions can be used in <Change Settings>, if the <Scan and Store> destination is <Mail Box>. You need to set the necessary scan settings in advance, since you cannot change the other functions during the Job Build mode.
<Select Color>
<2-Sided Original>
<Density>
<Original Type>
If the <Scan and Store> destination is <Mail Box> and you set the <N on 1> mode together with the Job Build mode, you cannot change <Select Color> and <Density> in <Change Settings>.
The following functions can be used in <Change Settings>, if the <Scan and Store> destination is <Advanced Box>, <Network>, or <Memory Media>. You need to set the necessary scan settings in advance, since you cannot change the other functions during the Job Build mode.
<Select Color>
<Scan Size>
<2-Sided Original>
<Density>
<Original Type>
8
Press <Start Sending>.
All scanned documents are combined into one and sent/saved to the specified destination.