WebDAV Server Settings
The WebDAV sending function is a function for sending scanned image files or image files sent from the mail boxes, to a WebDAV server directory on the Internet or your intranet, using the WebDAV protocol.
This section describes the procedure for setting up a WebDAV publishing directory.
Setting up a publishing directory enables users who have the necessary access privileges to manage files in the directory.
It is recommended that you consult the administrator for the network you are using when configuring the
WebDAV server.
WebDAV server.
IIS for Windows
The procedure below uses items of Windows 8.1 as an example. Depending on your environment, the items you see on the screen may differ.
1.
Set a recipient address using the control panel.
Sample recipient settings:
Server side settings:
Create a physical directory named "C:/Inetpub/export/share/home/users/", and then create a virtual directory that links to the physical directory as the folder to which files are sent.
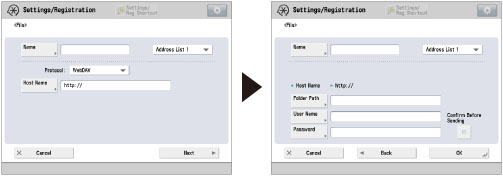
The machine's address settings:
<Protocol>: | WebDAV |
[Host Name]: | https://example.cse.canon.co.jp/ |
[Folder Path]: | /export/share/home/users/ |
[User Name]: | User name for the Basic and Digest authentication methods of the WebDAV server |
[Password]: | Password for the Basic and Digest authentication methods of the WebDAV server |
IMPORTANT |
Up to 128 alphanumeric characters can be entered for [Host Name] on the control panel. Also, up to 255 alphanumeric characters can be entered for [Folder Path]. Specify the server settings within the character limits. If you change the language of the touch panel display, [Host Name] and [Folder Path] may not appear correctly. If the language of the touch panel display differs from the computer used as a master browser, [Host Name] and [Folder Path] may not appear correctly, or you may not be able to browse the directories. To send to an IPv6 host, set [Host Name] using the following format: <IPv6 address>:<Port number> Example: [5aed:90a0:bc05:01d2:568a:2fc0:0001:12ee]:21000 |