Installing a Certificate File
You can use the Remote UI to install the key pair file and certificate file (used for the functions below) on the machine. The files installed as a key pair and certificate need to be registered from the Remote UI or the control panel of the machine in order to use the files.
Encrypted TLS Communication
A key pair and server certificate are required to use encrypted TLS communication for e-mail and I-faxes, the Remote UI, and delivering device information.
Install the key pair file and server certificate file using the Remote UI. The installed key pair file and server certificate file can be used as a key pair and server certificate by registering them from the control panel of the machine. (See "Registering a Key Pair File and Server Certificate File Installed from a Computer.")
Install the key pair file and server certificate file using the Remote UI. The installed key pair file and server certificate file can be used as a key pair and server certificate by registering them from the control panel of the machine. (See "Registering a Key Pair File and Server Certificate File Installed from a Computer.")
IEEE 802.1X Authentication
A CA certificate, key pair, and client certificate are required. For details, see the manual of the imagePRESS Server.
CA certificate
Install the CA certificate file using the Remote UI. The installed CA certificate file can be used as a CA certificate by registering it from the control panel of the machine. (See "Registering/Editing a CA Certificate File.")
Key pair and client certificate
Install the key pair file and client certificate file. The installed key pair file and client certificate file can be used as a key pair and client certificate by registering them from the control panel of the machine.
IPSec
A CA certificate, key pair, and client certificate are required. For details, see the manual of the imagePRESS Server.
CA certificate
Install the CA certificate file using the Remote UI. The installed CA certificate file can be used as a CA certificate by registering it from the control panel of the machine. (See "Registering/Editing a CA Certificate File.")
Key pair and certificate
Install the key pair file and certificate file. The installed key pair file and certificate file can be used as a key pair and certificate by registering them from the control panel of the machine.
NOTE |
For more information on registering a key pair and server certificate file, see "Registering a Key Pair File and Server Certificate File Installed from a Computer." For more information on generating a key pair and server certificate file, see "Generating a Key Pair and Server Certificate." To install a key pair and server certificate, it is necessary to log in as an administrator. |
Installing a Key Pair File and Server Certificate
The algorithms for key pairs and certificates that can be used with the machine are indicated below.
Signature Algorithm | Key Length/Type |
sha1RSA/sha256RSA/sha384RSA* /sha512RSA*/MD2RSA**/MD5RSA** | 512 bits/1024 bits /2048 bits/4096 bits |
sha1ECDSA/sha256ECDSA/sha384ECDSA/sha512ECDSA | P256/P384/P521 |
* Indicates algorithms that can be used only if the key length is equal to or longer than 1024 bits.
** Indicates algorithms that can be used only when installing from the Remote UI.
The formats of key pairs and certificates that can be used with the machine are indicated below.
Certificate Format | Extension |
PKCS#12* | .pfx/.p12 |
PEM | .pem |
* Indicates formats that can be used only when installing from the Remote UI.
1.
Click [Settings/Registration] → [Device Management] for <Management Settings>.
2.
Click [Key and Certificate Settings] → [Register Key and Certificate] → [Install].

3.
Click [Browse].
4.
In the dialog box that appears, select the key pair file and certificate file to install → click [Open].
The maximum number of characters that you can enter for the file name in [File Path] is eight, excluding the file extension ".p12" or ".pfx". Specify the name of the file to install so that it will not exceed eight characters.
5.
Click [Start Installation].
NOTE |
A preinstalled key pair and server certificate are registered in the machine. You can also perform encrypted TLS communication using the preinstalled key pair and server certificate. You can also use a key pair and server certificate generated and registered on the control panel of the machine for encrypted TLS communication. |
Installing a CA Certificate File
The algorithms for key pairs and certificates that can be used with the machine are indicated below.
Signature Algorithm | Key Length/Type |
sha1RSA/sha256RSA/sha384RSA* /sha512RSA*/MD2RSA/MD5RSA | 512 bits/1024 bits /2048 bits/4096 bits |
sha1DSA | 1024 bits/2048 bits/3072 bits |
* Indicates algorithms that can be used only if the key length is equal to or longer than 1024 bits.
The formats of key pairs and certificates that can be used with the machine are indicated below.
Certificate Format | Extension |
X.509 DER | .cer |
PEM | .pem |
NOTE |
For more information on registering a CA certificate file, see "Registering/Editing a CA Certificate File." To install a CA certificate, it is necessary to log in as an administrator. |
1.
Click [Settings/Registration] → [Device Management] for <Management Settings>.
2.
Click [CA Certificate Settings] → [Register CA Certificate] → [Install].

3.
Click [Browse].
4.
In the dialog box that appears, select the CA certificate file to install → click [Open].
The maximum number of characters that you can enter for the file name in [File Path] is eight, excluding the file extension ".cer". Specify the name of the file to install so that it will not exceed eight characters.
5.
Click [Start Installation].
Registering/Checking/Deleting a Certificate Revocation List (CRL)
This function registers/checks/deletes a certificate revocation list (CRL).
The algorithms for certificates that can be used with the machine are indicated below.
Signature Algorithm |
sha1RSA/sha256RSA/sha384RSA*/sha512RSA*/MD2RSA/MD5RSA/sha1ECDSA/sha256ECDSA/sha384ECDSA/sha512ECDSA |
* Indicates algorithms that can be used only if the key length is equal to or longer than 1024 bits.
The formats of certificates that can be used with the machine are indicated below.
Certificate Format | Extension |
CRL, DER | crl |
PEM | .pem |
NOTE |
For more information on registering a certificate revocation list (CRL), see "Verifying Certificate Validity Using Certificate Revocation List." To install a certificate revocation list (CRL), it is necessary to log in as an administrator. |
1.
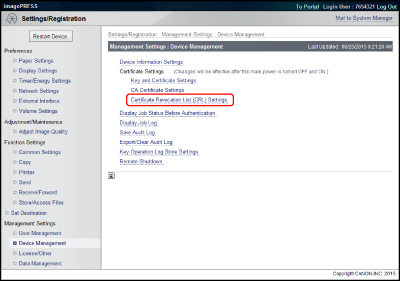
Click [Settings/Registration] → [Device Management] for <Management Settings>.
2.
Click [Certificate Revocation List (CRL) Settings].
To register a certificate revocation list (CRL):
Click [Register CRL] → [Browse].
Select the certificate revocation list (CRL) you want to register.
Click [Register].
IMPORTANT |
A certificate revocation list (CRL) cannot be registered in the following cases: If you want to register more than 50 certificate revocation lists (CRL) If the file size of a certificate revocation list (CRL) is more than 1MB If you use the unsupported signature algorithm If more than 1,000 expired certifications are registered in a certificate revocation lists (CRL) |
To check a certificate revocation list (CRL):
Click the certificate revocation list (CRL) you want to check → click [Verify CRL].
To delete a certificate revocation list (CRL):
Check the certificate revocation list (CRL) you want to delete → click [Delete].